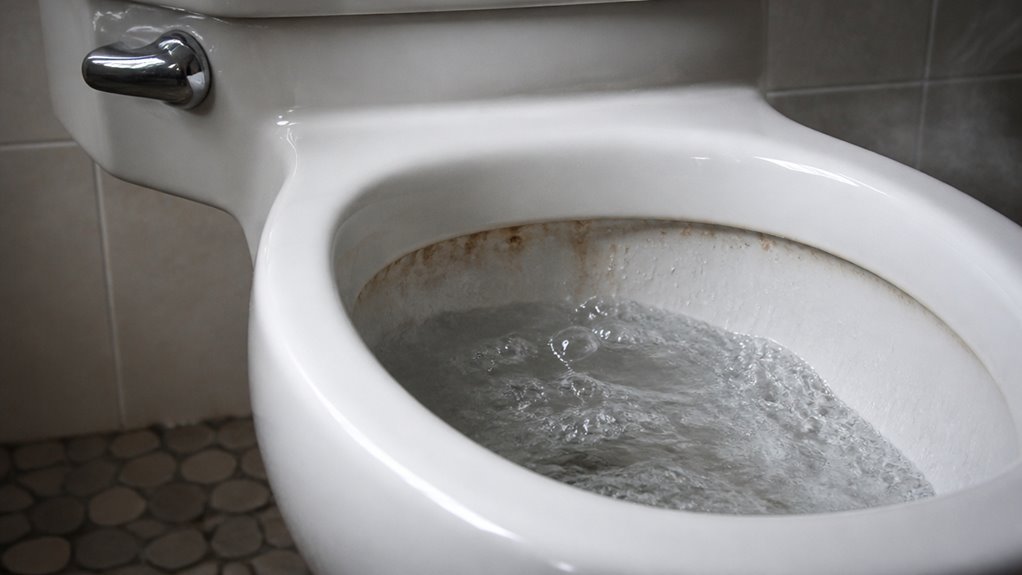
If your toilet doesn’t flush all the way, check the tank water level first. It should sit about one inch below the overflow tube for peak flush power.
Worn or misadjusted flappers can close too soon, cutting flushes short. Tangled chains can also limit flapper lift.
Mineral buildup in rim and siphon jets reduces water flow. Partial drain clogs or vent issues restrict drainage.
Adjusting, cleaning, and inspecting these parts can restore flush strength and reliability. Further insights explain how to tackle each problem efficiently.
Key Takeaways
- Low tank water level weakens flush power; adjust fill valve to maintain about 1 inch below overflow tube.
- Flapper closing too soon or chain issues can shorten flush duration; ensure flapper stays fully open with proper chain slack.
- Mineral buildup in rim jets and siphon jet restricts water flow; clean regularly with vinegar or descaler to restore flush strength.
- Partial clogs or venting problems cause slow drainage and residual waste; use a toilet auger and inspect vent pipes for blockages.
- Combine tank adjustments, flapper repairs, jet cleaning, and drain clearing to fully restore flush performance in older toilets.
Why Low Tank Water Levels Cause Incomplete Flushes?

Check your toilet’s tank water level first when facing incomplete flushes. Low water levels directly reduce the volume of water released per flush.
When the water sits too far below the overflow tube, typically more than an inch, it can’t generate the necessary force to clear the bowl completely. Insufficient water volume weakens the siphoning action essential for a full flush, often leaving waste behind.
Water below the overflow tube reduces flush power, weakening siphoning and often leaving waste behind.
You won’t get optimal flushing without enough water stored in the tank. This issue commonly occurs due to fill-valve misadjustment or leaks that let water escape prematurely.
In some cases, a leaking shut-off valve flapper can contribute to the loss of water from the tank, further lowering the water level and affecting flush performance.
Understanding this cause helps you focus your troubleshooting on restoring proper water height, which is critical for effective toilet performance before exploring other potential malfunctions or blockages.
How to Check and Adjust Your Toilet’s Water Level?
Measuring the water level in your toilet tank is a straightforward task that sets the foundation for effective flushing. Open the tank lid and locate the water surface relative to the overflow tube. Ideally, water should be about 1 inch below the tube’s top.
If it’s too low, adjust the fill valve by turning a screw or sliding a clip on the float arm to raise the water level. Regular cleaning and maintenance of the fill valve components can help prevent issues with water level inconsistency.
| Water Level Position | Flush Quality | Adjustment Needed |
|---|---|---|
| Below 1 inch | Weak, incomplete flush | Increase fill valve height |
| At 1 inch | Optimal flush | No adjustment needed |
| Above 1 inch | Risk of overflow | Decrease fill valve height |
Check these settings regularly to maintain consistent flush performance.
Why Flapper Problems Cut Flushes Short?
When the flapper closes too soon, it cuts the flush short before the tank fully empties. This leaves your toilet unable to clear waste effectively.
This premature closure limits the water volume released, reducing flush force. A worn, warped, or stiff flapper can cause this by failing to stay open long enough.
Additionally, improper seating or a weak seal may trigger early shutoff. Since the flush duration depends on the flapper’s timing, any malfunction directly impacts performance.
To diagnose, inspect the flapper for damage or deformation and verify it opens fully during flushing. Replace any degraded flapper to restore proper seal and timing.
Ensuring the flapper closes only after the tank empties will improve flush completeness and prevent frequent partial flush issues. Regular cleaning to prevent mineral buildup can also help maintain smooth flapper operation and avoid premature closing.
How to Fix Loose or Tangled Flapper Chains?
Loose or tangled flapper chains can prevent the flapper from lifting fully, cutting the flush short and weakening bowl clearing. To fix this, you need to guarantee proper chain slack and alignment for consistent operation.
Here’s how:
- Adjust Chain Length: Detach the chain from the flush lever. Shorten or lengthen it to allow about ½ inch of slack. Too tight restricts flapper lift; too loose causes tangling.
- Untangle the Chain: Remove any twists or knots along the chain to prevent sticking or catching during flush.
- Check Attachment Points: Verify that the chain hooks securely to both the flapper and flush lever without binding or slipping.
Proper chain slack is essential for smooth operation and prevents flush handle chain binding or malfunction.
Why Mineral Buildup Weakens Your Toilet’s Flush?
Although your toilet may appear to flush normally, mineral buildup can silently reduce its efficiency. It does this by clogging rim jets and the siphon jet.
Hard-water minerals like calcium and lime accumulate inside these small openings, restricting water flow into the bowl. When rim jets are partially blocked, the water distribution weakens, reducing the flush’s ability to clear waste effectively.
Similarly, a clogged siphon jet slows the siphoning action that pulls waste from the bowl. This buildup causes repeated weak flushes, even though your tank and flapper function correctly.
Over time, restricted jets lead to incomplete evacuation, requiring more frequent flushing or manual cleaning. Addressing mineral deposits promptly preserves flush force and prevents performance degradation in hard-water areas. This helps maintain your toilet’s reliability and hygiene.
Regular maintenance with eco-friendly cleaners can effectively dissolve mineral deposits without damaging rubber components, helping sustain flush performance.
How to Clean Rim Jets and Siphon Jets?
Mineral buildup in rim jets and siphon jets demands regular cleaning to restore peak water flow and flush power. To clear these blockages, follow these steps:
- Access the jets: Remove the toilet tank lid and locate rim jets under the bowl’s rim and the siphon jet at the bowl’s base. Use a flashlight if needed.
- Apply a descaling solution: Soak a cloth or sponge in white vinegar or a commercial descaler. Apply it to the jets or fill a plastic bag with vinegar and secure it around the rim jets to dissolve mineral deposits. Let it sit for 30-60 minutes.
- Scrub and flush: Use a small brush or wire to gently scrub away loosened buildup. Flush the toilet several times to clear debris and confirm improved water flow.
Regular maintenance like cleaning rim jets helps prevent mineral deposits that can cause noises and reduce flushing efficiency.
How to Spot and Clear Partial Clogs in Your Toilet?
When your toilet doesn’t flush fully, a partial clog could be holding things back. You’ll notice slow drainage or residual waste in the bowl despite a seemingly normal tank flush.
Start by inspecting the trapway and drain line for obstructions like paper or debris. Use a toilet auger to reach and dislodge blockages without damaging porcelain.
If the auger doesn’t clear the clog, try flushing with a bucket of water directly into the bowl to test if tank components or jets are at fault.
Avoid chemical drain cleaners as they can damage pipes and seals. Regularly removing buildup and debris prevents partial clogs, maintaining strong flush performance.
If problems persist, consider professional help to inspect deeper drain issues beyond the trapway. Persistent problems require professional plumber intervention to avoid further damage.
When and How to Test for Venting or Drain Line Issues?
If your toilet flushes weakly despite proper tank adjustments and clean jets, you should test the plumbing vent and drain line for blockages or restrictions. Vent issues reduce airflow, weakening siphon action. Drain line blockages slow waste evacuation.
To test:
- Perform a smoke or pressure test: Introduce smoke or pressurized air into the vent stack to detect blockages or leaks.
- Observe vent pipe airflow: On a windy day, check for airflow or listen for gurgling sounds during flushes, which indicate venting problems.
- Use a drain snake or camera inspection: Clear or identify partial clogs within the drain line that may reduce water flow.
Addressing these issues improves flush strength and prevents recurring drainage problems. If tests reveal no faults, consider inspecting other components. Additionally, slow drains and gurgling noises are common signs that may indicate venting or drainage issues requiring prompt attention.
How to Combine Fixes for Older Toilets With Weak Flushes?
After ruling out venting and drain line issues, your focus should shift to combining multiple fixes tailored for older toilets that commonly suffer from wear, scale buildup, and partial restrictions.
Start by adjusting the tank water level to about one inch below the overflow tube to maximize flush volume. Replace or adjust the flapper and lift chain to guarantee full, sustained opening during flushes.
Next, thoroughly clean rim jets and the siphon jet to remove mineral buildup that restricts water flow. Inspect the trapway for partial clogs and clear debris if found.
Combining these steps addresses common weak flush causes in aging toilets, restoring flush strength efficiently without unnecessary replacements. Consistent maintenance on these components will prolong toilet performance and reduce recurring flush issues. Additionally, ensuring the toilet sits rock-solid by using plastic or rubber shims can help prevent instability that might affect flushing efficiency.
Frequently Asked Questions
Can a Faulty Toilet Handle Affect Flush Strength?
Yes, a faulty toilet handle can affect flush strength. If the handle sticks or doesn’t fully lift the flapper valve, it cuts the flush short, reducing water flow into the bowl.
You should check for loose or broken parts in the handle mechanism. Make sure the lift chain has the right slack.
Fixing or replacing a malfunctioning handle often restores proper flapper operation and improves flush power.
How Often Should I Replace My Toilet Flapper?
You should replace your toilet flapper about every 3 to 5 years, or sooner if it shows wear.
A worn flapper is like a tiny dam holding back a river of water, causing incomplete flushes.
Check for warping, stiffness, or leaks regularly.
If you notice reduced flush power or continuous running water, swap it out immediately.
Regular inspection and timely replacement keep your toilet flushing efficiently and prevent water waste.
Does Toilet Bowl Shape Impact Flushing Efficiency?
Yes, the toilet bowl shape impacts flushing efficiency. Elongated bowls generally offer better flushing performance due to improved water flow and waste removal compared to round bowls.
The trapway design and water distribution pattern inside the bowl also influence flush effectiveness. When choosing or troubleshooting, focus on a bowl shape that promotes strong siphon action and smooth drainage to guarantee complete waste evacuation and reduce clogging risks.
Can Using Too Much Toilet Paper Cause Incomplete Flushes?
Like a river clogged by debris, using too much toilet paper can cause incomplete flushes by partially blocking the trapway or drain line.
This restricts water flow and slows evacuation, leaving waste behind.
To fix this, reduce toilet paper usage per flush.
If problems persist, check for partial clogs.
Regular maintenance and prompt clearing of blockages will restore proper flushing performance and keep your toilet functioning efficiently.
Are Dual-Flush Toilets More Prone to Flushing Issues?
Yes, dual-flush toilets can be more prone to flushing issues because they rely on precise mechanisms and water levels for each flush mode.
If the components, like the flush valve or buttons, wear out or misalign, you might experience incomplete flushes.
To fix this, regularly check and adjust water levels, clean mineral buildup, and ensure the dual-flush mechanism operates smoothly.
Proper maintenance prevents most common dual-flush problems.
Toilet Doesn’t Flush All the Way? Final Repair Tips
If you think fixing a weak flush is too complex, don’t worry. You can handle most issues yourself with simple checks and adjustments.
By ensuring your tank water level is correct, addressing flapper problems, and clearing mineral buildup or partial clogs, you’ll restore full flush power efficiently.
Even if your toilet is older, combining these straightforward fixes can markedly improve performance without costly replacements or professional help.
Take action now for reliable flushes every time.