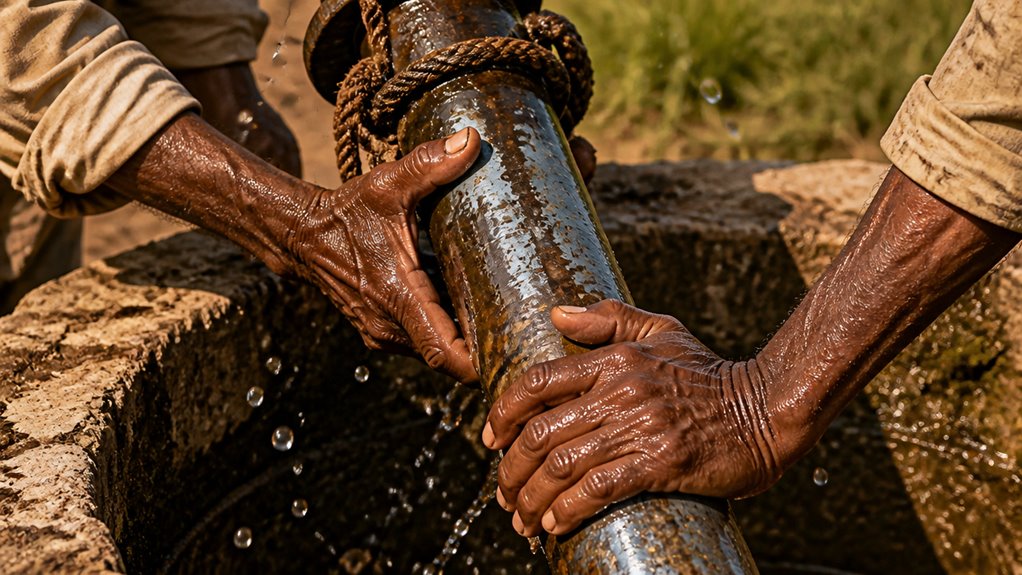
To pull a shallow well pipe, first cut power and relieve system pressure by opening a faucet and draining the tank.
Use pipe wrenches and a foot jack to loosen fittings and secure the pipe.
Lift sections hand over hand, cutting longer pipes into manageable pieces with a hacksaw.
Carefully handle foot valves and clean threads before removal.
If the pipe’s stuck, steady force or cutting above the blockage helps.
Follow these steps to safely and efficiently extract your well pipe and avoid common problems.
Key Takeaways
- Turn off power at the circuit breaker and verify with a voltage tester before starting pipe removal.
- Use a foot jack or pipe vise to secure the pipe at the wellhead and apply steady lifting force.
- Cut continuous pipes into manageable 3–4 foot sections using a hacksaw while maintaining tension to prevent dropping.
- Wear protective gloves, safety glasses, and steel-toe boots for safe handling and workspace stability.
- Remove pipe sections hand over hand, securing each exposed length immediately to avoid slipping back into the casing.
How to Tell What Kind of Shallow Well You Have?

To figure out what kind of shallow well you have, start by measuring its depth and inspecting the pipe setup at the wellhead.
Begin by measuring your shallow well’s depth and examining the pipe arrangement at the wellhead.
Shallow wells typically range under 50 to 60 feet deep. Check if the well uses continuous polyethylene or PVC drop pipe, as these simplify removal.
Look for unions or accessible top fittings; these indicate easier disassembly compared to sealed or threaded assemblies.
Also, determine the vertical lift from water level. Shallow-well pumps generally don’t exceed 25 feet of suction lift.
Note if the pipe appears as a single continuous length or segmented. Continuous pipe may require cutting into manageable sections during removal.
Accurately evaluating these factors helps you plan the right tools and techniques for safe, efficient pipe extraction in your shallow well.
Additionally, be aware that clogged or dirty filters can affect water flow and pressure, impacting the overall pump performance.
Cut Power and Drain Pressure in Your Shallow Well System
Before you start pulling the shallow well pipe, it’s really important to shut off all power to the pump. You can do this at the breaker or control box. Trust me, this step is crucial to avoid any accidental energizing.
Once you’ve turned off the power, go ahead and drain the pressure tank completely. This will relieve any stored pressure in the system.
It’s a smart move to do this because it helps prevent any sudden water discharge that could catch you off guard.
Also, be sure to check the circuit breakers for any tripped ones before proceeding to ensure safe operation.
Power Shutdown Procedures
Since working on your shallow well pipe involves handling electrical components and pressurized water, you’ll need to cut power to the well pump and fully drain the pressure tank before proceeding. This prevents electrical hazards and sudden water discharge, ensuring your safety and system integrity.
Follow these power shutdown steps precisely:
Turn off the circuit breaker or disconnect the power source to the well pump.
Verify the power is off using a voltage tester at the control box.
Disconnect electrical wiring at the control box, coiling wires away from the wellhead.
Open a faucet to relieve residual pressure and begin draining the system.
Never attempt pipe removal while the pump remains energized or the system is pressurized.
Adhering strictly to these steps minimizes risk and prepares your system for safe pipe extraction. Always wear protective gear such as gloves and safety glasses to safeguard yourself during the process.
Pressure Tank Drainage
After cutting power to your well pump, drain the pressure tank completely to eliminate system pressure. Open a faucet downstream to relieve pressure and allow air into the tank. This step prevents water from spraying or fittings from loosening unexpectedly.
Fully draining the tank guarantees safe disconnection of pipes and fittings without risking injury or damage.
| Step | Action | Purpose |
|---|---|---|
| Cut power | Turn off pump at control box | Prevents pump activation |
| Open faucet | Release water pressure | Eliminates residual system pressure |
| Drain tank | Allow all water to exit tank | Guarantees safe pipe disassembly |
Always confirm the tank is empty before loosening any connections. Wearing safety glasses and gloves during this process protects you from debris and unexpected water splashes.
Gather Tools Needed to Pull Shallow Well Pipe
Alright, before diving into pulling that shallow well pipe, let’s make sure you have everything you need. Start gathering your tools—pipe wrenches and adjustable wrenches are a must. You’ll also want some rope, wire cutters, and a hacksaw handy.
Oh, and don’t forget your safety gear! Protective gloves are essential, and it’s really important to have stable footing to avoid any slips or pinches. Trust me, having all this ready to go will make the removal process much smoother and keep you safe while you tackle the job.
Also, remember to turn off the power to the pump before starting any removal work to avoid accidents.
Essential Tools Overview
Gathering the right tools is critical for safely and efficiently pulling a shallow well pipe. You’ll need specialized equipment to loosen fittings, control pipe movement, and handle the pipe’s weight without causing damage or injury.
Prepare these essentials before starting:
Pipe wrenches and adjustable wrenches for loosening couplings and fittings.
Rope or sturdy wire to secure the pipe during extraction.
A foot jack or pipe vise to hold the pipe steady at the wellhead.
Hacksaw for cutting pipe sections if needed.
Chain and jack setup to break loose stubborn or corroded pipe connections.
Having these tools ready guarantees you can methodically detach and lift the pipe. This minimizes risks of damage or pipe slippage during the pull. Always ensure you have a clean workspace prepared to maintain safety and organization throughout the process.
Safety Gear Requirements
You should always wear appropriate safety gear to protect yourself when pulling a shallow well pipe. Gloves guard against sharp edges and pinch points, while sturdy boots provide slip resistance on wet surfaces.
Eye protection shields you from debris when cutting or loosening fittings. Depending on your environment, consider a hard hat and hearing protection.
Here’s a quick gear checklist:
| Gear Item | Purpose | Key Feature |
|---|---|---|
| Protective Gloves | Prevent cuts and pinches | Durable, non-slip grip |
| Safety Glasses | Shield eyes from debris | Impact-resistant lens |
| Steel-Toe Boots | Guarantee foot protection | Slip-resistant sole |
Always inspect your gear for damage before starting. Proper safety equipment reduces injury risk and allows you to work efficiently. Before starting, it is crucial to turn off the main electrical connection to prevent electric shock.
Disconnect Electrical Wiring and Loosen Wellhead Fittings
Once the power is off and the system is depressurized, disconnect the electrical wiring at the control box carefully to prevent damage or accidental contact. Coil the wires neatly away from the wellhead to avoid interference during pipe removal.
Next, focus on loosening the wellhead fittings, which may include unions, couplings, or threaded joints.
Keep these pointers in mind:
Use adjustable or pipe wrenches to loosen fittings without damaging threads. Apply penetrating oil on corroded fittings to ease loosening. Work gradually to avoid stressing the pipe or wellhead. Make certain all fittings are fully disconnected before attempting to pull the pipe.
Keep a helper close to assist with stabilizing fittings or handling tools. Following this guarantees a safe, damage-free disassembly at the wellhead. Additionally, monitoring the pump’s activity through a well pump controller can help detect any electrical or mechanical issues early, ensuring safe handling during maintenance.
Lift the Pipe in Sections, Securing Each Part
With the electrical wiring disconnected and all wellhead fittings loosened, begin lifting the pipe carefully in manageable sections. Grasp the pipe firmly and raise it hand over hand until you expose a joint or a length you can handle safely.
Secure this section immediately to prevent it from slipping back into the well casing. Repeat this process, lifting and securing each segment before proceeding. Use a helper to maintain tension and control. Cutting the pipe into shorter sections might be necessary for continuous runs.
A properly functioning check valve is crucial to ensure the pump remains primed during the pipe removal process.
| Action | Purpose |
|---|---|
| Lift section hand over hand | Control weight and prevent damage |
| Secure each segment | Prevent pipe from falling back |
| Use helper | Manage tension and enhance safety |
This methodical approach guarantees safe, efficient pipe removal.
Use a Jack or Clamp to Secure Shallow Well Pipe
Employ a jack or clamp to firmly secure the shallow well pipe at the wellhead during lifting. This prevents the pipe from slipping back into the casing and reduces strain on your grip.
Position the jack or clamp just above the wellhead, ensuring it grips the pipe tightly without damaging it.
Place the jack or clamp just above the wellhead for a secure, damage-free grip on the pipe.
Adjust tension gradually as you lift sections, repositioning the device when needed.
Key points to remember:
Use a foot jack or pipe vise designed for pipe diameter. Avoid overtightening to prevent pipe deformation. Have a helper maintain pipe tension during adjustments.
Check stability frequently before continuing the lift. Keep the jack or clamp clean and free of debris for reliable grip.
Proper use of these tools will make pipe removal safer and more controlled. Additionally, ensure your workspace is clean and organized to facilitate safe and efficient pipe removal.
Cut Long Pipes Into Manageable Sections for Removal
After securing the pipe firmly at the wellhead using a jack or clamp, focus on cutting long sections into manageable lengths for safer handling.
Use a hacksaw or pipe cutter to slice through the pipe cleanly, avoiding jagged edges that could cause injury or complicate reassembly.
Cut the pipe into sections that you can comfortably lift and control, generally no longer than 3 to 4 feet.
Have your helper maintain tension on the pipe to prevent sudden drops.
Be certain each cut is precise and perpendicular to the pipe axis to guarantee a proper fit during reinstallation.
Always wear protective gloves and maintain a stable stance to avoid slips.
Removing pipe in segments reduces the risk of damage and makes handling safer and more efficient.
Handle Foot Valves and Clean Pipe Threads Properly
Once you’ve pulled the pipe from the well, carefully unscrew the foot valve to avoid damaging its threads or internal components. Handle it gently to maintain the valve’s sealing integrity.
Next, clean all pipe threads thoroughly to guarantee a tight, leak-free connection during reassembly. Follow these steps for proper handling:
Use a wire brush to remove dirt, corrosion, and old thread sealant from pipe ends. Inspect threads for damage; replace any with stripped or cracked threads.
Apply a suitable thread sealant or Teflon tape evenly on cleaned threads before reinstallation. Keep pipe sections aligned to prevent cross-threading and ensure smooth assembly.
Organize removed parts systematically to avoid confusion during reinstallation or replacement. Proper care here prevents leaks and prolongs system reliability.
What to Do If Your Shallow Well Pipe Gets Stuck?
Properly handling foot valves and cleaning pipe threads helps prevent damage that can cause the pipe to get stuck during removal.
Proper care of foot valves and thorough thread cleaning prevent pipe damage and sticking during removal.
If your shallow well pipe does get stuck, first make sure power is off and system pressure is relieved.
Use a pipe vise or foot jack at the wellhead to secure the pipe firmly.
Gradually apply steady, controlled force with a chain and jack setup or pipe wrench to break corrosion or seized fittings loose.
Avoid sudden jerks that risk pipe damage.
If the pipe remains immobile, carefully cut it into manageable sections above the stuck point to remove what you can.
Mark and store removed pieces for reassembly.
When stuck issues persist, don’t hesitate to call a professional well technician to prevent costly damage.
Frequently Asked Questions
How Do I Know if My Well Pipe Needs Replacing or Just Cleaning?
You’ll know your well pipe needs replacing if you spot corrosion, cracks, or persistent leaks that cleaning can’t fix.
If water flow decreases despite cleaning, or if sediment and debris keep clogging the system, replacement might be necessary.
However, if buildup is minimal and water quality is good, thorough cleaning and flushing usually suffice.
Always inspect pipe threads and fittings closely. Consider professional advice if damage is extensive or unclear.
What Type of Thread Sealant Is Best for Shallow Well Pipes?
If you’re sealing shallow well pipes, you’ll want a thread sealant that’s both waterproof and safe for potable water systems.
That’s exactly why a PTFE (Teflon) tape labeled NSF-61 or a silicone-based pipe thread sealant designed for drinking water is best.
These options prevent leaks and resist corrosion, ensuring durability.
Avoid general-purpose sealants with harmful chemicals.
Always apply sealant evenly on clean threads for a tight, reliable seal.
Can I Use a Cordless Drill to Help Remove Stuck Fittings?
Yes, you can use a cordless drill with a suitable socket or adapter to help remove stuck fittings, but proceed cautiously.
Use low torque settings to avoid damaging threads or fittings. If fittings are severely corroded or seized, a drill might strip threads or break components.
Always wear protective gloves and make sure the pipe is securely clamped before applying power. For stubborn fittings, manual tools or cutting may be safer and more effective.
How Often Should Shallow Well Pipes Be Inspected for Corrosion?
Think of your shallow well pipe like a car’s brake system.
If you skip inspections, corrosion can cause sudden failure.
You should inspect shallow well pipes for corrosion at least once a year, especially in areas with aggressive water chemistry.
Regular checks help you catch early rust or wear, preventing costly breakdowns.
If your water is highly mineralized or the pipe shows signs of wear, increase inspections to twice yearly for safety and efficiency.
What Safety Gear Is Recommended Beyond Gloves and Proper Footwear?
You should wear safety goggles to protect your eyes from debris and splashes.
A hard hat is essential to guard against head injuries from falling tools or pipe sections.
Use hearing protection if you’re working around loud equipment.
Consider a dust mask or respirator when cutting pipe or working in dusty conditions.
Always wear sturdy gloves and proper footwear with slip-resistant soles to maintain firm footing and reduce pinch hazards during removal.
How to Pull a Shallow Well Pipe: Final Tips
Pulling your shallow well pipe is like untangling a knot. Methodical and patient work guarantees success.
By cutting power, gathering tools, and carefully disconnecting fittings, you’ll free the pipe without damage. Treat each section like a link in a chain, handling foot valves and threads with care.
If it gets stuck, don’t force it; use the right tools and techniques. With precision and patience, you’ll restore your well system smoothly and safely.