Last Updated on July 17, 2023
Submersible pumps are crucial for uninterrupted water supply in borewells. However, these pumps are subject to wear and tear, and sometimes they may need to be removed for maintenance or replacement.
Removing a submersible pump from a borewell can be intimidating, but with the right tools and techniques, it can be done smoothly and efficiently.
To remove the submersible pump from the borewell, you need to gain access to the borewell and secure the pump properly. Then, attach the safety rope or chain to ensure a safe and successful pump removal.
We will guide you through the steps of removing a submersible pump from a borewell. You can then take the submersible pump out properly.
How to Remove Submersible Pump From Borewell: A Step-By-Step Guide
The following are some quick steps for removing the submersible pump from the borewell:
- Step #1: Gather necessary tools and equipment
- Step #2: Turn off the Power and Clear the Work Area
- Step #3: Access the borewell
- Step #4: Secure the pump
- Step #5: Attach a safety rope or chain
- Step #6: Connect the lifting machine
- Step #7: Gradually lift the pump
- Step #8: Inspect and Replace or repair
- Step #9: Reinstall or seal the borewell
Let’s take a look at the steps.
Step #1: Gather Necessary Tools and Equipment
To properly prepare for the removal process, you’ll want to gather all the necessary tools and equipment recommended by the manufacturer or a professional.
This will include a pump puller or lifting machine, safety gloves, safety glasses, a T-handle pump removal tool, and a safety rope or chain.
It’s important to ensure that you have all the required tools and that they’re in good working condition to avoid any accidents during the removal process.
A pump puller or lifting machine will be needed to lift the submersible pump out of the borewell.
Safety gloves and glasses are essential to protect your hands and eyes from any debris or sharp edges.
A T-handle pump removal tool will help you loosen the pump from its position, while a safety rope or chain will ensure that the pump is securely lifted out of the borewell.
Step #2: Turn off the Power and Clear the Work Area
Here’s what you should do to prepare the work area:
- Remove any debris or obstacles that could interfere with the removal process. This includes rocks, dirt, and any other objects that might be in the way.
- Make sure you have enough space around the borewell to work comfortably. This will help you avoid tripping or getting in the way of the pump.
- Wear protective gear such as gloves and safety glasses to protect yourself from any potential hazards during the removal process.
- Turn off the power supply to the pump to prevent accidental activation. This is crucial for your safety as well as the safety of others in the vicinity.
- Have all the necessary tools and equipment ready before starting the removal process. This will save you time and avoid any unnecessary delays.
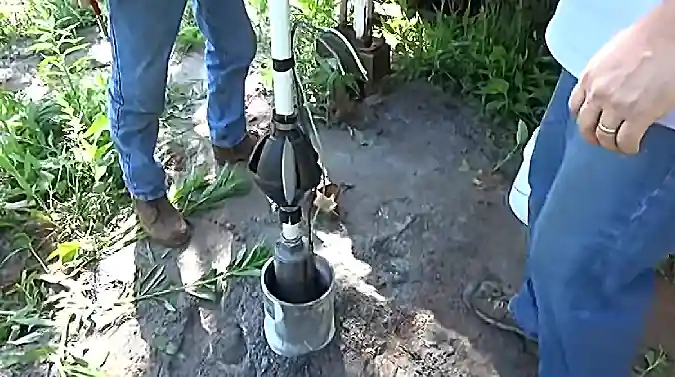
Step #3: Access the Borewell
Once the cap or cover is off, gaining access to the well becomes a matter of carefully maneuvering around the opening, ensuring that safety protocols are strictly followed.
You’ll need to be extra cautious when accessing the borewell, especially if it’s located in a confined space or at a significant depth.
Keep in mind that working with water and electricity can be dangerous, so make sure to take the necessary precautions to avoid any accidents.
To access the borewell, you may need to use a ladder or other equipment to reach the wellhead safely. Once you’re in position, be sure to secure yourself and your equipment to prevent any mishaps.
Remember that the borewell is essentially a hole in the ground, so it’s important to avoid leaning or reaching too far into the well, as this could cause you to lose your balance and fall in.
Step #4: Secure the Pump
Now that you’ve accessed the well safely, it’s time to ensure the T-handle pump removal tool is properly attached and tightened to secure the pump during the lifting process.
This tool is specifically designed for lifting submersible pumps from wells, so it’s important to use it correctly to avoid any accidents or damage to the pump. Here’s how to secure the pump using the T-handle pump removal tool:
- Attach the tool to the pump’s lifting eye or another designated lifting point. Make sure the tool is securely fastened and tightened to prevent any slipping during the lifting process.
- Check the weight of the pump and ensure that the tool is strong enough to support it. If the pump is too heavy for the tool, it could lead to a dangerous situation and damage to the pump.
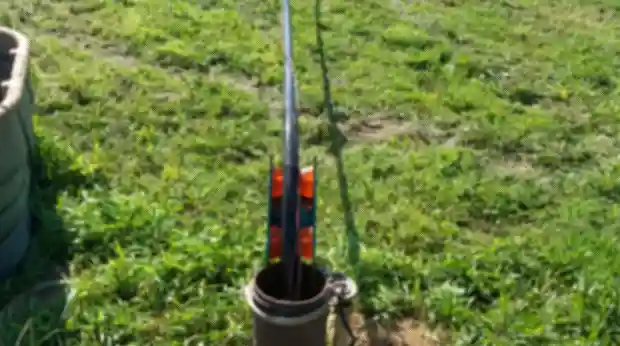
Step #5: Attach a Safety Rope or Chain
After securing the pump with the T-handle pump removal tool, it’s crucial to attach a strong safety rope or chain to the water pipe near the pump to prevent any accidents.
This safety measure will ensure that the pump is held securely in place during the removal process. The rope or chain should be of sufficient strength to support the weight of the pump and any other equipment being used during the removal.
Step #6: Connect the Lifting Machine
To safely lift the submersible pump from the borewell, connect the lifting machine to the T-handle pump removal tool or pump puller according to the manufacturer’s instructions.
This is crucial to ensure that the lift is done properly and without causing any damage to the pump or the borewell.
Make sure that all connections are secured before proceeding with the lift. Check that the lifting machine is capable of handling the weight of the pump.
Once everything is in place, carefully lift the pump out of the borewell, avoiding any obstacles or obstructions.
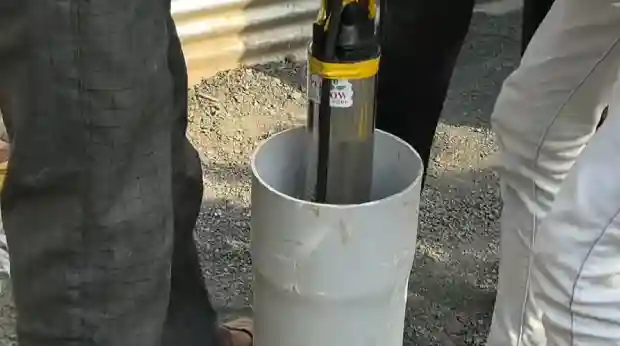
Step #7: Gradually Lift the Pump
As you activate the lifting machine or pump puller, you’ll gradually lift the pump out of the borehole, carefully preventing any damage to the equipment or the well casing. Here are some steps to keep in mind as you lift the pump:
- Apply gentle and controlled force: Make sure to lift the pump slowly and steadily without any sudden jerks or movements. This will help prevent any damage to the pump or the well casing.
- Keep an eye on the pump: As you lift the pump, keep a close watch on it to ensure that it’s coming up smoothly and without any obstructions. If there are any difficulties or obstacles encountered, stop the lifting process and assess the situation before proceeding.
- Adjust the lifting angle if necessary: Depending on the shape and size of the borehole, you may need to adjust the lift angle to overcome any obstacles or difficulties.
- Ensure the pump is clear and secure: Once the pump is completely out of the borehole, make sure it’s clear from the well casing and securely fastened by the lifting machine or pump puller.
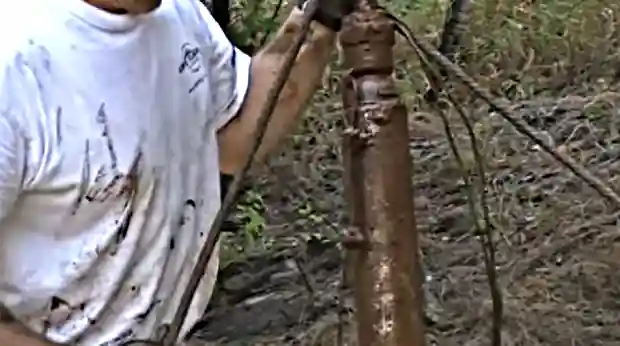
Step #8: Inspect and Replace or Repair
Now it’s time to carefully check the pump for any damage or wear and decide whether a repair or replacement is necessary.
Start by inspecting the pump thoroughly, and checking for any signs of cracks, corrosion, or other damage. Carefully examine all the internal components, including the impeller, motor, and wiring, looking for any signs of wear or damage.
Once you’ve assessed the pump’s condition, take a closer look at the well casing and the surrounding area. Look for any signs of leaks, cracks, or other damage that could affect the pump’s performance.
Depending on the pump’s condition and the borewell, you may need to replace the entire pump or just repair certain components.
Step #9: Reinstall or Seal the Borewell
Ensure you securely reinstall the borewell cap or cover after removing the pump to prevent any debris from entering the well, ensuring the safety and longevity of your well system.
Debris or foreign objects that enter the well can clog the pump or even damage the well’s interior, leading to costly repairs or replacements.
When reinstalling the borewell cap or cover, ensure that it’s fitted tightly and properly aligned with the well’s opening.
If necessary, seal the borewell according to local regulations and guidelines. Sealing the borewell is essential to prevent contamination or pollution of the surrounding groundwater sources.
Before sealing, make sure that all debris and sediment are removed from the well and the well is disinfected with approved chemicals.
What Signs Indicate a Submersible Pump Needs to Be Removed From a Borewell?
If you’re experiencing decreased water flow or pressure, unusual noises or vibrations, or frequent tripping of circuit breakers, it may be time to remove your submersible pump from the borewell. The signs are as follows:
1. Decreased Water Flow or Pressure
You may be concerned when you notice a significant decrease in water flow or pressure from your taps or fixtures, indicating that your submersible pump isn’t working optimally. Various issues, such as worn-out components, clogged impellers, or a failing motor could cause this.
It’s important to address this problem as soon as possible to prevent further damage to your pump and ensure that you have a consistent water supply.
One of the main causes of decreased water flow or pressure is a clogged impeller. This is the rotating component of the pump that moves water through the system.
Over time, debris, sand, and other particles can accumulate in the impeller, reducing its efficiency and causing water flow problems.
To fix this issue, you may need to remove the submersible pump from the borewell and clean the impeller thoroughly. It’s important to follow proper safety procedures and consult a professional if you’re not familiar with the process.
2. Unusual Noises or Vibrations
Feeling vibrations or hearing strange sounds from your submersible pump is like a warning bell, indicating that internal mechanical issues may require immediate attention. Ignoring these warning signs can lead to further damage and costly repairs.
Here are some possible reasons for the unusual noises or vibrations and some steps you can take to remove the submersible pump from the borewell:
- Worn out bearings: If you hear a grinding noise or feel excessive vibrations, it may indicate that the bearings are worn out.
To fix this issue, you need to remove the pump from the borewell and replace the bearings. Make sure to follow the manufacturer’s instructions and use the proper tools and equipment.
- Loose or broken impeller: If you hear a rattling noise or notice a decrease in water flow, it may indicate that the impeller is loose or broken.
You’ll have to remove the pump from the borewell and inspect the impeller. If it’s loose, you can tighten it or replace the impeller if it’s broken.
If you experience unusual noises or vibrations from your submersible pump, it’s best to act quickly and investigate the issue.
3. Frequent Tripping of Circuit Breakers
Experiencing frequent circuit breaker trips with your submersible pump could be a sign of an electrical issue that requires immediate attention. Faulty wiring, motor problems, or an overload on the pump can cause the circuit breaker to trip as a safety measure.
It’s important to have a professional inspect your pump and determine the root cause of the issue. Operating the pump without addressing the problem can lead to further damage and potentially hazardous conditions.
If the issue isn’t with the wiring or motor, removing the submersible pump from the borewell may be necessary for further inspection. This can be a complex process that requires specialized equipment and expertise.
It’s recommended that you seek the assistance of a professional to safely and effectively remove the pump. Once the pump is removed, it can be thoroughly inspected and any necessary repairs or replacements can be made.
4. Fluctuating Water Levels
Unstable water levels in the borewell could indicate a malfunctioning pump, leading to potential damage and unsafe conditions.
If you notice that the water level in your borewell fluctuates excessively, it may be time to remove the submersible pump and inspect it for faults.
Here are a few steps to guide you through the process:
- Turn off the pump’s power and disconnect it from the control panel.
- Remove the pipes connected to the pump and carefully lower the pump using a rope or cable.
- Inspect the pump for any signs of damage, such as worn out bearings or a damaged impeller. If you notice any issues, it may be necessary to replace the pump.
5. Continuous Power Supply Issues
Power supply problems are common with submersible pumps. Frequent tripped breakers or blown fuses can be indicative of internal electrical faults that need to be resolved.
Borewell pump removal can be a challenging task, especially if you’re dealing with power supply issues. First, you need to ensure that the power supply to the pump is disconnected.
Next, you’ll need to detach the pump’s control box and remove any bolts or screws that are securing the pump to the well casing. Once the pump is free from its location, you can safely lift it to the surface for inspection and repair.
If you’re unsure about how to proceed, it’s best to seek the assistance of a professional technician to avoid further damage to the pump or personal injury.
6. Inconsistent Water Quality
To improve the inconsistent quality of your well water, there are a few steps you can take before considering pump removal.
Installing a filtration system can help remove sediment, debris, and contaminants from your water supply.
Various filtration systems are available, including sediment filters, activated carbon filters, and reverse osmosis systems.
Another option is to add chemicals to treat your well water. Chlorination can help kill bacteria and other microorganisms, while hydrogen peroxide can help remove odors and improve taste.
Keep in mind that adding chemicals may only solve some issues and may require periodic maintenance to ensure effectiveness.
How often should submersible pumps be removed and inspected?
You should have your submersible pump inspected and removed at least once a year to ensure optimal performance and prevent costly breakdowns.
Regular inspections and maintenance enable the early detection of developing issues or wear in the pump system, allowing for timely repairs before any major issues occur in the pump.
The frequency of inspection and removal may vary depending on usage, water quality, and specific manufacturer recommendations. However, a general guideline is to have your submersible pump inspected and removed annually.
Following this guideline can help to prolong the life of your pump, save you money on repairs and replacements, and ensure that your water supply remains consistent and reliable.
How long does it take to remove a submersible pump from a borewell?
Removing a submersible pump from a borewell can take varying amounts of time depending on several factors.
Factors such as the pump system’s complexity, the borewell’s depth, and any potential complications can significantly influence the duration of the removal process.
In simpler cases where the pump system is easily accessible and there are no unforeseen issues, the removal process can be completed within a few hours.
Conversely, in situations where the pump is located at greater depths or if it is damaged or stuck, the removal process may require additional time and effort.
Therefore, it is essential to engage the services of a professional pump technician for the safe and efficient removal of submersible pumps from borewells.
Safely and Efficiently Removing a Submersible Pump from a Borewell
Removing a submersible pump from a borewell is a task that requires careful planning, the right tools, and a systematic approach.
Following the step-by-step process outlined above, you can safely and effectively remove a submersible pump from a borewell.
In order to ensure safety, be sure to turn off the power, clear the work area, gather the necessary tools. Secure the pump, attach a safety rope or chain, and connect the lifting machine, gradually lift the pump while making sure that any obstacles are not encountered while it is being lifted.
Before you decide whether to repair or replace the pump, be sure to inspect it for damage or wear. Finally, reinstall the borewell cap or cover securely and seal the borewell if required.
Regular inspection and maintenance are essential to ensure the optimal performance of submersible pumps.

