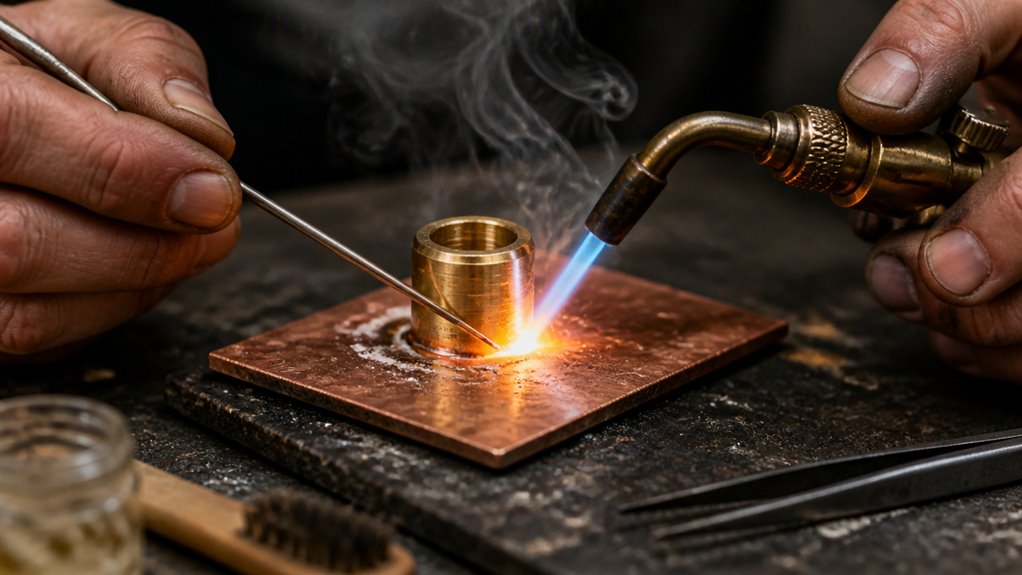
You can solder brass to copper effectively by thoroughly cleaning both surfaces to remove oxides and oils. Apply flux designed specifically for these metals, and heat the brass first for even temperature matching.
Choose a compatible solder, such as a lead-free or silver-bearing alloy, to guarantee proper flow and joint strength. Control heat application to avoid flux degradation and promote capillary action.
Then cool joints naturally and remove flux residues. Understanding these steps will help you master strong, reliable brass-to-copper joints.
Key Takeaways
- Brass and copper can be soldered effectively with proper surface cleaning to remove oxides and contaminants for reliable bonding.
- Use flux specifically rated for copper and brass to dissolve oxides and promote solder wetting during heating.
- Heat brass and copper evenly, starting with brass, to ensure both reach soldering temperature simultaneously for optimal solder flow.
- Select appropriate solder type—lead-free or silver-bearing alloys improve strength, corrosion resistance, and flow on brass-to-copper joints.
- Allow joints to cool naturally, then thoroughly remove flux residues to maintain joint durability and prevent corrosion.
How to Solder Brass to Copper Successfully?

When soldering brass to copper, you must start with thorough surface preparation to guarantee a strong, reliable joint.
Remove all oxides, oils, and contaminants using abrasive tools like emery cloth or wire brushes, focusing on both visible and mating surfaces.
Thoroughly clean all oxides, oils, and contaminants with abrasive tools on visible and mating surfaces for optimal soldering.
Assemble the parts quickly after cleaning to prevent re-oxidation.
Next, apply an appropriate flux designed for copper and brass to dissolve oxides during heating and inhibit further oxidation.
Heat the joint evenly, starting with the brass since it heats differently, ensuring both metals reach soldering temperature simultaneously.
Avoid overheating, which can degrade flux and impair solder flow.
Finally, feed solder directly to the heated joint, not the flame, to encourage capillary action and achieve a continuous, bright fillet.
This will confirm a sound metallurgical bond.
Note that brass contains a high copper content which provides antimicrobial benefits and can influence joint durability under certain conditions.
Choosing Soft Soldering or Brazing for Brass-Copper Joints
When you’re working on brass-to-copper joints, you might want to go with soft soldering. This method is great for non-structural applications where you don’t need super high strength. Plus, it operates at lower temperatures, making it easier to manage.
On the other hand, if your project demands more strength or if it’s going to be exposed to high temperatures, brazing is the way to go. It really shines in terms of joint integrity and durability. So, take a moment to think about the mechanical requirements and the conditions your joint will face. That’ll help you pick the right method for your needs! Understanding the role of stages in pressure accumulation can help ensure your joints withstand operational stresses.
Soft Soldering Suitability
Although both soft soldering and brazing can join brass to copper effectively, selecting the appropriate method depends on the joint’s mechanical requirements and operating conditions.
Soft soldering suits non-structural or low-stress joints where temperatures remain below 200°C. It offers ease of application and requires less heat, reducing distortion risks.
When deciding if soft soldering fits your project, consider:
- Joint strength: Soft soldering provides adequate tensile strength for plumbing and decorative work but lacks the durability needed for load-bearing applications.
- Thermal exposure: If the joint won’t face high temperatures, soft soldering maintains integrity without flux degradation.
- Complexity and accessibility: Soft soldering accommodates intricate or confined joints due to lower heat input.
Use soft soldering when mechanical demands are moderate and thermal exposure is limited. Additionally, regular maintenance such as inspecting for corrosion on water valves can prolong the life and reliability of soldered joints.
Brazing Strength Advantages
Soft soldering works well for low-stress applications, but brazing offers markedly higher joint strength and temperature resistance. This makes it better suited for demanding brass-to-copper connections.
When you braze, the filler metal melts above 450°C, creating a metallurgical bond that withstands mechanical loads and elevated temperatures better than soft solder joints. This strength advantage is critical in structural or high-pressure environments where joint integrity is paramount.
Brazing also reduces the risk of joint failure due to thermal cycling, as the alloys involved form more stable interfaces. However, brazing requires more precise temperature control and joint preparation.
If your project demands durability and thermal resilience, brazing is the superior choice, ensuring a robust, long-lasting connection between brass and copper components. Additionally, using penetrating oil can help prepare and maintain metal joints by preventing corrosion and easing the loosening of stuck fittings before soldering or brazing.
How to Prepare Brass and Copper Surfaces for Soldering?
To get your brass and copper surfaces ready for soldering, you really need to start with a good cleaning. It’s essential to remove any oxide, dirt, and oils. You can use abrasives like emery cloth or wire brushes for this. Just remember to focus on the mating faces too, not just the areas you can see. This way, you’ll ensure proper solder flow and a strong joint.
Once you’ve cleaned everything up, try to assemble the parts right away. This helps minimize re-oxidation and keeps the surfaces nice and bright. That brightness is key for achieving peak capillary action when you’re soldering. So, don’t delay—get those pieces together and ready to go!
For the best results, make sure to deburr and prepare the edges thoroughly to ensure a smooth and reliable connection deburring techniques.
Surface Cleaning Techniques
Preparing brass and copper surfaces for soldering starts with thorough cleaning to remove oxides, dirt, oils, and tarnish that can inhibit solder flow and joint strength.
You need to expose bright metal surfaces to guarantee peak wetting and capillary action. Focus on the mating faces, not just visible exteriors.
Follow these steps to prepare the surfaces:
- Mechanically abrade both metals using emery cloth, fine sandpaper, or a wire brush to eliminate oxides and tarnish, exposing a clean, bright surface.
- Degrease the area with a suitable solvent like isopropyl cleaner to remove oils and contaminants that impair flux effectiveness.
- Immediately assemble and apply flux to minimize exposure time and prevent re-oxidation prior to soldering.
This precise cleaning guarantees a strong, reliable joint by enhancing solder adhesion and flow. Properly prepping the surface is essential to ensure ideal bonding and prevent future joint failure.
Preventing Re-Oxidation
Once you’ve cleaned and assembled the brass and copper components, minimizing their exposure to air is key to preventing re-oxidation.
Oxides rapidly form on freshly cleaned surfaces, degrading solderability and joint integrity. To counter this, assemble and flux the parts promptly after cleaning.
Use a suitable flux specifically designed for brass and copper; it dissolves existing oxides and creates a protective barrier during heating.
Keep the components covered or in a low-oxygen environment if delays occur. Avoid prolonged handling, which introduces oils and contaminants, accelerating oxidation.
Additionally, make certain the workspace has minimal drafts that can cool surfaces unevenly, promoting oxidation spots.
Applying pipe sealant after soldering can help prevent leaks and prolong the life of the joint.
Picking the Right Flux for Brass and Copper
Selecting the appropriate flux plays a critical role in guaranteeing a strong, clean solder joint between brass and copper. You need a flux that dissolves oxides and prevents re-oxidation during heating for peak wetting and solder flow.
When choosing flux, consider these factors:
- Compatibility: Use flux specifically rated for copper and brass to guarantee effective oxide removal and proper chemical action on both metals.
- Residue: Pick a flux that leaves minimal corrosive residue to avoid long-term joint degradation. Avoid excessive application.
- Activation Temperature: Select flux with an activation temperature matching your soldering process to maintain flux activity throughout heating without premature burnout.
For underground applications, it is also important that the joint materials are made of dezincification-resistant brass to ensure long-term corrosion resistance.
What Solder Types Are Ideal for Brass and Copper?
When you’re soldering brass to copper, picking the right solder really matters for the strength and durability of the joint.
For instance, lead-free solder is a great option because it not only resists corrosion but also has some environmental perks.
On the other hand, if you’re looking for something that boosts mechanical strength and has great flow characteristics, silver-bearing solder is the way to go.
Just remember, it’s key to keep that joint nice and tight and to heat things properly.
That way, you’ll ensure a solid bond that lasts!
Additionally, understanding the temperature resistance of your solder is crucial to ensure the joint withstands operational heat without failure.
Lead-Free Solder Benefits
Typically, lead-free solder is the preferred choice for joining brass to copper due to its environmental and health advantages, as well as its compatibility with plumbing and general fabrication standards.
When you select lead-free solder, you guarantee compliance with regulations restricting hazardous materials and reduce exposure to toxic lead fumes.
Additionally, lead-free alloys offer sufficient mechanical strength and corrosion resistance for most brass-to-copper joints.
Consider these key benefits:
- Regulatory Compliance: Meets standards like RoHS, essential in plumbing and electronics applications.
- Improved Health and Safety: Eliminates lead-related toxicity risks during soldering and in finished assemblies.
- Material Compatibility: Provides reliable wetting and bonding on both brass and copper surfaces without compromising joint integrity.
Using lead-free solder helps you achieve durable, code-compliant, and safer joints in your brass-to-copper projects. For enhanced longevity and corrosion resistance, stainless steel fittings offer superior corrosion protection compared to brass in harsh environments.
Silver-Bearing Solder Uses
Beyond lead-free options, silver-bearing solders stand out for their enhanced mechanical strength and higher melting points. They’re ideal for brass-to-copper joints requiring superior durability or exposure to elevated temperatures.
These solders typically contain 2-10% silver, which improves tensile strength and corrosion resistance compared to standard tin-based solders. When you select silver-bearing solder, you gain a joint that withstands mechanical stress and thermal cycling better. This is vital in plumbing or industrial applications.
The elevated melting point, often above 600°F (316°C), means you’ll need precise temperature control to avoid overheating. Silver-bearing solders also promote reliable wetting on both brass and copper surfaces, provided you’ve prepared and fluxed the metals properly.
Using them guarantees a robust, long-lasting bond, especially when strength and heat tolerance are priorities.
Solder Flow Characteristics
Although solder selection depends on the specific application, choosing the right solder type markedly affects flow characteristics and joint quality between brass and copper.
You want solder that melts cleanly and wets both metals evenly to guarantee a strong, leak-proof joint. Lead-free solders, especially those with silver content, provide excellent flow due to their lower surface tension and enhanced capillary action.
When selecting solder, consider:
- Melting point: choose solder that flows at a temperature compatible with brass and copper without damaging the joint or flux.
- Alloy composition: silver-bearing solders improve wetting and mechanical strength, ideal for plumbing and jewelry.
- Flux compatibility: use flux designed for copper or brass to optimize solder flow and prevent oxidation during heating.
Selecting solder with these characteristics guarantees consistent, reliable joints between brass and copper.
How to Heat Brass and Copper Evenly for Soldering?
When soldering brass to copper, heating both metals evenly guarantees a strong, reliable joint by allowing the solder to flow properly.
You should apply heat gradually, focusing the flame primarily on the brass first, as it often requires more time to reach the soldering temperature.
Then, shift the heat to encompass the copper, ensuring both metals approach the melting point of the solder simultaneously.
Avoid directing the flame at the solder directly; instead, heat the joint area uniformly to prevent localized overheating.
Use a torch tip size appropriate for the joint dimensions to maintain consistent temperature distribution.
Monitor the color change and temperature to avoid flux degradation or metal damage.
This controlled, balanced heating optimizes solder adhesion and joint integrity without compromising the metals’ properties.
How to Ensure Proper Solder Flow for Brass-Copper Joints?
Achieving proper solder flow depends on maintaining a clean, well-fitted joint and applying the right amount of solder at the correct point.
To guarantee optimal flow between brass and copper, first prepare the joint meticulously. Remove oxides and ensure a tight fit to promote capillary action.
Next, heat both metals evenly until the joint reaches soldering temperature simultaneously. Avoid direct flame contact with the solder.
Finally, apply solder directly to the heated seam, not the torch. This allows it to melt and flow naturally.
- Maintain a uniform joint gap to maximize capillary draw.
- Use flux compatible with both metals to prevent oxidation during heating.
- Monitor solder appearance. A bright, continuous fillet confirms proper flow and wetting.
Best Cooling and Cleaning Methods for Brass-Copper Joints
Proper cooling and cleaning directly impact the durability and performance of brass-copper solder joints.
You should allow the joint to cool naturally at room temperature, avoiding rapid quenching with water. This can induce thermal stress and cause microfractures.
Controlled cooling preserves the metallurgical integrity of the joint and prevents cracking.
After cooling, thoroughly remove flux residues with water or a neutralizing agent, especially if acidic flux was used.
Residual flux can accelerate corrosion and reduce joint longevity. Use a soft brush to ensure complete cleaning without damaging the joint.
Finally, inspect the joint for any discoloration or residue that might compromise sealing.
Following these precise cooling and cleaning protocols guarantees a strong, reliable solder joint between brass and copper components.
Avoid Common Soldering Mistakes With Brass and Copper
Although brass and copper soldering is common, many practitioners still encounter avoidable errors that compromise joint integrity. To avoid these pitfalls, focus on three critical areas:
- Surface Preparation: Don’t skip thorough cleaning. Oxides and oils prevent proper solder wetting. Use abrasive tools to expose bright metal and assemble quickly to minimize re-oxidation.
- Heat Control: Avoid uneven heating. Brass requires careful preheating to match copper’s temperature. Apply heat to the joint, not directly to the solder, ensuring it melts on contact with the metals.
- Flux Management: Use appropriate flux rated for brass and copper. Excess flux leaves corrosive residues, but insufficient flux causes poor flow and weak joints. Balance is essential for reliable bonding.
How to Ensure Long-Lasting Brass to Copper Connections?
To make certain long-lasting brass to copper connections, you must focus on meticulous joint preparation and controlled soldering conditions.
Achieving durable brass to copper joints requires careful preparation and precise soldering control.
Begin by thoroughly cleaning both metals to remove oxides, oils, and contaminants using abrasive tools. Assemble the components quickly to prevent re-oxidation.
Apply an appropriate flux to inhibit oxidation during heating. Heat the joint evenly, often starting with the brass to accommodate its thermal properties, guaranteeing both metals reach soldering temperature simultaneously.
Avoid direct flame contact with the solder; instead, let it flow into the joint by capillary action. Use suitable lead-free or silver-bearing solder for strength and corrosion resistance.
After soldering, allow the joint to cool naturally to prevent stress. Finally, remove flux residues promptly to prevent corrosion and guarantee joint durability.
Frequently Asked Questions
Can Brass and Copper Joints Be Soldered Underwater?
You can’t effectively solder brass and copper joints underwater because water cools the metals too quickly. This disrupts heat distribution and solder flow.
Unlike controlled, dry environments where flux works to prevent oxidation, underwater conditions cause flux to wash away. As a result, solder fails to adhere properly.
For reliable joints, you need precise heating and clean, dry surfaces. Underwater soldering lacks these controls, making it impractical and prone to weak, porous connections.
Is Soldering Brass to Copper Safe for Potable Water Systems?
Yes, soldering brass to copper is safe for potable water systems when you use lead-free or silver-bearing solder and appropriate flux rated for drinking water applications.
Be sure you clean surfaces thoroughly to avoid corrosion and use flux that won’t leave harmful residues.
Proper heating and joint preparation prevent leaks and contamination.
Always follow plumbing codes and manufacturer guidelines to maintain water safety and system integrity.
How Does Soldering Brass to Copper Affect Electrical Conductivity?
Soldering brass to copper won’t turn your circuit into a lightning bolt, but it does slightly reduce electrical conductivity due to the solder and joint interface.
The solder layer, typically less conductive than the base metals, adds resistance. You’ll get a minor voltage drop and heat buildup if current’s high.
To optimize conductivity, guarantee a clean, tight joint with minimal solder thickness. Use high-quality, silver-bearing solder for better electron flow.
Can Brass-Copper Solder Joints Withstand Outdoor Weather Exposure?
Yes, brass-copper solder joints can withstand outdoor weather exposure if you prepare and protect them properly. You need to use appropriate flux and solder to guarantee corrosion resistance and strong bonding.
After soldering, clean off all flux residues to prevent corrosion. Applying a protective coating or sealant further enhances durability against moisture and oxidation. Without these steps, the joint may degrade faster in harsh outdoor environments.
What Tools Are Best for Soldering Brass to Copper at Home?
You’ll need a propane torch or a small butane torch for precise heating, alongside quality emery cloth or fine-grit sandpaper to clean surfaces.
Use copper/brass-rated flux and lead-free or silver-bearing solder. A pair of heat-resistant gloves and needle-nose pliers help with handling hot parts.
Additionally, a flux brush for applying flux and a damp sponge for cleanup guarantee a clean joint. These tools optimize control, heat distribution, and joint quality when soldering brass to copper.
How to Achieve Strong Brass-to-Copper Solder Joints?
Soldering brass to copper is entirely doable when you follow the right steps and use proper materials.
By preparing surfaces meticulously, choosing the correct flux and solder, and controlling heat precisely, you’ll guarantee a strong, reliable joint.
Remember, patience is key; rushing can cause weak bonds or defects. Stick to the process, and you’ll have a connection that stands the test of time, proving that slow and steady truly wins the race.