Last Updated on August 19, 2023
In the world of well pump plumbing systems, the humble check valve plays a critical role, quietly safeguarding the integrity and functionality of the entire setup. But do you know what a check valve on a well pump is?
A check valve is a crucial component within well pump plumbing systems, serving as a safeguard against water backflow and ensuring the efficient operation of the entire system. Its primary function is to prevent water from flowing back into the well once the pump is turned off.
Understanding how to install and maintain these unassuming devices is paramount for the smooth operation of well pump systems.
Here, we’ll dive into the world of check valves and explore how they work, why they’re important, and how to tell if yours is on the fritz.
What Is a Check Valve on a Well Pump and How to Install it?
You will need a few materials to install a check valve on a regular or submersible well pump. These include a check valve, pipe wrenches, Teflon tape, and a hacksaw.
The main installation steps involve:
- Shutting off the power to the well pump.
- Draining the water from the system.
- Removing the old check valve.
- Installing the new one by securing it tightly with pipe wrenches.
- Using Teflon tape for a leak-free connection.
Let’s take a closer look at the total installation process.
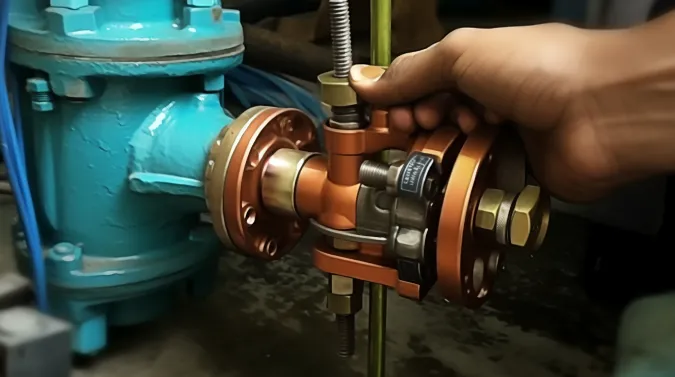
Step 01: Inspect the Check Valve
First, check for any defects in the valve and ensure that the spring-assisted poppet moves freely. Look for the arrow on the valve body indicating the intended flow direction and ensure it is oriented correctly based on the water flow in your system.
Here are some important things to consider when inspecting the check valve:
- Check for any cracks or signs of wear on the valve body.
- Examine the poppet for any damage or debris that may hinder its movement.
- Verify that the spring is in good condition and provides proper tension.
- Ensure that the valve is securely attached to the well pipe to prevent leaks or vibrations.
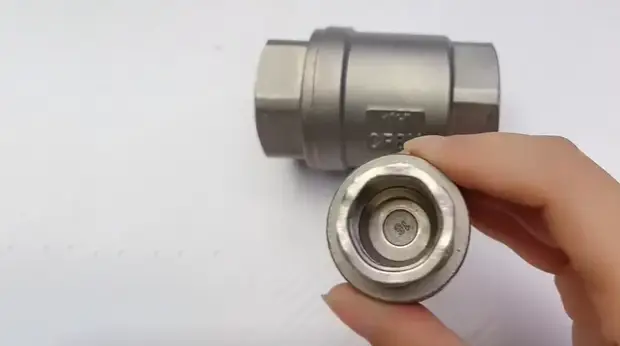
Step 02: Select the Appropriate Check Valve
To choose the right check valve material for your system, consider the requirements of your well pump system and the type of piping it uses.
Stainless steel may be ideal if you have a system with steel piping. Stainless steel is highly resistant to corrosion and can withstand high temperatures and pressures. It is also durable and long-lasting, ensuring reliable performance.
Also, stainless steel check valves are compatible with various fluids, making them versatile for various applications.
Step 03: Turn Off the Power and Isolate Pressure Tank
To continue with the installation process, turning off the power to the well pump and isolating the pressure tank is crucial. This ensures safety and prevents any accidents or damage. Follow these steps to complete this task:
- Locate the power switch for the well pump.
- Turn off the power by flipping the switch to the ‘off’ position.
- Close the valve between the pressure tank and the plumbing.
- Verify that the power is completely turned off before proceeding.
Step 04: Prepare the Well Pump and Piping
If necessary, lift the submersible pump out of the well and clean the pipe ends to ensure they are free from debris.
Once the pump is out, you need to cut and prepare the pipe to accommodate the check valve. The check valve is an essential component of the well pump system.
It allows water to flow in one direction only, preventing backflow and maintaining pressure in the system.
Step 05: Apply Teflon Tape
Wrap Teflon tape around the threaded ends of the pipe fittings to ensure a secure seal and prevent any leaking. This simple step is crucial for the proper functioning of your well pump system.
To apply the Teflon tape, start at one end of the fitting and wrap it around the threads clockwise. Ensure you don’t leave any gaps or overlap when wrapping the tape.
Here are four reasons why applying Teflon tape is important:
- It acts as a lubricant, making it easier to tighten the fittings.
- Teflon tape provides a barrier that prevents water from seeping out.
- It helps to reduce the risk of corrosion and rust on the fittings.
- The tape creates a tight seal, ensuring that the water flows smoothly without any leaks.
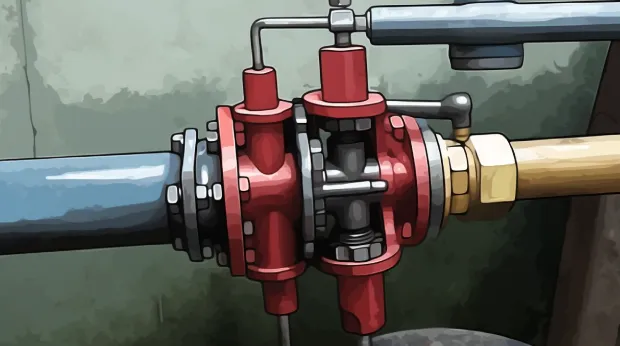
Step 06: Install the Check Valve
Once the check valve connections are tightened, move on to the next step.
Thread one end of the check valve onto the pipe using a pipe wrench, ensuring a secure and tight connection. Repeat this process for the other end, connecting it to the pipe leading to the pressure tank. These tight connections will ensure the proper functioning of the check valve.
Step 07: Test for Proper Installation
To ensure proper installation, turn on the power to the well pump and observe the water flow for any leaks. Check valves are crucial components that prevent water from returning to the well when the pump is turned off. Testing for proper installation is essential to ensure the check valve is functioning correctly.
Here are some steps to follow:
- Check for leaks around the check valve connections.
- Monitor the pressure tank for at least an hour.
- The pressure should remain consistent.
- If there is pressure loss, it may indicate a problem with the check valve or other components.
Step 08: Finalize Installation
Secure any exposed pipe with clamps or brackets as needed to finalize the installation. This step is crucial to ensure the stability and longevity of your well pump system.
Properly securing the pipes can prevent any leaks or damage caused by movement or vibrations. Use sturdy clamps or brackets suitable for the pipe material and size.
Tighten them securely to provide adequate support and protection for your well pump system.
Types of Check Valves Suitable for Well Pumps
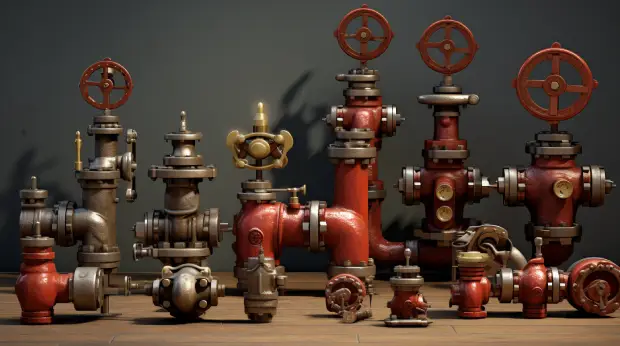
When choosing a check valve for your well pump, there are several options to consider. The most common ones are:
- Swing check valve
- Spring-loaded check valve
- Inline check valve
- Foot valve
Let’s take a look at each valve and see how they work.
No 01: Swing Check Valve
The swing check valve is commonly used to prevent backflow in well pump systems. It is a traditional and common type of check valve that operates with a hinged flap.
Here are some key points about swing check valves:
- Hinged Flap: The swing check valve has a hinged flap at the top, allowing it to swing open and close.
- Flow Direction: When water flows in the desired direction, the flap swings open, allowing water to pass through and reach the outlet.
- Backflow Prevention: In the event of flow reversal, the flap closes due to the force of the backflow, preventing water from flowing back into the well pump system.
- Debris Handling: Swing check valves can handle debris to some extent, making them suitable for well pump systems where some debris might be present.
No 02: Spring-Loaded Check Valve
You’ll find that spring-loaded check valves offer reliable backflow prevention in well pump systems and are suitable for varying flow rates and pressures. These check valves are designed with a spring mechanism that assists in closing the valve quickly when flow reverses.
This feature is especially important in well pump systems to prevent water hammering, which can cause damage to the pipes and the pump.
The spring-loaded check valves are available in both horizontal and vertical configurations, allowing for installation flexibility. These valves effectively prevent backflow, ensuring that the water flows in one direction only.
They are also designed to handle different flow rates and pressures, making them suitable for a wide range of well pump systems.
With their reliable performance and versatility, spring-loaded check valves are an excellent choice for ensuring the efficient operation of your well pump.
No 03: Inline Check Valve
Consider an inline check valve if you’re looking for a compact and easy-to-install option for your pipeline. These valves are installed directly in the pipeline, allowing water to flow in one direction.
Here are some key features and benefits of inline check valves:
- Compact design: Inline check valves are space-saving solutions, making them ideal for well pump systems with limited space.
- Easy installation: These valves can be easily installed directly into the pipeline, saving time and effort.
- Reliable operation: Inline check valves ensure that water flows in the intended direction, preventing backflow and potential damage to the system.
- Suitable for various applications: Inline check valves can be used in a wide range of applications, including residential, commercial, and industrial settings.
No 04: Foot Valve
Installing a foot valve at the end of the suction pipe helps prevent debris from entering the pump and maintains its prime. This valve is a vital component of a well system as it ensures that the pump is protected from any potential damage caused by foreign objects.
The foot valve contains a screen or strainer, which acts as a barrier, preventing unwanted particles from entering the pump. When the pump is not running, the foot valve prevents water from flowing back into the well, thus maintaining the pump’s prime.
Without a foot valve, the pump may lose its prime, resulting in reduced efficiency and potential damage. Therefore, it is essential to install a foot valve to ensure the longevity and optimal performance of the well pump.
How do you know if your well pump check valve is bad?
When a well pump check valve is bad, you may notice several symptoms and even strange noises. The symptoms are:
- Vibrations: A failing check valve may start to vibrate due to the improper sealing of the valve mechanism.
- Loss of internal parts: As the check valve deteriorates, internal components may become loose or even detach completely, leading to inefficient operation.
- Reverse flow: A malfunctioning check valve may allow water to flow backward, causing water to return to the well rather than being pumped out.
- Excessive wear and damage: Over time, a faulty check valve can experience wear and damage to its sealing surfaces, resulting in leaks and reduced efficiency.
These symptoms indicate that your well check valve needs immediate attention or replacement to ensure proper functioning of your well pump system.
Does a check valve affect Well Pump water pressure?
To maintain proper water pressure, ensure a functioning check valve is installed in your well pump system. A check valve is a critical component that helps regulate water flow and prevent pressure fluctuations.
When the pump stops, the check valve closes automatically, preventing water from flowing back down the well. This ensures that the water remains in the system and maintains the desired pressure. Without a check valve, the water could flow backward, causing pressure loss and potentially damaging the pump.
Check valves also help prevent backspin, upthrust, and water hammer, all of which can negatively impact water pressure.
Protect Your Home’s Water Supply: Put a Check Valve on Your Well Pump
Installing a check valve on your well pump is crucial for maintaining proper water pressure and preventing backflow. Different types of check valves are available for well pumps, such as spring-loaded, swing, and inline check valves.
It is important to regularly check and replace a faulty check valve to ensure the smooth operation of your well pump system. So, why wait? Take the necessary steps to ensure your well pump has a reliable check valve for optimal performance and peace of mind.

