
Last Updated on August 22, 2023
Your well pump check valve is a silent yet critical component of your well water system. Its role is to ensure that water flows in one direction, preventing any backflow into the well. But how can you determine whether your well pump check valve is malfunctioning?
There’s a telling sign that can give you a clue. If you notice a significant drop in water levels after using water from your well, it could be a red flag indicating a potential issue with your check valve.
Another unmistakable sign to watch out for is a distinct banging noise emanating from your well. This noise, often described as a water hammer, can signal that water flow is abruptly stopping and reversing due to a faulty check valve.
We’ll discuss all the potential signs of a bad well pump check valve, how it impacts your well system, and steps to address this issue effectively.
How to Tell If Well Pump Check Valve Is Bad: Signs and Symptoms
A malfunctioning check valve can cause a variety of problems, and there are some symptoms that can be identified. They are as follows:
- Water level drop after using well water
- Banging noise from well
- Pump starting again when no water is used
- Unusual burping and gurgling during filling
- Water takes time to start flowing after pump start
- Loss of pressure and intermittent cycling
Let’s examine each symptom in detail, so you can determine whether the well pump check valve is defective.
1. Water Level Drop After Using Well Water
When you notice a significant drop in the water level in your well after using well water, it’s a clear indication that there may be a problem with the check valve.
Check valves are crucial to preventing water from flowing back into the well once it has been pumped out.
If it is not functioning properly, water can easily flow back into the well, causing a noticeable drop in the water level. This can be a sign of a failing check valve.
2. Banging Noise from Well
Another indication of a malfunctioning check valve is a banging noise coming from the well after the pump shuts off. This noise, known as water hammer, occurs when water abruptly stops and then rapidly reverses its flow.
A faulty check valve can allow this water hammer effect to happen, resulting in the banging noise. If you hear such noises, it’s a strong indication that the check valve may not be functioning properly.
To further confirm if the well pump check valve is bad, you can perform the following steps:
- Observe if the banging noise occurs consistently after the pump shuts off.
- Check for any visible leaks or water discharge around the check valve area.
- Test the pressure in the system by using a pressure gauge and comparing it to the recommended pressure range for your well pump.
3. Pump Starting Again When No Water Is Used
If your pump starts running even when no water is being used in your household, it could point to a faulty check valve.
A properly functioning check valve should maintain pressure in the water system, preventing the need for the pump to kick on unnecessarily.
There is a possibility that the check valve is not effectively holding backflow if you notice your pump cycling on and off without any water demand.
4. Unusual Burping and Gurgling During Filling
If you hear unusual burping and gurgling while your system is filling, it could indicate a problem with the check valve. These sounds are an indication that water is flowing back into the well, which should not be happening if the check valve is functioning properly.
5. Water Takes Time to Start Flowing After Pump Start
When the water takes a while to start flowing after the pump is turned on, it might be a sign of an issue with the check valve.
The check valve plays a crucial role in allowing water to flow freely from the pump to your plumbing system. If the check valve is not functioning properly, it can cause delays in water flow.
One possible cause of this issue is a stuck check valve. Over time, debris and sediment can accumulate in the valve, preventing it from opening fully.
Another possibility is a damaged or worn-out check valve. If the valve is cracked or has deteriorated seals, it may not open properly, resulting in slower water flow.
6. Loss of Pressure and Intermittent Cycling
When water takes time to start flowing after your pump starts, it can be frustrating. However, if you also notice a loss of pressure and intermittent cycling of your pump, it may indicate a problem with the check valve.
A faulty check valve can result in pressure loss, causing the pump to cycle more frequently as it tries to maintain the desired pressure level. Here are three signs that your well pump check valve may be bad:
- Loss of pressure: If you notice a decrease in water pressure throughout your plumbing system, it could be due to a compromised check valve. This can lead to reduced water flow and inadequate pressure for daily tasks.
- Intermittent cycling: A faulty check valve can cause the pump to cycle on and off more frequently, even when water is not being used. This constant cycling can put unnecessary strain on the pump and lead to premature failure.
- Air in the system: An ineffective check valve can allow air to enter the plumbing system, resulting in the formation of air pockets. These air pockets can cause water hammering, sputtering faucets, and other issues.
If you are experiencing these symptoms, it is recommended to have your well pump check valve inspected and replaced if necessary.
How to Test Check a Valve on a Well Pump?
To test the check valve on your well pump, there are several key steps you need to follow.
Step 1: Turn Off Power to the Pump
Begin by turning off the power to the well pump. After turning off the power to the well pump, ensure your safety while working on the check valve. Here’s what you need to do:
- Disconnect the power supply: Locate the circuit breaker or switch that controls the well pump and turn it off. This will prevent any accidental electrical shock while working on the check valve.
- Test for power: Use a voltage tester to confirm that there is no electricity flowing to the pump. This step is crucial for your safety.
- Secure the power source: If possible, lock the circuit breaker or switch in the off position. This will prevent anyone from accidentally turning it back on while you’re working on the check valve.
- Use caution: Even with the power off, it’s important to treat the well pump with care. Avoid touching any exposed wires or components, and always follow proper safety procedures.
Step 2: Access the Well Cap
It is now necessary for you to access the well cap. The well cap is the cover that protects the opening of the well. It is usually made of metal or plastic and is secured with screws or bolts. To access the well cap, you will need a screwdriver or a wrench, depending on the type of fasteners used.
Once the well cap is removed, carefully lower it to a level that is easy to reach for testing. This will allow you to inspect the well pump and check valve for any signs of damage or malfunction. It is important to handle the well cap with care to avoid any accidents or injuries.
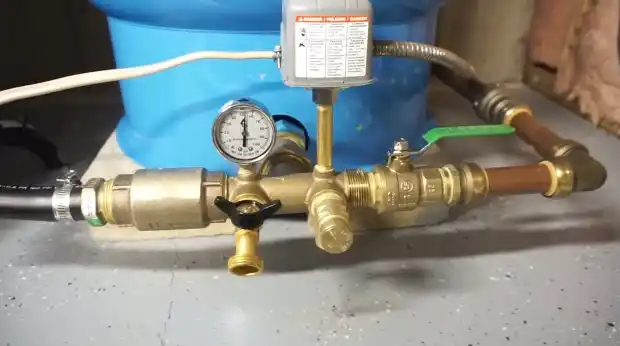
Step 3: Locate the Check Valve
After accessing the well cap and lowering it to a manageable level, your next step is to locate the check valve.
This valve is typically identifiable by its black rubber construction and is positioned at the top of the well casing, near the point where water enters your home’s plumbing system. It might be attached to a pipe or fitting that leads into the well.
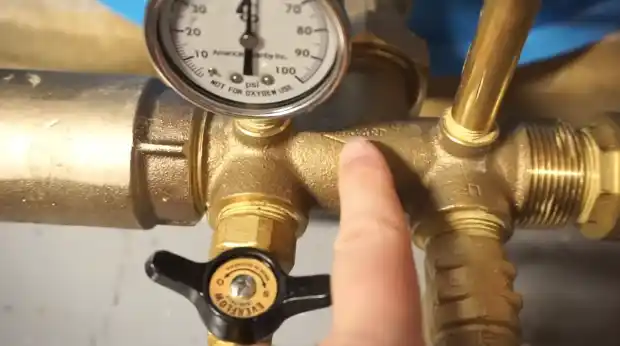
Step 4: Check Valve Movement Test
To ensure proper functioning, test the movement of the check valve handle in both directions.
To determine if the check valve is functioning properly, start by visually inspecting it for any signs of damage or wear. Next, turn the handle of the check valve clockwise and counterclockwise.
It should move smoothly without any resistance or obstruction. If you encounter any difficulty or if the valve feels loose or wobbly, it may indicate that the check valve is malfunctioning.
It should be replaced as soon as possible to avoid potential issues with your well pump system.
Step 5: Slightly Pull the Valve
After visually inspecting the valve for damage or wear, you should pull the valve slightly. Follow these steps to perform the test accurately:
- Use pliers to firmly grip the movable check valve, which is usually located near the top of the pump.
- Gently pull the valve upwards, about 1/4 inch from its seat. If the valve moves easily and returns to its original position, it is functioning correctly.
- However, if the valve is difficult to move or does not return to its seat, this indicates a faulty check valve that needs to be replaced.
Step 6: Test Tight Seating
After slightly pulling the valve to check for any signs of damage or wear, the next step is to test the tight seating of the well pump check valve.
To test the tight seating, push the check valve back into its seat in multiple directions. Apply gentle pressure to ensure it seats tightly and securely.
Step 7: Replace Well Cap
After testing, securely replace the well cap to protect the well and its components by ensuring a tight and secure seal.
To replace the well cap, carefully position it back onto the well casing opening. Align the cap with the casing and ensure that it fits snugly and securely. Depending on the type of well cap you have, you might need to screw it in place or use any provided fasteners.
Double-check that the cap is tightly sealed to prevent any debris or contaminants from entering the well. This final step ensures the protection and proper functioning of your well system.
How long do well pump check valves last?
The lifespan of well pump check valves can vary depending on factors such as the valve type, materials used in its construction, and the maintenance practices applied.
Well check valves that are properly installed and well-maintained can last for many years, potentially even decades.
Regular inspections to ensure that the valve is functioning correctly, as well as addressing any signs of wear, damage, or debris buildup, can significantly contribute to extending its longevity.
Factors like water quality, system pressure, and the presence of corrosive elements can influence the durability of well check valves.
Consequently, while there is no fixed lifespan, adequate care and maintenance can maximize the operational life of these crucial components in well water systems.
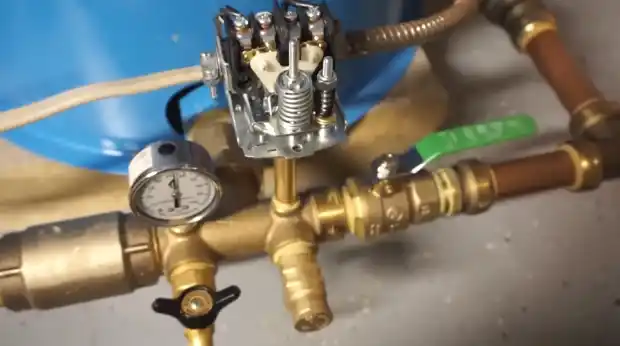
Can a faulty well pump check valve lead to high electric bills?
A faulty well pump check valve can indeed result in higher electricity bills. When the check valve is malfunctioning, water from the pressure tank can flow back into the well, causing a drop in pressure. As a result, the pressure switch is signaled to activate and pressurize the tank again.
This continuous cycle forces the well pump to run nonstop, consuming more electricity than necessary.
The inefficiency caused by the faulty check valve leads to increased pump operation and prolonged electricity usage, ultimately reflecting in higher electric bills.
It’s crucial to address check valve issues promptly to prevent such energy wastage and financial implications.
Keep Your Well Pump Check Valve in Top Shape
You are now aware of the telltale signs of a malfunctioning well pump check valve. By recognizing symptoms like water level drops, banging noises, pump cycling, unusual sounds during filling, delayed water flow, and pressure loss, you can pinpoint potential issues and take action.
Remember, a well-maintained check valve is vital for the efficiency of your well water system. Regular inspections and addressing problems promptly can save you from high energy bills and ensure smooth water flow.

