To winterize your water heater, first turn off the power or gas and shut the main water supply. Drain the tank by opening the pressure relief valve and attaching a hose to the drain valve. Flush out sediment until the water runs clear.
Insulate exposed pipes and the tank to prevent freezing. For tankless units, close inlet and outlet valves and drain each side. Before vacations, activate vacation mode or fully drain if freezing is expected.
Properly preparing your system guarantees performance and longevity through cold months. You can explore detailed steps and tips next.
Key Takeaways
- Drain and flush the water heater tank annually to remove sediment and prevent freeze damage during winter.
- Insulate exposed pipes and the tank with foam and insulating blankets to reduce heat loss and prevent freezing.
- Shut off main water supply and power or gas to the unit before draining for safety during winterization.
- Open pressure relief valve and faucets to allow air in and ensure complete draining of water and sediment.
- For tankless heaters, close inlet/outlet valves, drain both sides, and leave disconnected until freezing conditions pass.
Why You Need to Winterize Your Water Heater?
Although water heaters are designed for year-round use, you need to winterize your unit to prevent damage caused by freezing temperatures. When water inside the tank or pipes freezes, it expands, risking cracks and ruptures in your heater and plumbing.
This leads to costly repairs or full replacement. You also face sediment buildup from trapped moisture, which can accelerate corrosion and reduce efficiency. Winterizing protects your heater’s internal components by preventing freezing and sediment accumulation during cold spells or extended absences.
Additionally, insulating exposed pipes and the tank minimizes heat loss, ensuring consistent performance. Taking these precautions reduces downtime, extends your heater’s lifespan, and maintains reliable hot water supply throughout winter’s harsh conditions.
Don’t overlook winterizing; it’s essential for safeguarding your water heater against freeze-related failures. Implementing pipe insulation is a key measure to reduce heat loss and prevent freezing in cold weather.
How to Drain and Flush a Tank Water Heater?
Before you dive into draining your tank water heater, there are a couple of important steps to take. First off, make sure you turn off the main water supply. It’s also a good idea to disconnect the power or gas to the unit—safety first, right?
Once you’ve done that, go ahead and remove the drain plug located at the bottom of the tank. And don’t forget to open the pressure relief valve! This little step helps air flow in, making sure the water drains smoothly without any hiccups.
After you’ve drained the tank, it’s time for a good flush. Use fresh water or even some air pressure to clear out any sediment buildup inside. This will help keep your water heater running efficiently for longer!
Be sure to monitor the draining process closely to avoid any leaks or issues during maintenance.
Preparing to Drain Tank
Start by turning off the main water supply and shutting off the gas or power to your tank water heater. This prevents water flow and guarantees safety during the draining process.
Next, open a hot water faucet nearby to relieve pressure in the system. Locate and open the pressure relief valve on the tank to allow air entry, which facilitates draining.
If water flow is slow, use a wire or similar tool to clear any sediment blocking the valve. Position a hose at the drain valve at the tank’s bottom for controlled water discharge.
Make sure you have a suitable container or drainage area ready to handle the volume. These steps prepare the tank for safe and effective draining and flushing.
Annual flushing helps to remove sediment buildup that can cause hissing noises and reduce heater efficiency.
Draining Process Steps
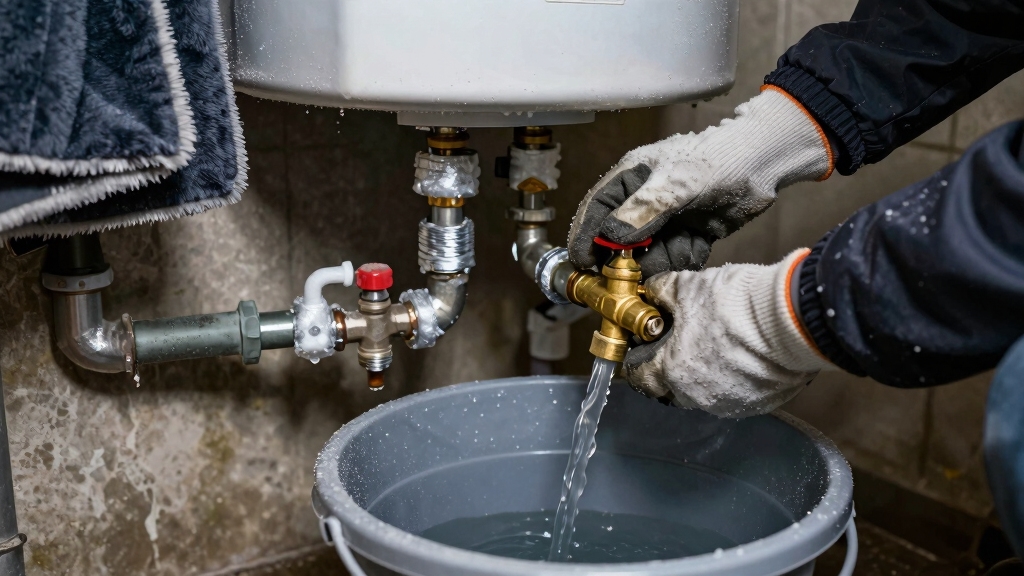
With the tank prepared for draining, you can now open the drain valve at the bottom to release water in a controlled manner. Attach a hose to the valve to direct water safely to a drain or outside.
Open a hot water faucet in your home to allow air into the tank, ensuring smooth drainage. Monitor the flow; if water trickles, open the pressure relief valve to introduce air and clear potential blockages.
Allow the tank to empty completely, noting that about two quarts of water will remain with corrosive particles. After draining, close the drain valve securely and replace any removed plugs.
This controlled draining prevents damage during winter and prepares the tank for the next step of sediment flushing.
For optimal maintenance and to extend the lifespan of your heater, consider using copper heating elements with adjustable thermostats during your next tune-up.
Flushing Out Sediments
Flush out the sediments by pumping fresh water into the tank for about 90 seconds to agitate and loosen mineral deposits.
First, make certain the main water supply and power or gas are off. Open the drain valve at the tank’s bottom and pressure relief valve to allow air in and facilitate draining.
After initial draining, introduce fresh water through the inlet or outlet valve to flush out loosened sediments. Repeat pumping and draining cycles until the water runs clear, signaling sediment removal.
You can also use compressed air through the rear inlet or outlet to dislodge stubborn particles. Once done, replace the drain plug securely and close the relief valve.
This process extends your tank’s lifespan by preventing corrosion and maintaining efficient heat transfer. Regular annual inspection can help identify early signs of corrosion and prevent costly damage.
How to Winterize a Tankless Water Heater?
Before freezing temperatures arrive, you’ll want to carefully shut off the main cold water inlet and hot water outlet valves on your tankless water heater to prevent pipe damage.
Shut off main cold and hot water valves on your tankless heater before freezing weather to avoid pipe damage.
Next, remove the drain cap from the cold isolation valve and attach a hose to the service valve to drain water into a suitable container.
Repeat this draining process on the hot isolation valve side to fully evacuate water from the unit.
Leave the tankless water heater disconnected from the water supply until freezing conditions have passed to avoid any internal damage caused by ice expansion.
Always consult your owner’s manual for any model-specific instructions before beginning.
This method guarantees your tankless system stays protected during winter without risking corrosion or freeze damage.
Additionally, maintaining the water heater temperature above 40 degrees Fahrenheit helps prevent freezing and protects the unit during cold months.
How to Insulate Your Water Heater and Pipes?
After winterizing your tankless water heater, the next step is to protect your system from cold exposure by insulating both the water heater and its pipes.
Start by wrapping exposed hot and cold water pipes with slip-on foam insulation, especially in unheated areas like basements, crawl spaces, or attics.
This prevents heat loss and freezing.
If your water heater tank is exposed to cold, cover it with an insulating blanket designed for your model.
Secure it tightly to avoid gaps.
Make certain all insulation fits snugly around valves and fittings to maintain continuous protection.
Proper insulation reduces energy waste and minimizes the risk of pipe bursts or heater damage during freezing temperatures.
This helps maintain system efficiency throughout winter.
For added protection, drain your water heater or pressure tank only when temperatures are above freezing to avoid freezing damage to the system.
How to Prepare Your Water Heater for Vacation or Absence?
Before you head out on vacation, it’s a good idea to drain your plumbing system. Just shut off the main valve and open all the faucets. This helps prevent any freezing damage while you’re away.
If you’re going to be gone for less than two weeks, you can set your water heater to the vacation setting. This way, you’ll save some energy but still keep a bit of heat in there.
Oh, and if you can, have someone check on your home, especially during extreme weather. It’s always better to catch any potential issues early!
Also, understanding the differences between water-filled and oil-filled pumps can help you choose the best system to avoid maintenance problems during prolonged absences.
Draining Plumbing System
Prepare your plumbing system for an extended absence by fully draining it to prevent freezing and damage.
First, shut off the main water supply to stop incoming flow.
Open all faucets, hot and cold, to drain water from the pipes.
Next, remove the drain plug at the bottom of your water heater to empty the tank.
Open the pressure relief valve to allow air in, ensuring smooth drainage.
If water flow slows, clear obstructions with a wire.
After draining, flush the tank by briefly running water or air pressure through inlet or outlet valves to remove sediment.
Leave faucets open until all water is out.
This thorough draining minimizes freeze risks and protects your plumbing system during your absence.
Remember to close valves and replace plugs only after freezing danger passes.
Regular flushing also helps prevent sediment build-up, which can cause leaks and reduce heater efficiency.
Using Vacation Thermostat
You’ll often find a vacation thermostat setting on modern water heaters designed to reduce energy use during short absences.
When you plan to be away for less than two weeks, switch your water heater to this setting to lower the temperature markedly, preventing unnecessary heating and reducing utility costs.
Before activating it, verify all faucets are closed and no water is being used. This mode maintains minimum heat to prevent freezing without fully shutting down the system.
If you expect temperatures to drop below freezing or your absence extends beyond two weeks, consider draining the plumbing system instead.
Always consult your water heater’s manual for exact instructions on engaging the vacation setting, as improper use can risk damage or inefficient operation.
Electric water heaters maintain safety during such settings through thermostats and thermal cut-off switches that prevent overheating and pressure buildup.
Home Monitoring Tips
Regularly monitoring your water heater during vacations or extended absences helps prevent costly damage from freezing or leaks.
Before leaving, drain the entire plumbing system by shutting the main valve and opening all faucets, including hot and cold lines on the heater.
If you’re away less than two weeks, set the thermostat to vacation mode to maintain minimal heat.
Have someone check your home periodically, especially during extreme cold, to make sure pipes haven’t frozen and no leaks occur.
If fully draining isn’t feasible, use an air compressor to clear lines and keep valves closed.
Upon return, inspect insulation, reconnect power or gas, and run water to clear air locks.
This proactive monitoring minimizes risk and extends your water heater’s lifespan.
How to Reactivate Your Water Heater After Winter?
When winter ends, start by replacing the drain caps on the isolation valves to guarantee a sealed system.
Next, close the service valves and open the main cold water inlet and hot water outlet valves to restore flow.
If you winterized a gas heater, reconnect the gas line, assuring the valve is parallel to the line.
Then restore power or ignite the pilot light according to your model’s instructions.
For electric heaters, simply restore the power supply.
Run hot water at a faucet to expel trapped air and verify there are no air locks.
Confirm the tank fills fully to prevent corrosion from standing water.
Finally, check all connections for leaks and assure the pressure relief valve functions properly before resuming normal use.
Troubleshooting Common Water Heater Winterizing Issues
After reactivating your water heater, you might encounter some common issues related to winterizing procedures. Blocked sediment buildup and air locks often cause poor water flow or strange noises. Insufficient insulation may lead to freezing pipes or heat loss.
Verify all valves are fully open to guarantee proper water circulation. If corrosion or leaks appear, inspect the drain plug and relief valve integrity.
| Issue | Likely Cause |
|---|---|
| Low water pressure | Air lock or partially closed valve |
| No hot water | Gas/power not restored or sediment blockage |
| Pipe freezing | Inadequate pipe insulation or exposed pipes |
Troubleshoot by flushing the system again and checking valve positions. Add insulation where needed. Address these promptly to avoid damage or inefficiency.
Tips for Maintaining Your Water Heater Year-Round
Maintaining your water heater year-round guarantees peak performance and extends its lifespan. To keep your system efficient and reliable, follow these key tips:
Consistent water heater maintenance ensures optimal efficiency and a longer-lasting system.
- Drain and flush your tank at least once a year to remove sediment buildup. This helps prevent corrosion and improves heating efficiency.
- Inspect and test the pressure relief valve regularly to ensure it operates correctly. This prevents tank overpressure.
- Insulate exposed pipes and the tank, especially in unheated spaces. This minimizes heat loss and prevents freezing.
- Check for leaks, unusual noises, or pilot light issues. Addressing them promptly can help avoid costly repairs or failures.
Frequently Asked Questions
Can I Use Antifreeze in My Water Heater Instead of Draining It?
You shouldn’t use antifreeze in your water heater instead of draining it. Antifreeze can contaminate your potable water supply and damage the system.
Proper winterization involves draining the tank and pipes to remove water that can freeze and cause damage. Use approved methods like flushing and insulating pipes.
If you want to protect plumbing in unheated areas, consider non-toxic antifreeze only for certain systems, but never in your water heater itself.
How Often Should I Winterize My Water Heater in Cold Climates?
You should winterize your water heater annually before the first freeze in cold climates. This timing guarantees sediment is flushed out and pipes are insulated, preventing damage from freezing.
If your heater is exposed or in unheated spaces, check insulation mid-winter. Regular maintenance extends lifespan and avoids costly repairs.
After winter, reactivate properly to avoid air locks or corrosion. Adjust frequency if local weather conditions are harsher or your system ages.
Is It Safe to Winterize a Water Heater Myself Without Professional Help?
Yes, you can safely winterize a water heater yourself if you follow proper steps carefully.
Always turn off power or gas and main water supply before draining. Use manufacturer guidelines, especially for tankless units.
Insulate pipes and flush sediments thoroughly. If you’re unsure or uncomfortable with gas connections or electrical components, it’s best to call a professional.
Proper preparation prevents freezing damage and extends your heater’s lifespan.
What Type of Insulation Is Best for Water Heater Pipes?
Picture snug foam sleeves hugging your water heater pipes. That’s the best insulation you can use.
Slip-on foam insulation efficiently reduces heat loss and prevents freezing, especially in unheated areas like basements or crawl spaces.
It’s easy to install and fits tightly around pipes, blocking cold air.
For extra protection, wrap your heater tank with an insulating blanket.
Together, these materials maintain temperature and help avoid costly pipe damage during winter.
Can Winterizing My Water Heater Improve Energy Efficiency?
Yes, winterizing your water heater can improve energy efficiency. By insulating exposed pipes and the tank, you reduce heat loss. This means your heater uses less energy to maintain water temperature.
Draining sediments also helps by improving heat transfer inside the tank. These steps minimize standby heat loss and prevent freezing damage.
This ensures your system operates efficiently during cold months, lowering energy consumption and extending the heater’s lifespan.
Winter-Proof Your Water Heater and Avoid Costly Surprises
Winterizing your water heater protects it from freezing damage, ensuring reliable hot water when you need it most. Draining and insulating might seem tedious, but skipping these steps risks costly repairs.
Tank and tankless models require different care, yet both benefit from proper preparation. Whether you’re staying through winter or heading out, taking these practical steps now saves you frustration later.
Stay proactive; your water heater’s longevity depends on it.

