
First, turn the shut-off valve clockwise and flush to drain water from the tank and bowl.
Disconnect the water supply line using an adjustable wrench. Then cut caulk around the base.
Remove bolt caps and nuts carefully, rocking the toilet gently to break the wax seal before lifting it straight up.
Clear old wax from the flange and inspect for damage. Select the right cap based on pipe type and size.
Secure the cap properly and seal the flange to prevent leaks and odors.
For detailed steps on tools, safety, and finishing touches, keep exploring.
Key Takeaways
- Shut off water supply, flush toilet, and remove remaining water to prevent leaks during removal.
- Disconnect water supply line and remove toilet bolts, then lift toilet straight up without dragging.
- Scrape off old wax ring and clean flange thoroughly before capping.
- Measure pipe diameter accurately and select a compatible cap material and seal type.
- Dry-fit and secure the cap per plumbing codes, then apply caulk around flange and test for leaks.
Essential Tools for Removing a Toilet Safely

Gathering the right tools is essential for removing a toilet safely and efficiently. You’ll need an adjustable wrench to disconnect the water supply line and unscrew floor nuts.
A flat screwdriver or pry tool helps remove bolt caps without damaging them. Use a utility knife to cut through caulk sealing the toilet base.
Have a bucket or towels ready to catch residual water from the tank and supply line. A putty knife or scraper aids in removing the old wax ring and debris after lifting the toilet.
Wearing gloves and eye protection protects you from sharp edges and contaminants. Preparing these tools beforehand reduces risk, prevents damage, and streamlines the removal process. This ensures you work both safely and effectively. Remember to shut off the water supply before starting to avoid leaks and spills during removal.
How to Shut Off Water and Drain Your Toilet?
Start by turning off the toilet’s shut-off valve, rotating it clockwise until it stops to cut the water supply.
Next, flush the toilet to empty the tank and reduce the water in the bowl.
Use an adjustable wrench to disconnect the water supply line from the tank’s fill valve.
Expect some residual water to leak out, so keep a bucket or towels ready.
Remove the toilet bolt caps with a flat screwdriver or pry tool to expose the mounting nuts.
This process guarantees the toilet is fully drained and isolated from the water source, preventing leaks or spills during removal.
Completing these steps carefully preps your toilet for safe detachment without damaging plumbing or flooring.
Always ensure safety precautions are in place when handling plumbing components, similar to precautions taken when working with electrical components.
How to Remove the Toilet Without Damaging Your Floor?
Before you start lifting the toilet, it’s a good idea to protect your flooring. Just lay down a drop cloth or some cardboard to avoid any scratches or potential water damage. Trust me, it’s worth the extra step!
Once you’re ready to go, gently rock the toilet. This helps break the wax seal without using too much force, which could end up cracking the flange or even your floor. No one wants that headache!
And hey, don’t forget to keep some towels and a bucket handy. You’ll want to manage any leftover water and debris that might come out during the removal. It just makes the whole process a lot smoother!
Before you begin, make sure to shut off the main water valve to prevent any unwanted water flow during the removal.
Protecting Flooring Surface
When removing a toilet, protecting your flooring is critical to prevent scratches, cracks, or water damage.
Start by clearing the area and placing a protective barrier like a thick drop cloth, cardboard, or plywood around the base.
Avoid dragging the toilet across the floor; instead, lift it straight up.
Use towels or a plastic sheet underneath to catch any residual water.
Check for existing damage to address before reinstalling or capping.
For any repairs involving PVC pipes or fittings, using a plumbing-grade PVC adhesive ensures secure, water-tight joints.
| Step | Recommended Material | Purpose |
|---|---|---|
| Floor protection | Drop cloth/plywood | Prevents physical damage |
| Toilet placement | Towels/plastic sheet | Catches water drips |
| Lifting method | Manual lift | Avoids floor scratches |
| Area clearance | Clean workspace | Prevents accidental damage |
| Inspection | Visual check | Identifies pre-existing issues |
Gentle Toilet Removal
Protecting your flooring sets the foundation for removing the toilet without causing damage. First, cut any caulk around the base with a sharp utility knife to free the toilet’s seal.
Next, use an adjustable wrench to remove the floor nuts after prying off the bolt caps carefully. To break the wax seal without harming the floor, rock the toilet gently side to side.
Once loosened, lift the toilet straight up and avoid dragging it across the floor. Set it on a padded surface to prevent scratches or cracks.
Inspect the exposed flange and surrounding floor for any signs of damage. Taking these precise, slow steps helps you avoid costly repairs and preserves the integrity of your flooring throughout the removal process.
Before proceeding, it’s important to turn off the water supply and flush the toilet to empty the tank to ensure a smooth removal process.
Managing Water and Debris
Turn off the shut-off valve by rotating it clockwise until fully closed.
Then flush the toilet to drain most of the water from the tank and bowl.
Disconnect the water supply line carefully, keeping a bucket or towels ready to catch residual water.
Remove bolt caps and unscrew floor nuts with an adjustable wrench.
Cut any caulk around the base using a utility knife to prevent floor damage.
When lifting the toilet, rock it gently to break the wax seal without forcing it.
Place it on a protective surface.
Use towels or a drop cloth around the area to catch drips and debris.
Clean the flange area thoroughly, removing old wax and residue to avoid damage or contamination during capping or future installation.
It is important to inspect the flange for damage before capping to ensure a secure seal and prevent leaks.
How to Inspect and Clean the Toilet Flange?
First things first, you’ll want to take a good look at the toilet flange. Check for any cracks, corrosion, or damage that might compromise the seal. This is super important because a secure seal is key to preventing leaks down the line.
Once you’ve inspected it, grab a scraper or a vacuum to remove all that old wax, debris, and residue. You want to make sure the surface is nice and clean.
Trust me, this step is crucial for ensuring the flange works properly before you go ahead and cap or reinstall the toilet. Regular maintenance and inspection can help prevent water damage by catching issues early, such as problems with the seal integrity.
Flange Condition Assessment
A thorough inspection of the toilet flange is critical once the fixture is removed. It guarantees a proper seal and prevents leaks or sewer gas escape.
Start by examining the flange for cracks, corrosion, or warping that could affect stability or sealing. Check that the flange sits flush with the finished floor surface and is securely fastened to the subfloor.
Assess the condition of the bolt holes to ensure they can firmly hold new toilet bolts without stripping or cracking.
Focus on these key points during your assessment:
- Verify flange integrity: no cracks, breaks, or rust.
- Confirm flange height aligns with the floor level.
- Inspect bolt holes for damage or wear.
This precise evaluation secures a reliable base for future toilet installation or capping. Proper maintenance and timely replacement of worn parts help avoid common issues such as corrosion of metal valves that can compromise plumbing components.
Debris Removal Techniques
Once you’ve confirmed that the flange is structurally sound and properly aligned, focus on removing any debris or old wax residue that could compromise the seal or clog the drain.
Use a putty knife to scrape away wax, followed by a vacuum or brush to clear small particles. Inspect the flange surface for remaining buildup and guarantee the drain opening is clear. Proper cleaning and inspection are essential steps before disassembling the valve to avoid leaks and ensure a secure fit.
| Task | Recommended Tool |
|---|---|
| Remove old wax ring | Putty knife |
| Clear debris | Shop vacuum or brush |
| Pry off plastic cap | Flat screwdriver |
| Dislodge stubborn cap | Hammer and chisel (careful) |
| Final inspection | Flashlight and mirror |
Thorough cleaning guarantees a tight seal and prevents future leaks or blockages.
Remove and Identify Different Types of Flange Caps
When you take off the toilet, you’ll often find a flange cap covering the drain opening. These caps come in different types, and identifying them correctly is vital for proper removal and future capping.
Common flange caps include:
- Snap-in plastic caps: Easily pried off with a flat tool. They’re designed for temporary coverage during testing.
- Threaded caps: Screw on tightly. You’ll need to unscrew them carefully to avoid flange damage.
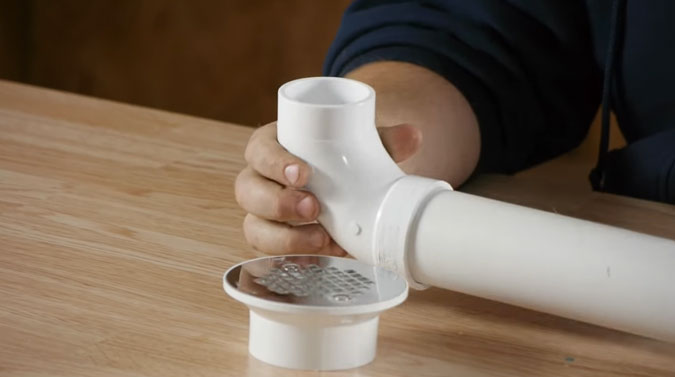
- Solvent-welded caps: Permanently glued and require careful chipping or cutting for removal without harming the flange.
Use appropriate tools and techniques to avoid flange damage. After removal, clear any residue or broken pieces to prepare the drain opening for the next step. Proper maintenance and preventing backflow can help avoid complications during plumbing work.
How to Choose the Right Cap for Your Toilet Drain?
When it comes to choosing the right cap for your toilet drain, the first thing you want to do is make sure it matches the exact diameter of your drain. Getting the right size is key for a secure fit, so don’t skip this step!
Next up, think about the material of the cap. PVC is a popular choice because it’s durable and resistant to chemicals. You’ll also want to consider the type of seal it offers. Some caps come with a rubber gasket, while others use solvent weld.
Why does this matter? Well, proper compatibility helps prevent leaks and keeps sewer gases from sneaking into your home. So, take your time and make sure you choose wisely!
Cap Size Compatibility
Although selecting the right cap size for your toilet drain may seem straightforward, it requires careful measurement and verification of the pipe diameter to guarantee a secure, leak-proof fit.
Start by identifying the pipe material (PVC, ABS, cast iron) and measuring the pipe’s outside diameter accurately using a caliper or tape measure.
Remember, nominal pipe size doesn’t always reflect the true physical dimensions.
To make certain compatibility:
- Measure the pipe diameter precisely at the opening.
- Confirm the cap’s size matches the specific pipe standard (e.g., 3-inch PVC).
- Dry-fit the cap before permanent installation to verify a snug fit.
Following these steps helps avoid leaks and ensures a durable seal when capping your toilet drain.
Material and Seal Type
Selecting the right material and seal type for your toilet drain cap depends on the pipe composition and the intended permanence of the closure.
For PVC or ABS pipes, use a matching plastic cap with solvent cement to guarantee a tight, permanent seal.
For cast iron or metal pipes, choose a threaded metal test cap with a rubber gasket or a compression fitting to allow future access.
If you want a temporary seal, rubber test caps secured with a hose clamp work well on smooth pipe ends.
Avoid mixing materials, as incompatible caps can cause leaks or damage.
Always clean and dry the pipe end before applying the seal.
Choosing the correct combination prevents sewer gas leaks and maintains the integrity of your plumbing system.
How to Properly Install a Cap on the Toilet Drain?
When installing a cap on the toilet drain, guaranteeing the cap fits securely and matches the pipe diameter is essential for preventing leaks and odors.
Ensuring the cap fits the toilet drain pipe perfectly is crucial to prevent leaks and odors.
Start by dry-fitting the cap to confirm compatibility with the pipe size. Clean and thoroughly dry the pipe end to guarantee a secure seal.
Depending on the pipe type, PVC or cast iron, use an appropriate adhesive or mechanical fastener to secure the cap.
Focus on these key steps:
- Verify the cap matches the pipe diameter precisely to avoid loose fittings.
- Prepare the pipe end by cleaning off debris and moisture before installation.
- Use the correct securing method, solvent cement for PVC or threaded fittings for metal pipes, to guarantee a leak-proof seal.
Follow these steps carefully for a reliable, professional cap installation.
How to Seal the Toilet Area to Prevent Odors and Debris?
To effectively prevent odors and debris from escaping the toilet area after removal, you need to create a tight seal over the open drain and flange.
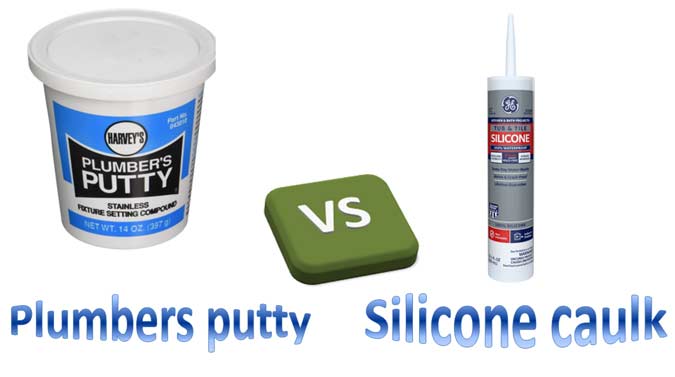
Start by ensuring the cap fits securely on the drain pipe. Then apply a bead of high-quality silicone caulk around the flange perimeter.
Press the flange firmly onto the floor, sealing any gaps where gases or particles could escape. Next, run a continuous bead of caulk along the gap between the flange edge and the floor surface.
Smooth the caulk with a damp finger or tool to guarantee full coverage without voids. Allow the sealant to cure according to the manufacturer’s instructions before leaving the area unattended.
This method effectively blocks sewer gases and debris, maintaining a clean, odor-free environment.
How to Check and Repair the Floor and Flange Before Capping?
Although the toilet has been removed, you must carefully inspect the floor and flange for damage before capping the drain.
Start by examining the flange for cracks, corrosion, or looseness.
Begin by inspecting the flange carefully for any signs of cracks, corrosion, or looseness.
Next, check the subfloor surrounding the flange for signs of water damage, rot, or instability.
Address any issues promptly to assure a secure and lasting cap installation.
Focus on these key steps:
- Remove all old wax and debris from the flange area to get a clear view of its condition.
- Tighten or replace damaged flange bolts and hardware to stabilize the flange.
- Repair or replace compromised subfloor sections to provide a solid base for the flange and cap.
Perform these checks thoroughly to avoid leaks or structural failure after capping.
Safety Tips and Common Mistakes to Avoid When Removing a Toilet
Prioritize safety by wearing gloves and eye protection before beginning any work on toilet removal. Protect yourself from sharp edges, chemical exposure, and potential splashes.
Work slowly around the flange to avoid damaging the pipe or subfloor. Use towels or a bucket to manage residual water and debris.
Avoid forcing stuck bolts or caps; excessive leverage can crack the flange or pipe, leading to costly repairs. Make certain you fully shut off the water supply and drain the toilet to minimize leaks.
Don’t neglect removing old caulk carefully to prevent surface damage. Verify local plumbing codes before capping the drain line permanently, as improper sealing can allow sewer gas to enter your space.
Follow these steps for a safe, effective toilet removal process.
Frequently Asked Questions
Can I Reuse the Old Wax Ring When Reinstalling the Toilet?
No, you shouldn’t reuse the old wax ring when reinstalling the toilet.
Wax rings compress and deform after initial installation, losing their sealing capability.
Reusing one risks leaks and sewer gas escaping.
Always replace the wax ring with a new, properly sized one to guarantee a tight, reliable seal.
This helps avoid water damage and unpleasant odors, maintaining the integrity of your toilet’s connection to the flange and drain line.
How Long Can a Capped Toilet Drain Remain Unused Safely?
You can safely leave a capped toilet drain unused for up to six months without risk of pipe damage or odor issues, provided it’s properly sealed.
Studies show improper capping leads to 35% higher chances of sewer gas leaks. Make sure the cap fits snugly, seals all openings, and check it periodically.
Beyond six months, inspect the cap and flange to prevent deterioration or contamination before reuse or permanent closure.
What Should I Do if the Flange Is Severely Damaged Beyond Repair?
If the flange is severely damaged beyond repair, you’ll need to replace it. First, remove the old flange completely, ensuring the drain pipe is clean and smooth.
Choose a flange compatible with your pipe material and size. Securely fasten the new flange to the floor and drain pipe, using appropriate anchors and sealants.
Check for a level installation to prevent leaks or instability before reinstalling the toilet or capping the drain.
Are There Specific Local Codes for Capping Toilet Drains Temporarily?
Codes can certainly vary by city, so check your local plumbing laws before capping your commode’s connection temporarily.
Many municipalities mandate using specific materials like PVC test caps and require airtight seals to stop sewer smells safely.
You’ll also want to make sure the cap’s easy to remove for future work.
Always verify permit requirements and follow manufacturer instructions to meet code and maintain system safety without surprises or setbacks.
How Do I Dispose of Old Toilet Parts and Wax Rings Properly?
You should dispose of old toilet parts and wax rings by separating recyclable materials like metal bolts and plastic parts from non-recyclable ones.
Wrap used wax rings in plastic or seal them in a bag to prevent mess and odors.
Check with your local waste facility for specific disposal guidelines.
Avoid flushing wax rings or toilet debris down drains.
Proper disposal prevents plumbing issues and environmental contamination.
Finish Your Toilet Removal Without Leaks or Odors
Removing and capping a toilet correctly is essential to avoid leaks and odors. Did you know that improperly sealed toilet drains can cause up to 30% more indoor humidity, leading to mold growth?
By following proper steps, shutting off water, inspecting the flange, and sealing the drain, you guarantee a secure, odor-free closure. Always double-check your work and address any floor or flange damage to maintain your bathroom’s integrity and prevent costly repairs down the line.