Last Updated on April 3, 2023
Are you remodeling your bathroom and need to move your shower drain?
Drains can be moved, but it’s not a job for the faint of heart. It takes some serious know-how and muscle to get the old one out and the new one in – especially if your concrete is set in stone. But don’t fret; we’re here to help.
In this article, we’ll guide you on how to move a shower drain in concrete step by step. We’ll also give you some tips on making the job easier and avoiding common mistakes. So, let’s get started!
What are a Shower Drain, and How Does it Work?

A shower drain is a plumbing fixture that is installed on the floor of a shower stall. The drainpipe connects to the shower and allows water to flow out and into the sewer or septic tank.
The drain is typically covered with a grate or screen that prevents hair, soap, and other debris from clogging the drain. There is a hole in the center of the drain that allows water to pass through.
The drain is connected to the drainpipe with a P-trap. The P-trap is a U-shaped pipe that contains water and creates a seal that prevents sewer gases from entering the home.
Instruction on How to Move a Shower Drain in Concrete
There are a few reasons why you might need to move a shower drain. Maybe you’re changing the layout of your shower, or perhaps you’re just moving the drain to a new location. Whatever the reason, it’s not a job that should be taken lightly.
Before you begin, there are a few things you’ll need:
- Shower drain
- Pipe wrench
- Adjustable wrench
- Pliers
- Teflon tape
- Hammer
- Chisel
- Cold chisel
- Drill with masonry bit
- Saw (reciprocating or jigsaw)
- Caulk
- Concrete sealer
- Grout
- Silicone caulk
Step 1: Remove the Old Shower Drain

The first step is to remove the old shower drain. This can be done by disconnecting the P-trap from the drainpipe. Use a pipe wrench to loosen the nuts that connect the P-trap to the drainpipe. Once the nuts are loose, remove the P-trap and set it aside.
Next, use an adjustable wrench to loosen the shower drain’s nut in place. Once the nut is loose, unscrew it by hand and remove the drain. If the drain is stubborn, you may need to use a pair of pliers to loosen it.
Once the drain is removed, you should clean out any debris that may be in the drainpipe. Use a wire brush to remove any buildup of soap or hair. Flush the drainpipe with water to remove any remaining debris.
Step 2: Prepare the New Drain Location
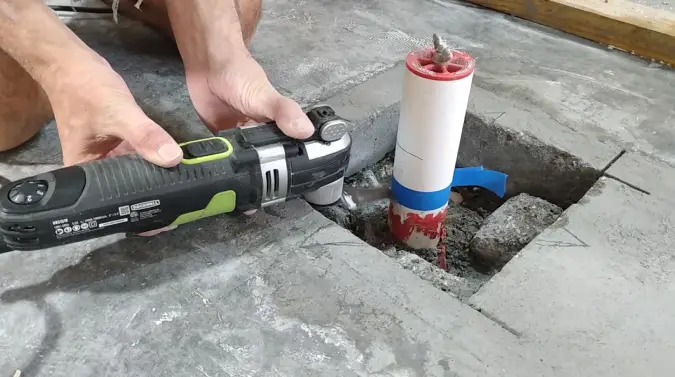
The next step is to prepare the new drain location. If you’re moving the drain to a new location, you’ll need to cut a hole in the shower floor. The hole should be big enough to accommodate the new shower drain.
If you’re simply moving the drain within the same general area, you won’t need to cut a new hole. However, you will need to clear any debris from the area around the drain. Use a chisel and hammer to remove any tile or grout that may be in the way.
Step 3: Install the New Shower Drain
Once the new drain location is prepared, it’s time to install the new shower drain. Start by wrapping Teflon tape around the threads of the drain. This will help to create a watertight seal.
Next, screw the drain into place and tighten it with an adjustable wrench. Be careful not to overtighten the drain, as this could damage the threads.
Once the drain is in place, you’ll need to reconnect the P-trap. Wrap Teflon tape around the threads of the P-trap and screw it into place. Use a pipe wrench to tighten the connection.
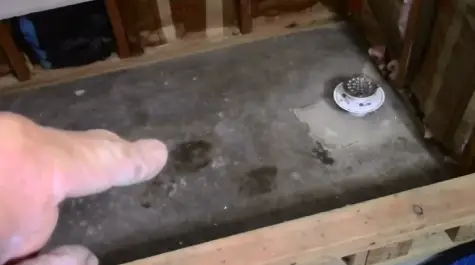
Step 4: Install the Drain Cover

The final step is to install the drain cover. This can be done by simply screwing the cover into place. Be sure to use Teflon tape around the threads to create a watertight seal.
You may need to use pliers to tighten the cover if it’s too tight to screw in by hand. Once the cover is in place, your new shower drain is ready for use.
Safety Precautions
When working with concrete, you should take a few safety precautions.
- Wear gloves, a dust mask, and eye protection.
- Avoid skin contact with concrete.
- Work in a well-ventilated area.
- Wet concrete can be very slippery, so be careful when walking on it.
- If you get concrete on your skin, wash it off immediately with soap and water.
- Concrete can be caustic, so avoid getting it in your eyes.
- If you do get concrete in your eyes, flush them out immediately with water.
- Never leave tools lying around on wet concrete.
- Be aware of your surroundings and watch for hazards.
Common Mistakes When Moving a Shower Drain in Concrete
Here are some common mistakes people make when they try to move a shower drain in concrete:
1. Not removing the old drain first: This is a mistake because you need to remove the old drain before installing the new one. Otherwise, you’ll just be creating a bigger mess.
2. Not using the proper tools: You need to use the right tools for the job. Otherwise, you’ll just be making things worse. Make sure you have a drill, a saw, and the proper concrete cutting bits.
3. Not sealing the new drain: This is a mistake because you need to seal the new drain so that water doesn’t leak through. Otherwise, you’ll just be wasting your time.
4. Not testing the new drain: This is a mistake because you need to test it before using it. In any other case, you may find yourself dealing with a messy situation.
5. Not following the instructions: This is a mistake because you need to follow the instructions that come with the new drain. Otherwise, you could end up making things worse.
Conclusion
Moving a shower drain in concrete is not a difficult task, but it does require some care and attention to detail. Be sure to follow the instructions carefully and take your time. With a little bit of effort, you should be able to move your shower drain without any problems.

