
Last Updated on May 18, 2023
Do you have a sump pump in your home and wonder if a check valve is necessary for a sump pump?
A check valve is a vital piece of equipment that ensures the effectiveness of your sump pump. Without this one-way valve, water being pumped out would not stay out and instead flow back into the sump pit, leading to excessive wear and tear on the pump and a shortened lifespan.
Throughout this post, we’ll go over the steps necessary for installing a check valve on your sump pump and how it can benefit your home. And we’ll discuss common questions related to this issue and provide helpful answers.
Is Check Valve Necessary for Sump Pump: Explained
A check valve is an integral component for any type of submersible sump pump system. Its purpose is to ensure that water can flow in only one direction, from the pressure tank and column above the pump, back into the sump when the pump shuts off.
These components would be subject to reverse-flow action without a check valve, leading to potential damage and costly repairs. But how do you install a submersible sump pump check valve?
Specific considerations must be considered to install a check valve into a submersible system properly. For instance, the check valve should be sized correctly according to the media running through it.
Also, the installed check valve must be suitable for vertical or horizontal mounting positions as required by the specific application. Lastly, make sure the construction material is compatible with the flow media and can withstand changes in temperature and pressure over time.
Where do you buy an affordable a Check Valve for sump pump?
If you’re looking for an affordable check valve for your sump pump, the best place to find one is online. Several online retailers and marketplaces offer a wide range of check valves to choose from.
Conducting a simple search will provide you with many different options and enable you to compare prices to find a valve that fits your budget. The good news is that purchasing online is often more affordable than at a physical store, as online retailers do not have to cover traditional overhead costs.
If you need guidance on finding the best valve, take a look at our article on the most affordable check valves for sump pumps. The article includes recommendations about high-quality check valves at a competitive price.
Is it OK to have two check valves on a sump pump?
Using two separate check valves in parallel on a sump pump system provides two levels of protection against stuck-closed failure scenarios where both valves fail so that they do not allow any water to flow out of the sump well.
In addition to providing increased protection from clogging sources like sand or sediment buildup in pipes and fittings, this also helps protect against loss of vacuum due to improper pipe sizing or faulty pipe installation. It could lead to reverse flow conditions damaging the sump pump and its components.
But, some potential drawbacks are associated with using two check valves on one sump pump system. For instance, if either one fails open, this could cause an immediate discharge of water back into the sump well because no opposing force prevents reverse flow action.
Therefore, always pair your two installed parallel check valves with other protective measures, such as anti-siphon backflow preventers or float switches, depending on your specific requirements or preferences, to protect your pipes against reverse flows and excessive pressures.
Does it matter where you put the sump pump check valve?

When installing a sump pump check valve in your plumbing system, the placement of the valve is essential to ensure optimal performance and protection against potential damage.
This is especially important in situations where clogging sources like sand and sediment buildup can cause reverse flows or loss of vacuum due to faulty installations or pipe sizes.
Ideally, the valve should be positioned between 8 to 12 inches above floor level for convenient inspection, servicing, or maintenance if needed in the future.
This allows homeowners to maintain normal operation under usual conditions while protecting themselves against unexpected events like power outages or extreme weather. Seeking the advice of a plumber can help ensure proper placement for maximum efficiency and protection.
How Do You Install a Sump Pump Check Valve?

Installing a sump pump check valve can help ensure that your sump pump is running at full capacity and functioning properly. Here is a step-by-step guide on installing a sump pump check valve:
Step 01: Turning Off the Power
Before beginning any work on your sump pump, it is vital to ensure that you have turned off the power supply to the pump. This is to avoid any risk of electrocution or short-circuiting, which could cause significant damage.
The first step is to locate the right circuit breaker in your home’s electrical panel and flip the switch to “off.” Labeling the switch or taking note of it in some way may be helpful to make it easier to find in the future.
Safety always comes first, so do not hesitate to seek professional help if you are unsure about handling electrical issues. With the necessary precautions in place, you can proceed confidently and safely with your sump pump maintenance.
Step 02: Locate the Existing Check Valve
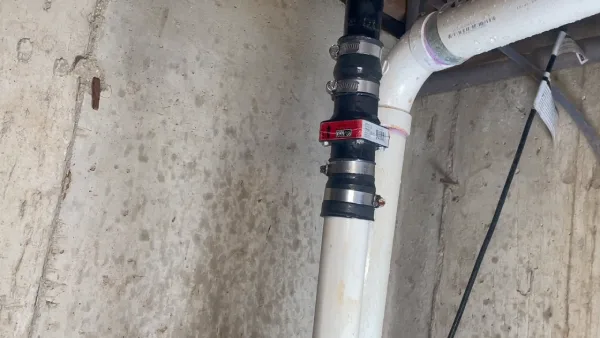
Check valves are typically installed on the sump pump’s discharge pipe near the top of the pit. To locate it, inspect all accessible parts of the discharge pipe and look for an object resembling a metal or plastic bell-shaped component with an embossed arrow.
Note where this component is located so you can easily remove and access it when needed. If necessary, use a flashlight to illuminate hard-to-reach places better.
Step 03: Clean The Discharge Pipe
Once you have located and identified the existing check valve, you may proceed to remove and clean it from its position in the discharge pipe. Use a rag or some other cloth material, such as an old towel, to carefully wipe away any dirt or debris collected over time.
Pay close attention during this process to ensure that no small pieces are left behind in hard-to-reach places that could potentially cause blockage down the line. If more extensive cleaning is required, consider using an appropriate solvent, such as mineral spirits.
You can also use a stiff brush to help dislodge heavy debris and any grime that may be stuck in the pipes. But at the end of this step, all pipes should be thoroughly clean and free from obstructions.
Step 04: Install The New Check Valve

Now is the time to put your new check valve within your sump pump’s discharge pipe. Inserting it correctly will require careful attention and precision, so pay close attention during this process and do not rush through it too quickly or carelessly.
Start by lightly pushing or twisting the new check valve into place on top of your discharge pipe until its shape fits properly around its circumference.
Ensuring that all edges match up as accurately as possible before securing it tightly with clamps or a pipe wrench, depending on what type of device you have chosen for installation purposes.
Finally, ensure that the flow arrow printed onto your new check valve points away from your sump pump before turning back on its power source again at the circuit breaker box. And with that, you have successfully installed your new check valve.
Step 05: Test the Valve
Testing should be done before restoring power to ensure everything functions correctly. Pour some water into the pit and observe its flow through the valve. The water should flow away from the pump as intended, and all connections should be secure.
The valves should open freely without obstruction but close again tightly after each cycle to not create an overflow risk for your basement or crawlspace. If you find any irregularities during testing, tighten any loose connections and try again until you are satisfied with the function.
Step 06: Restore Power
Once you have tested and confirmed the proper functioning of your new sump pump check valve, restore power at your circuit breaker. Ensure to follow all safety precautions and initially turn off all power sources before attempting to restore power to your sump pump.
It will help to double-check all connections before switching back on the power to avoid any potential mishaps. With that done, your sump pump and its newly installed check valve will be ready for operation again.
Step 07: Monitor the Pump
Monitoring your sump pump’s performance for several cycles is important for safety and longevity. Be aware of signs such as vibrations coming from within its housing, which could indicate an obstruction on the impeller blade or motor caused by debris buildup over time.
Pay attention to how quickly it responds when triggered into action. Keeping an eye on things like this can help prevent more serious issues down the line, which may require professional assistance to resolve safely.
Remember, when you monitor and maintain your sump pump regularly, it will be able to continue providing reliable protection for years to come. And by following the steps outlined above, you can quickly and easily install a new check valve whenever necessary.
With that done, your sump pump can keep your basement or crawlspace dry with no worries.
Equip Your Sump Pump with a Quality Check Valve for Maximum Efficiency
You should now understand how essential check valves are for your pump to work properly. Installing a new check valve may seem intimidating initially, but with a quality check valve, the right instructions and tools, it can be done easily by just about anyone.
With these items in place, you can easily install your new check valve and use your sump pump safely, securely, and effectively. So, if you’re wondering whether a check valve is necessary for your sump pump, you can answer with an emphatic yes.

