Last Updated on April 3, 2023
Sometimes the simplest tasks can be the most difficult, which is undoubtedly true when removing a faucet handle cap. This seemingly small task is made even more frustrating because you end up with wet hands and an overflowing sink every time you try to remove it. Don’t worry, though. With this tutorial, you’ll be able to learn how to remove faucet handle cap without any fuss.
What You’ll Need
Here is a list of things you’ll need before starting this project:
- Flathead screwdriver
- Phillips head screwdriver
- Wrench (optional)
- New faucet handle cap (optional)
How to Remove Faucet Handle Cap: Step-by-Step Instruction?
Here are the step-by-step instructions on how to remove a faucet handle cap:
1. Turn Off the Water Supply:
The first thing you need to do is to turn off the water supply. This will prevent any further mess and will make the process a lot easier. It can be done by turning the knob located under the sink.
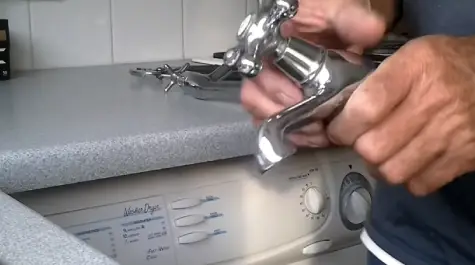
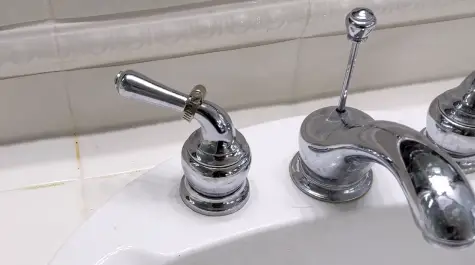
2. Remove the Screws:
The next step is to use a screwdriver to remove the screws holding the handle in place. There will be two screws in most cases, but sometimes there can be just one. Once the screws are removed, you should be able to pull the handle off easily.
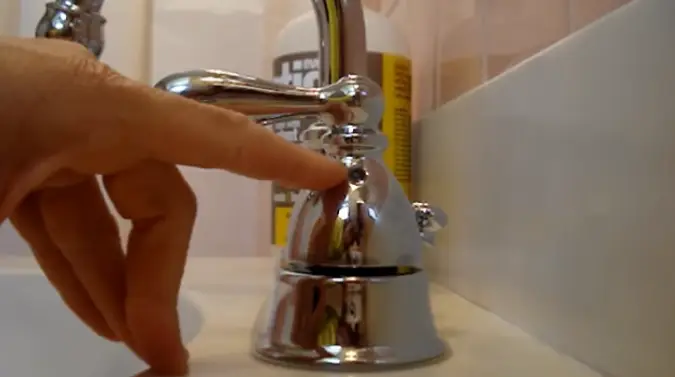
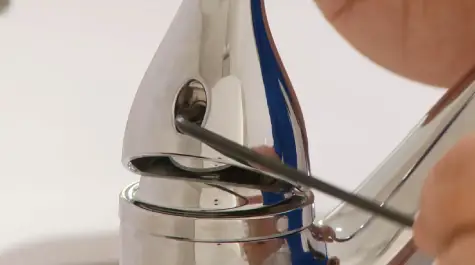
3. Remove the Cap:
After the handle has been removed, you will be able to see the cap. In order to remove it, simply use a screwdriver and pry it off. If it is stuck, you can try using a wrench for extra leverage.
4. Replace the Cap (optional):
You can replace the old cap with a new one if you want. To do this, follow the same steps in reverse order.
5. Turn on the Water Supply:
The last thing you need to do is to turn on the water supply and test if everything is working properly.
Removing a faucet handle cap may seem like a difficult task, but it is actually quite easy once you know how to do it. With this tutorial, you’ll be able to do it in no time.
What To Do To Avoid Damaging Faucet?
Here are a few tips to help you avoid damaging your faucet when removing the handle cap:
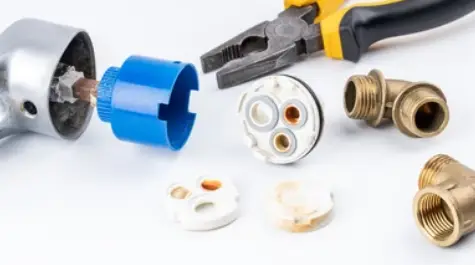
1. Use the Right Tools:
When removing the handle cap, be sure to use the right tools. A screwdriver or a wrench can come in handy.
2. Apply Pressure Gradually:
When using a screwdriver or a wrench, gradually apply pressure. This will help you avoid stripping the screws or damaging the finish on your faucet.
3. Go Slow:
When removing the handle cap, it’s important to go slow and be careful. This way, you can avoid accidentally breaking the cap or damaging the faucet.
What Should I Do if I Break the Handle Cap?
If you accidentally break the handle cap, don’t despair. There are a few things you can do to fix it:
1. Use Super Glue:
If the handle cap is made of plastic, you can try using super glue to fix it. Simply apply a small amount of glue to the broken piece and then attach it back to the faucet.
2. Use Epoxy:
If the handle cap is made of metal, you can try using epoxy to fix it. Simply apply a small amount of epoxy to the broken piece and then attach it back to the faucet.
3. Replace the Handle Cap:
If the handle cap is broken beyond repair, you’ll need to replace it. You can find replacement handle caps at most hardware stores.
5 Reasons to Remove Kitchen Faucet Handle Cap
There are many reasons why you might want to remove your kitchen faucet handle cap. Here are 5 of the most common ones:
1. To Replace the Cap:
The most common reason for removing the handle cap is to replace it with a new one. This is usually necessary when the old cap is broken or damaged.
2. To Clean It:
Another common reason for removing the handle cap is to clean it. Over time, the cap can become dirty and grimy over time, and it might even rust. By removing it, you’ll be able to give it a good cleaning and make it look like new again.
3. To Replace the Handle:
In some cases, you might need to replace the entire handle. This is usually necessary if the handle is broken or damaged beyond repair. However, if you want to use the old cap with the new handle, you must first remove the old cap.
4. To Install a New Faucet:
If you’re installing a new faucet, you’ll need to remove the old one first. Consequently, if you are planning on using the same cap on a new faucet, you will need to remove the handle cap.
5. To Repair the Faucet:
If your faucet is leaking or not working properly, you might need to remove the handle in order to access the parts that need to be repaired.
6. To Prevent Water Damage:
If your faucet is leaking, it can cause water damage to your sink, countertop, and even the floor. By removing the handle cap, you’ll be able to access the parts that need to be repaired and stop the leak.
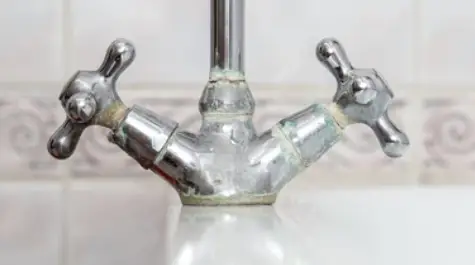
7. To Avoid Rust:
If your faucet is made of metal, it can start to rust over time. This is especially true if it is exposed to water regularly. By removing the handle cap, you’ll be able to clean the faucet and prevent it from rusting.
8. To Improve the Look of Your Faucet:
Over time, the handle cap can become dirty and grimy. This can make your faucet look old and outdated. By removing the handle cap and cleaning it, you’ll be able to make your faucet look new again.
9. To Access the Parts:
If your faucet is not working properly, you might need to remove the handle in order to access the parts that need to be repaired. By removing the handle cap, you’ll be able to get to the parts that need to be fixed.
10. To Save Money:
If you’re planning on replacing your faucet, you can save money by reusing the handle cap on a new faucet. However, you will need to first remove the handle cap from the old faucet.
FAQ’s
What are the Different Types of Faucet Handle Caps?
Faucet handle caps come in various shapes, sizes, and materials. The most common type of faucet handle cap is the screw-on type. These caps are easy to remove and can be reused on a new faucet. Other types of faucet handle caps include push-on caps and Snap-On caps.
Can I Use a Different Type of Handle Cap on My Faucet?
Yes, you can use a different type of handle cap on your faucet. However, you might need to make some adjustments to the size of the hole in the handle.
What are Some Common Problems with Faucets?
Some common problems with faucets include leaks, drips, and noisy valves. These problems can often be fixed by removing the handle and accessing the parts needing repair.
Conclusion
The steps you have just learned regarding removing a faucet handle cap will help you easily access the parts that you need to repair or replace. As an alternative, you can clean your faucet’s handle cap and make it look as good as new again. Be sure to use the appropriate tools when removing the handle cap from your faucet, and be very careful not to damage the finish.

