Last Updated on April 10, 2025
To attach PEX to galvanized pipe, you’ll need PEX tubing, crimp rings, a crimp tool, and threaded coupling fittings. First, evaluate the galvanized pipe for damage and clean it.
Use dielectric unions to prevent corrosion, then connect the PEX using crimped or push-fit connections. Secure all fittings tightly to avoid leaks and perform a pressure test afterward.
These steps are critical for a reliable installation, and you can discover more tips on enhancing your plumbing project.
Key Takeaways
- Evaluate and clean the galvanized pipe for any corrosion or damage before starting the connection process.
- Use threaded coupling fittings and dielectric unions to connect PEX to galvanized pipe securely.
- Employ a crimp tool with copper crimp rings for reliable crimped connections on PEX tubing.
- Perform pressure testing after installation to ensure there are no leaks in the system.
- Regularly inspect the connections for signs of wear or corrosion to maintain system integrity.
PEX Meets Galvanized: Materials and Equipment Needed
When you’re ready to attach PEX to galvanized pipe, you’ll need several essential materials and tools to guarantee a successful connection. Start with PEX tubing, which offers flexibility and durability.
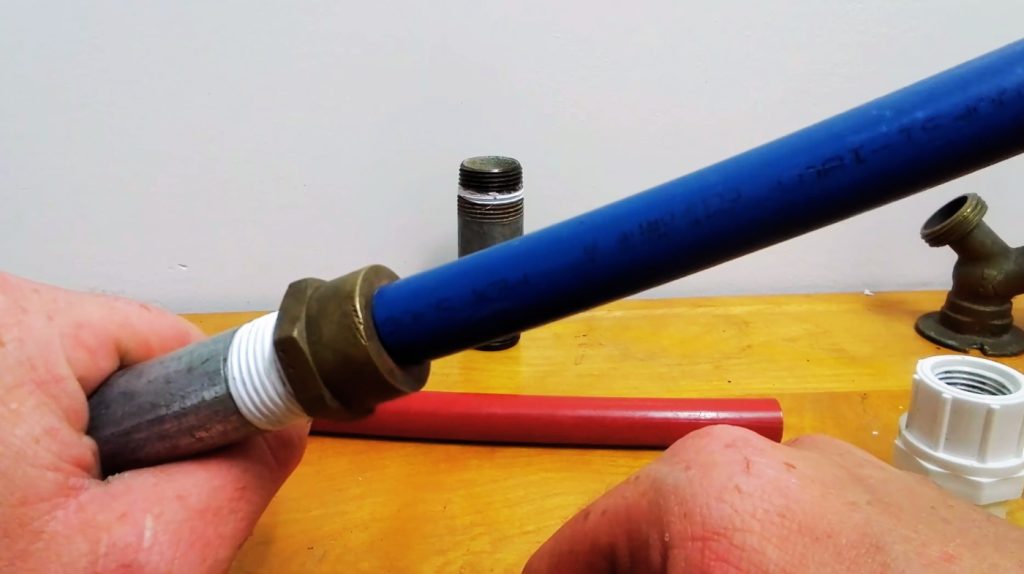
You’ll also require crimp rings to secure fittings onto the tubing and a crimp tool for tightening those rings. Use threaded coupling fittings to connect the galvanized pipe threads to PEX. To prevent galvanic corrosion, include dielectric unions in your supplies.
Choose between PEX-A or PEX-B fittings based on your flexibility needs, and consider push-fit or SharkBite fittings for ease. Don’t forget a PEX cutter for clean cuts, a crimping gauge for secure connections, and Teflon tape or pipe dope for leak prevention.
Additionally, remember that identifying water leaks early can save you from costly repairs later on.
Preparatory Steps for Installation
Before starting the installation of PEX to galvanized pipes, it’s crucial to conduct a thorough assessment and preparation.
First, evaluate the galvanized pipes for corrosion, leaks, or damage. If needed, replace compromised sections and check threaded connections for compatibility with PEX adapters.
Evaluate your galvanized pipes for any signs of corrosion or damage, and ensure compatibility with PEX adapters before proceeding.
Next, create a detailed layout for your PEX installation, ensuring it complies with local building codes. Verify that your PEX fittings match the galvanized pipe threads, opting for brass or compatible materials to prevent corrosion.
It’s important to use a PEX female adapter for a secure connection between the two materials. Clear your workspace, shut off the water supply, and have all necessary tools ready.
Finally, be mindful of corrosion risks when joining dissimilar metals and consider using dielectric unions to mitigate potential issues post-installation.
Connection Process Overview
In this section, you’ll prepare the galvanized pipe for a secure connection to PEX. Start by verifying the pipe is clean and accessible, then proceed to use appropriate fittings for the changeover.
Brass couplings are required to prevent galvanic corrosion when connecting to copper, which is crucial for ensuring a secure transition. Finally, you’ll need to properly secure the PEX connections to prevent leaks and guarantee durability.
Preparing the Galvanized Pipe
Evaluating the condition of your galvanized pipe is essential for ensuring a reliable PEX connection. Check for any corrosion or damage, as these factors can compromise the connection quality.
Next, clean the pipe’s surface thoroughly to remove dirt, rust, or debris, facilitating a better seal. Identify the thread type—whether it’s National Pipe Threads (NPT) or another type—to choose the correct adapter. Measure the diameter of the pipe to select the appropriate PEX fittings.
Finally, determine the type of adapter needed, such as brass or threaded ones, ensuring compatibility for a secure conversion from galvanized to PEX. Taking these steps helps lay a solid foundation for a successful PEX connection.
Proper fittings are essential for secure connections, which further enhances the reliability of the installation.
Securing PEX Connections
With the galvanized pipe prepared, you can now focus on securing the PEX connections effectively. Choose the appropriate connection method: crimping, expansion, or push-fit fittings.
For crimp connections, use a crimp tool and copper rings to create a tight seal. If you opt for expansion connections, employ a PEX expander tool to stretch the tubing. PEX provides an alternative for homeowners to replace leaking pipes without professional help.
Push-fit fittings allow for quick, tool-free installation. For stainless steel clamp connections, tighten the rings with a ratchet tool. Consider maintenance needs as different connection methods may influence the longevity of your plumbing system.
Verify cleanliness by removing debris from cut ends, and use sharp tools for precise cuts. Validate your connections by performing pressure tests to confirm leak-free performance, and always match fittings with the corresponding type of PEX tubing for best results.
Types of Connections Explained
When attaching PEX to galvanized pipe, understanding the types of connections is essential. Crimped connections offer reliability and are widely used, while push-fit connections provide a quick, tool-free option.
Additionally, threaded connections guarantee a secure fit, especially when dealing with different pipe materials. PEX is an alternative to soldering copper pipes, making it a versatile choice for various plumbing applications.
Crimped Connections Overview
Crimped connections offer a reliable method for joining PEX tubing to various fittings, making them a popular choice in plumbing applications.
Here’s a quick overview of key points regarding crimped connections:
- Crimp Rings: Copper crimp rings are essential for ensuring a tight seal.
- Crimping Tool: A specialized crimping tool is required to secure the crimp ring effectively.
- Fitting Compatibility: These connections work with different PEX types, primarily PEX-B, due to its affordability.
- Advantages and Disadvantages: While crimp connections are easy to install and materials are widely available, the necessary tool can be a costly investment. Additionally, crimp systems are the most widely used in North America due to cost-effectiveness and proven reliability.
Push-Fit Connection Benefits
While crimped connections provide a solid option for joining PEX tubing, push-fit connections offer distinct advantages that make them increasingly popular among plumbers.
These connections are incredibly easy to install, requiring no specialized tools, which speeds up the installation process markedly. You’ll find them reliable even in concealed spaces, providing a tight seal that lasts.
Versatile fittings are available for various pipe materials, including PEX and CPVC, and they’re particularly advantageous for quick repairs or new installations.
Additionally, these fittings facilitate tool-free attachment and reconfiguration without damaging the pipe. With options like push-to-connect and PEX-specific fittings, you can tackle plumbing tasks efficiently, making push-fit connections a wise choice for both professional and DIY projects.
Threaded Connection Advantages
Threaded connections offer a reliable and versatile solution for joining PEX to galvanized pipe, making them a popular choice in plumbing.
Here are some key advantages:
- Easy Adaptation: You can easily adapt these connections to existing plumbing systems without extensive modifications. This adaptability is crucial for maintaining the integrity of plumbing systems, especially when using corrosion-resistant materials.
- Wide Availability: Threaded fittings are widely available and compatible with various pipe types, simplifying sourcing.
- Simple Tools: Installation requires only basic plumbing tools, like a pipe wrench, making it accessible for DIY projects.
- Cost-Effective: Generally, threaded connections are less expensive compared to other adapter types, providing budget-friendly options. Additionally, they can securely connect pipes using threaded fittings, ensuring a leak-proof seal.
Safety Considerations During Installation
When installing PEX to galvanized pipe, it’s essential to prioritize safety to prevent accidents and guarantee a secure connection.
Follow these key safety considerations:
| Safety Aspect | Precautions | Tools Needed |
|---|---|---|
| System Shutdown | Turn off water supply | None |
| Workspace Safety | Keep area clear of obstacles | None |
| Tool Maintenance | Inspect tools before use | Crimping tools |
| Personal Protection | Wear gloves and safety glasses | Safety gear |
Verify galvanized pipes are clean and use compatible adapters to prevent corrosion. Additionally, ensure that the material quality of all fittings and adapters used is suitable for maintaining system safety.
Always perform pressure tests and maintain good ventilation to verify a safe installation process. By adhering to these guidelines, you enhance safety and system integrity.
Troubleshooting and Maintenance Tips
To guarantee your PEX connections to galvanized pipes maintain ideal performance over time, it’s essential to troubleshoot common issues and implement effective maintenance strategies.
Pay attention to these key areas:
- Corrosion Prevention: Use corrosion-resistant materials and seal threads properly to avoid leaks.
- Compatibility Checks: Ascertain all fittings are compatible with PEX to prevent connection failures.
- Environmental Considerations: Select the correct type of PEX for your environment, especially for heating systems. Additionally, consider using PVC conduit to protect PEX from damage and facilitate future replacements.
- Regular Inspections: Regularly monitor connection points for signs of corrosion or damage to keep your system functioning properly.
Frequently Asked Questions
Can I Use PEX With Existing Copper Pipes?
Yes, you can use PEX with existing copper pipes. To do this, you’ll need specialized fittings, such as push-fit or sweat adapters, to guarantee a secure connection. Make sure to follow manufacturer guidelines for installation and check local plumbing codes for compliance.
When shifting between materials, address potential corrosion issues, so use the appropriate adapters to prevent leaks and maintain system integrity. Always prioritize safety and durability in your plumbing projects.
What Tools Do I Need for PEX Installation?
When diving into PEX installation, you’ll need the right arsenal. Grab a PEX pipe cutter for clean cuts, a crimper tool for securing fittings, and an expansion tool if you’re using expansion fittings.
Don’t forget a clamp tool to cinch connections tightly. A go/no-go gauge will help guarantee each crimp’s quality. With these tools, you’re set to create a reliable PEX system that flows smoothly and efficiently!
Is PEX Suitable for Outdoor Use?
PEX isn’t the best choice for outdoor use without precautions. It’s flexible and cost-effective, but freezing temperatures can cause it to burst. You’ll need to insulate it properly and bury it at least 2 feet deep to prevent freezing.
Additionally, PEX isn’t UV-resistant, so direct sunlight can degrade it over time. If you’re planning outdoor installations, consider using specialized PEX designed for environmental factors to guarantee durability and longevity.
How Long Does PEX Last Compared to Galvanized Pipe?
PEX pipes typically last between 25 to over 50 years, considerably outlasting galvanized pipes, which last around 20 to 50 years.
One interesting statistic is that PEX can endure various environmental conditions without the risk of corrosion, while galvanized pipes often suffer from mineral buildup, reducing their lifespan.
Can I Connect PEX to PVC Pipes?
Yes, you can connect PEX to PVC pipes using compatible fittings. For quick installations, you might consider push-to-connect SharkBite fittings, which require no glue. If you prefer traditional methods, use threaded fittings, ensuring you’ve got the right male and female connectors.
Always cut the pipes cleanly and secure your connections properly. Don’t forget to apply plumber’s tape on threaded joints to prevent leaks, and test the connection afterward for any issues.
Fitting It All Together: Choosing the Right Connectors
To sum up, connecting PEX to galvanized pipe can be a straightforward process if you follow the right steps. Like weaving threads into a tapestry, each connection strengthens your plumbing system.
By understanding the types of fittings and ensuring safety, you can create a seamless bond between old and new materials. Remember, regular maintenance will keep your system flowing smoothly, preventing potential leaks and issues.
With a little care, your plumbing will stand the test of time.


