Last Updated on June 13, 2023
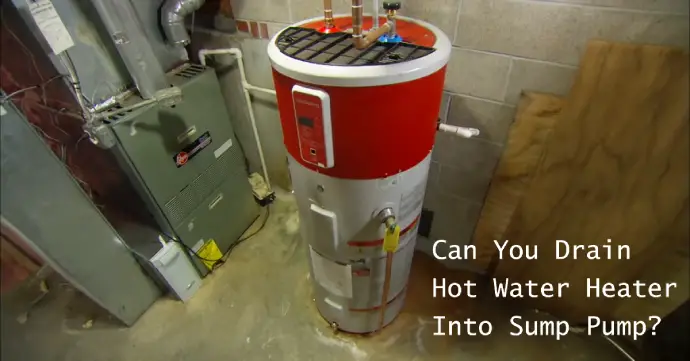
Have you ever found yourself in a situation where you need to drain your hot water heater, but you’re still determining if it’s safe to do so into your sump pump? It’s a common question that can cause confusion and concern for homeowners.
Sump pumps are primarily designed to handle basements or low-lying area water, such as groundwater or rainwater. They are not specifically designed to handle the high temperatures and sediment from a hot water heater.
Hot water can damage the sump pump, and sediment can clog the pump or its components, resulting in reduced performance or even failure. To safely drain a hot water heater into a sump pump, taking certain steps to minimize the risks involved is essential.
Here, we’ll cover everything you need to know about how to drain your hot water heater into your sump pump, including some faqs. So sit back, relax, and let’s get started.
How Can You Drain a Hot Water Heater Into the Sump Pump in a Safe Manner?

Draining a hot water heater into a sump pump can be done carefully to avoid damaging the pump. Here are the key steps you should follow, along with a detailed discussion:
- Step 01: Familiarize Yourself With the Equipment
- Step 02: Turn off the Power
- Step 03: Prepare the Necessary Tools and Materials
- Step 04: Locate the Drain Valve
- Step 05: Connect the Garden Hose
- Step 06: Position the Other End of the Hose
- Step 07: Open the Drain Valve
- Step 08: Monitor the Draining Process
- Step 09: Empty the Sump Pump Pit if Necessary
- Step 10: Close the Drain Valve and Disconnect the Hose
- Step 11: Restore Power to the Hot Water Heater
Step 01: Familiarize Yourself With the Equipment
Before starting the sump and system swap, it is crucial to familiarize yourself with the equipment. You need to understand the sump pump’s location, functioning, and components to smoothly execute the hot water heater smoothly draining into it.
The sump pump is typically located in your crawl space or basement. It consists of a sump pit, pump, discharge pipe, and check valve.
Water enters your home’s foundation or basement through the sump pit, and the pump discharges it through the discharge pipe. The check valve stops the water from flowing back into the sump pit.
Step 02: Turn off the Power
Make sure to shut off the power source to your hot water heater before draining. This is a crucial step to ensure your safety throughout the procedure.
To turn off the power, find the circuit breaker or switch for your hot water heater and turn it off. This will ensure that no electricity flows to the unit while you work on it. It’s important to take this step seriously and ensure that the power is off completely.
Even a small amount of electrical current can be dangerous when dealing with water and metal equipment. Once you’ve successfully turned off the power, you can move on to the next step.
Step 03: Prepare the Necessary Tools and Materials
Now it’s time to gather your tools and materials. Grab your garden hose, pliers, and a large container before moving on to the next step.
Ensure that your garden hose is long enough to reach your chosen drainage area and that your container is large enough to hold all of the hot water that will be drained.
Adjustable pliers or a wrench will be needed to loosen and remove the drain valve, so ensure you have one of these tools on hand.
Wear gloves and eye protection to protect yourself from the hot water and any debris from the tank when you drain it.
Step 04: Locate the Drain Valve
Let’s find the brass or plastic spigot with a threaded cap or handle located near the bottom of your hot water heater. This drain valve is where you’ll release the water from the tank.
You should note that the location of the drain valve may vary depending on the make and model of your hot water heater. In most cases, it’s typically found at the front or side of the unit. When locating the drain valve, make sure you have a clear path for the water to flow out of the tank.
Step 05: Connect the Garden Hose
Here are three important things to keep in mind when connecting the garden hose to the drain valve of your hot water heater:
- Tighten the connection: Use adjustable pliers or a wrench to ensure a tight and secure connection between the garden hose and the drain valve.
- Choose the right length of the hose: Make sure that the hose is long enough to reach the desired drainage area.
- Ensure proper drainage: Drainage areas should be suitable for the volume and temperature of drained water and water flow should be unhindered.
Step 06: Position the Other End of the Hose
To ensure proper drainage of your hot water heater, you should position the other end of the garden hose in the sump pump pit. When positioning the hose, ensure it’s securely in place and not at risk of dislodging.
Step 07: Open the Drain Valve
You must turn the valve counterclockwise slowly to avoid sudden hot water surges. Take note that the hot water flowing through the hose can cause serious burns.
Due to this, you must exercise caution when opening the valve. Take your time and make sure you have a good grip on the valve handle.
As you slowly turn the valve, you will notice hot water flowing out of the heater and into the hose. Once the valve is fully open, the water will continue to flow until the tank is completely drained.
Step 08: Monitor the Draining Process
Keep an eye on the water flow as it drains out of the tank to ensure everything is flowing smoothly and there are no unexpected issues.
As the water drains, use a flashlight to inspect the tank’s inside and ensure no excess sediment or debris could clog the drain valve or cause other issues. If you notice any leaks or other hose or drain valve issues, turn off the water supply and address the problem before continuing.
Step 09: Empty the Sump Pump Pit if Necessary
When draining the hot water heater into the sump pump, you should monitor the pit’s capacity. If the pit doesn’t have enough space to handle the additional water, it can cause a backup and potentially damage the pump.
This is possible by using a separate pump or finding an alternative drainage method. It’s recommended to regularly check the pit’s capacity to prevent potential issues and avoid damage to the sump pump or surrounding area.
Step 10: Close the Drain Valve and Disconnect the Hose
After draining your hot water heater completely, turn the drain valve counterclockwise and secure the garden hose cap to prevent residual leaks.
Once the valve is closed and the hose is capped, you can be assured that your hot water heater is ready for its next use. To further ensure your water heater’s longevity, periodically checking the valve and hose for any signs of wear or damage is recommended.
Step 11: Restore Power to the Hot Water Heater
After you’ve closed the drain valve and disconnected the hose, restoring power to the hot water heater is simple.
Locate the circuit breaker or switch that controls the hot water heater and turn it back on. Once the power is restored, allow the tank to fill with water.
This may take some time, so be patient. Check for any leaks or issues before using the hot water again. You should ensure everything is in working order before using your hot water heater again.
Can I use a submersible pump in hot water?

You can safely use a submersible pump to move hot liquids up to 200°F without worrying about damaging the pump or causing any issues. These pumps are designed to handle hot, corrosive, non-corrosive, clear, or solid-laden liquids.
So, if you want to drain your hot water heater into a sump pump, using a submersible pump is a great option. But before you start, here are some things to keep in mind:
- Ensure the submersible pump you’re using is rated for the temperature of the liquid you’re pumping. Most submersible pumps can handle liquids up to 200°F, but it’s always best to double-check.
- Use a garden hose to connect the pump to the hot water heater. Ensure the hose extends far enough from the water heater to the sump pump.
- Be sure to turn off the power supply to the hot water heater before you start pumping. This will prevent any accidents or damage to the water heater.
Can draining a hot water heater into a sump pump contaminate the groundwater?
When you drain your hot water heater into a sump pump, it can contaminate the groundwater with harmful substances.
Hot water heaters collect sediment, minerals, and other impurities, particularly when they are not maintained regularly. These impurities consist of heavy metals, chemicals, and bacteria, which threaten the environment if not disposed of correctly.
The hot water heater’s water permeates the ground and mixes with the surrounding soil and water, endangering the groundwater. It’s critical to correctly dispose of the water from the hot water heater to prevent contamination.
Use a hose to drain the water into a suitable disposal system, such as a sewer drain or a septic tank.
Prioritize Safety When Draining Your Hot Water Heater Into Sump Pump
It is vital to prioritize safety when draining a hot water heater. Attempting to drain into a sump pump is not advisable due to potential hazards, including damage to the pump’s parts and reduced performance.
To drain safely, disconnect the power, attach a garden hose to the drain valve, and open it slowly while monitoring what’s happening. In case an alternative method is necessary, using a submersible pump appropriate for hot liquids is highly recommended.
Also, ensure the pump can handle high temperatures and take appropriate safety measures, such as turning off the power source.
Disposing of the water via a suitable system, including a sewer drain or septic tank, is essential to prevent both environmental damage and potential health hazards.


