Last Updated on April 5, 2023
Installing a water pressure regulator is a task that requires skill and experience from a professional plumber. But it is possible to install one yourself if you have the right tools and know how to install them. Taking on such a project can save money and give you a sense of accomplishment.
Replacing or installing a new water pressure regulator is something that anyone with a basic knowledge of plumbing can do with relative ease. All required are turning off the main water supply, removing the existing regulator, measuring and cutting any pipe, and installing the new one.
With a water pressure regulator installed, you can monitor and maintain it more quickly, so the water pressure is constant and safe. Check out the tools and steps you’ll need to know to complete the installation if you’re thinking of doing it yourself.
How Can I Install A Water Pressure Regulator Myself: 6 Steps

Installing a water pressure regulator yourself may seem intimidating, but it keeps water flowing and prevents damage to fixtures and pipes caused by excessive pressure. Still, it’s relatively easy with the right tools, knowledge, and patience.
Materials Needed:
- Water pressure regulator
- Pipe wrench or adjustable pliers
- Teflon tape
- Pipe cutter
- PEX or copper piping (if necessary)
- Pipe fittings (if necessary)
STEP 1. Turn Off the Main Water Supply
The first step in installing a water pressure-reducing valve is to turn off the principal water supply. This can usually be found near the entrance of a building and should be marked as such. To shut off the main water supply, rotate the valve clockwise until it is fully closed.
If you are unsure if this has been done correctly, test it by turning on an internal faucet; no water should come out if it has been closed correctly. Once this is done, all other faucets should be turned off, and any remaining in-use appliances should be disconnected from their respective outlets before proceeding.
STEP 2. Remove the Old Regulator (if Applicable)
If an existing regulator is already installed at your property, then this unit should be removed before installing the new one. To do so, begin by detaching any connected pipes or fittings attached to either side of the existing unit before unscrewing it from its mounting bracket (usually located inside an adjacent wall).
Once removed, clear away any debris that may have accumulated inside before proceeding with the installation of the new unit.
STEP 3. Measure and Cut Piping (if Necessary)

The next step is measuring where piping needs to be cut. This will depend entirely on where you choose to mount your new unit, either outside or inside, and what materials are used for piping.
For ease of use, it is recommended to use Teflon tape when making connections between pipes so that they remain secure during operation. Also, double-check measurements before cutting any piping material.
Otherwise, you risk having too short or too long pieces, which can delay installation or cause problems down the road.
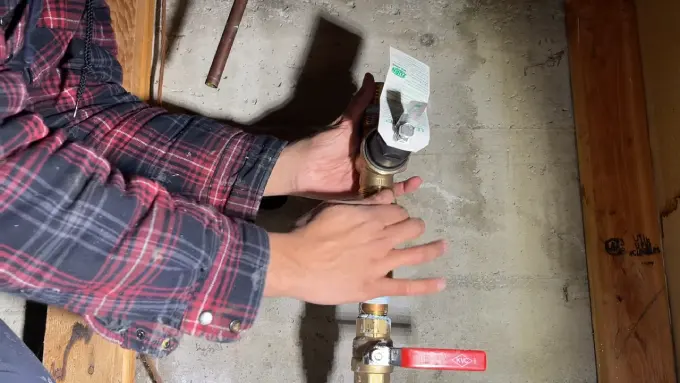
STEP 4. Install the New Water Pressure Regulator
After all the necessary measurements have been made and any piping cut, the new water pressure regulator can be installed. Begin by attaching it to its mounting bracket (on an adjacent wall). Then connect any relevant pipes or fittings to either side of the unit using a wrench or pliers.
Before installation, attach any necessary fittings, such as washers and gaskets. Next, use a level and straightedge to mark the mounting holes for the new valve onto the wall or flooring where it will be installed.
Finally, secure all fittings with Teflon tape or pipe compound before finally attaching and tightening down all nuts and bolts.
STEP 5. Connect the Piping (if Necessary)
If any existing pipes need connecting to your newly installed water pressure regulator, you’ll need to prepare them first. Cleaning all surfaces with steel wool or sandpaper before attaching using standard soldered joints or compression fittings, depending on the type of metal used in construction.
Use channel locks or adjustable wrenches to securely tighten nuts, bolts, or clamps. Ensure all connections are airtight before connecting up any additional pipes, such as those leading from the hot and cold taps.
STEP 6. Turn On the Water Supply
Once all connections have been made securely and everything appears correct, you can slowly turn back on your main water supply, ensuring no leaks occur along the connected pipes or valves.
If everything appears ok after running for some time, check again with a pressure gauge placed at each tap/faucet point and adjust as required until the optimal water flow has been achieved throughout your home’s plumbing system.
Where is the Best Place to Install a Water Pressure Regulator, and Why?
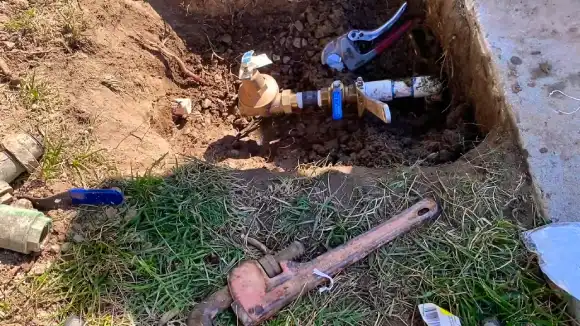
Getting an effective and reliable water supply for your home is often as easy as installing a water pressure regulator near your main water line.
The main water line provides access to the city’s supply of fresh, clean water delivered at a consistent rate and pressure. Placing a pressure regulator in this location ensures that the pressure entering your home’s plumbing system remains within safe limits for your equipment.
Placing a pressure regulator near the main line helps regulate and maintain the desired flow rate in your home plumbing system. This helps reduce wear and tear on your appliances and fixtures from overexertion due to high pressures and prevents leaks or other damage caused by too low of forces.
For optimal protection against fluctuations in water supply, it is recommended that you install more than one pressure regulator near your main line. This will allow each unit to monitor different areas of your plumbing system individually, giving you greater control over how much each area receives at any given time.
Also, having multiple devices installed allows you to respond quickly if any one unit fails or malfunctions without needing to shut down an entire plumbing network for repairs or replacement parts.
What Type of Water Pressure Regulator Should I Choose for My Home?

When selecting a water pressure regulator for your home, you should consider the type of regulator, the required flow rate, and the size of the valve. Lead-free brass adjustable water pressure regulators with gauges offer many benefits over other types of water pressure regulators on the market.
Lead-free brass is ideal for water pressure regulators because it is highly corrosion-resistant and can withstand exposure to hard water without corroding or rusting. Lead-free brass offers excellent protection against wear and tear compared to plastic or steel regulators due to its durability and long-lasting nature.
The adjustable feature on these valves allows you to customize the desired flow rate from a few psi up to 300 psi, depending on your needs. You can also adjust the pressure within seconds by turning a dial or lever, making these valves easier to use than other types of valves requiring multiple steps to change the flow rate.
A gauge is also included with many of these valves, which provides an easy way to view what level of pressure has been set so that you can ensure that your system remains within optimal operating conditions at all times.
How Can I Test the Water Pressure After Installing a Water Pressure Regulator?
Testing the pressure of water after installing a regulator valve is relatively straightforward. This can be done by either taking a quick reading with a handheld device such as a manometer or attached gauge or using a digital meter that logs readings over time.
If you are using a handheld device, it is essential to take multiple readings at different times of day to get an accurate reading of your peak and average pressures throughout your home. If you are using a digital meter, log into its settings and select “test” mode to record exact readings throughout the day.
At What PSI Do I Need to Set a Pressure-Regulator Valve After Installing?

Generally speaking, the ideal house water pressure should range between 40-60 PSI to avoid issues with leaking plumbing fixtures due to low pressures as well as burst pipes due to high pressures.
But, most experts suggest aiming for an optimal range of 60-70 PSI for best results across all areas of your home. It is essential not to exceed 80 PSI when setting up your regulator valve, as doing so may create dangerous conditions and potentially cause serious damage due to excessive pressures.
How Long Does It Take Me to Install a Water Pressure Regulator?
The amount of time needed to assemble a pressure regulator yourself will depend on several factors, including the size and complexity of the system. But in general, someone who knows their way around basic plumbing tools can complete most installations in about one to three hours or less.
Complex systems require additional time spent troubleshooting during installation, which could add several more hours to completion time. Also, if you have no prior experience with plumbing systems, it would be wise to seek assistance from an experienced professional.
Can I Install a Water Pressure Regulator on a PVC Pipe?
Generally speaking, most regulations can be installed on PVC pipes without issue due primarily to their lightweight nature, making them easy to install. Some rules may also fit onto copper pipes if an additional adapter piece is purchased separately from the regulator.
Before selecting a model, it is essential to read the instructions carefully and factor in any compatibility details for different types of pipes. This can save time and money, as well as avoid any disasters.
Safety Concerns to Consider When Installing a Water Pressure Regulator

Installing any device related to a home’s plumbing system should always be done with safety as the top priority. If proper precautions aren’t taken, harm or damage can never be completely avoided during installation.
- When setting up a water pressure regulator, one crucial step that should be considered is ensuring all tools used during the process are properly calibrated according to their manufacturer specifications.
- Improper calibration of tools can lead to inaccurate measurements, which may result in additional problems in the future, such as leaks caused by weak seals between threaded fittings being tightened too much.
- While cleaning the pipes before any installation is vital, using the right cleaning solution is essential. Any debris lodged in any of the joints can cause blockages and lead to various problems, so cleaning them is essential.
- Personal Protective Equipment (PPE) should also be considered while working on plumbing systems. This could involve wearing gloves and protective eyewear when dealing with liquid chemicals or pressure from copper piping in tight spaces.
Installing a Water Pressure Regulator: The Right Tools
Installing a water pressure regulator yourself can be daunting, but it is possible with knowledge and the right tools. You must research beforehand and choose the best product for your situation to avoid any costly mistakes in the future.
Doing so will allow you to benefit from improved daily water pressure and save money by avoiding expensive repairs or replacements due to improper installation. With those steps followed carefully, you can upgrade your home’s plumbing without hiring expensive professionals for installation services.
Remember that if things become complicated or confusing during installation, feel free to contact an experienced plumber who can help you finish the job correctly.

