
You should start by using a toilet cleaner with an angled nozzle or a gel that clings under the rim. Apply it carefully to avoid splashing, then let it sit for 10–15 minutes to break down biofilms and mineral buildup.
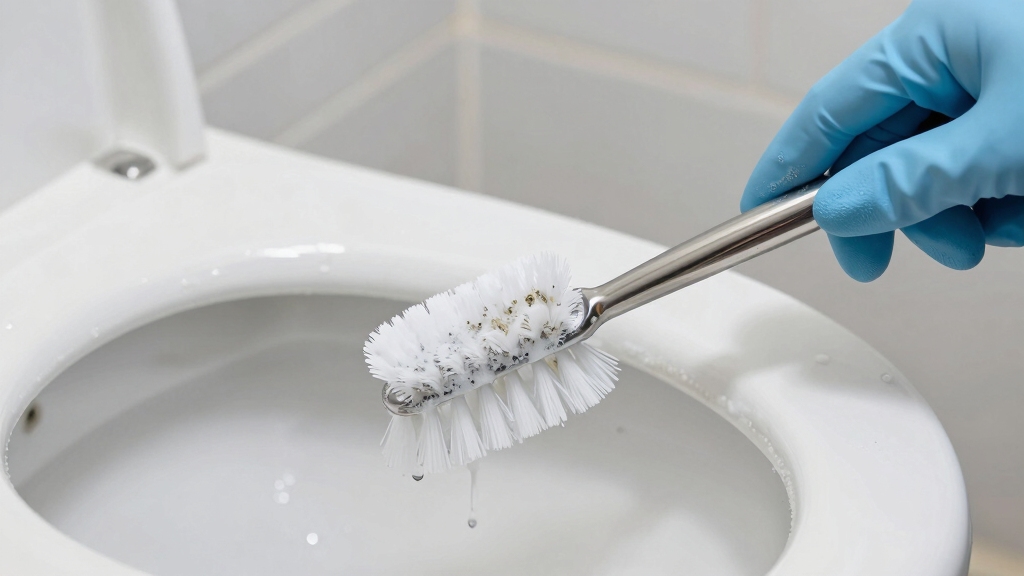
Use an angled brush or narrow tool to scrub rim jets and tight crevices thoroughly. Flush to rinse away loosened grime. Wearing gloves and eye protection reduces health risks during cleaning.
If you want to master maintenance and tackle tough spots, keep exploring effective methods.
Key Takeaways
- Use acid-based or enzymatic gel cleaners with angled nozzles to apply under the rim for effective biofilm and mineral deposit removal.
- Scrub with an angled, stiff-bristled toilet brush and narrow tools like pipe cleaners to reach rim jets and tight crevices.
- Allow cleaners to dwell for 10–15 minutes, extending up to 30 minutes for tough stains, ensuring thorough disinfection and stain breakdown.
- Flush after scrubbing to rinse away loosened debris and inspect rim jets, repeating cleaning if necessary for persistent buildup.
- Wear chemical-resistant gloves, goggles, and protective clothing during cleaning to avoid exposure to pathogens and harsh chemicals.
Understanding the Importance of Cleaning Under the Toilet Rim

When you overlook cleaning under the toilet rim, you leave a hidden hotspot where harmful bacteria like Salmonella can thrive for weeks. Neglecting the toilet rim creates a hidden hotspot for harmful bacteria to persist undisturbed.
This area fosters biofilm formation, concentrating enteric bacteria far beyond the bowl water’s levels. Biofilms protect microbes from disinfectants, letting them persist despite routine flushing and surface cleaning.
Flushing can aerosolize these pathogens, spreading droplets that risk inhalation or contamination of nearby surfaces. You should know that microbes colonize crevices and rim jets where flow is intermittent, making disinfection challenging.
Using a toilet brush is essential for scrubbing under the rim to reach these hidden areas effectively. Wearing appropriate personal protective equipment during cleaning helps reduce exposure to harmful microbes.
Additionally, mineral deposits under the rim shield biofilms, reducing cleaning efficacy. Neglecting this zone increases your chances of pathogen transfer during cleaning through splashes or contaminated tools.
Essential Tools for Effective Toilet Rim Cleaning
To tackle the job of cleaning beneath the toilet rim, have the right tools at your disposal. You’ll definitely want to grab some angled brushes and small hand tools that are specifically designed for those tight spaces.
Trust me, they make a world of difference! Proper preparation, including setting up a clean workspace, can greatly improve the efficiency of your cleaning process.
And hey, don’t forget about your safety. It’s super important to wear protective gear like chemical-resistant gloves and safety goggles. You really want to shield yourself from any harsh cleaners or unexpected splashes.
Remember, the toilet rim contains rim jets where flush water enters the bowl, so thorough cleaning here is crucial. Using the right equipment not only speeds up the cleaning process but also keeps you safe while you work. So, gear up and get ready to make that toilet rim sparkle!
Must-Have Cleaning Tools
Although cleaning under the toilet rim can be challenging, having the right tools makes the task more efficient and thorough.
Start with an angled toilet brush featuring stiff, durable bristles and a long curved neck to reach rim jets without seat removal. A large angled toilet brush is especially effective for reaching under the rim and scrubbing away stubborn grime. To soften and loosen mineral buildup, applying controlled heat from a blow dryer can aid in the cleaning process.
Use rim-specific liquid cleaners, acid-based or disinfecting gels, with angled applicator nozzles to target mineral buildup and biofilm precisely. Narrow brushes, pipe cleaners, or interdental picks help scrub tight crevices and rim jets.
For stubborn deposits, pumice sticks used wet can remove mineral scale carefully. Mechanical tools like manual syringes or low-speed rotary brushes aid in thorough scrubbing, while flow-cleaning tablets support maintenance.
Finally, disposable wipes assist quick surface cleanings between deep cleans. Equipping yourself with these must-have tools guarantees effective, targeted, and hygienic cleaning under the toilet rim.
Protective Gear Importance
Having the right cleaning tools helps you tackle grime under the toilet rim effectively, but protecting yourself during the process is just as important. Exposure to harsh chemicals, pathogens, and splashes demands proper personal protective equipment (PPE) to minimize health risks.
OSHA mandates that employers provide appropriate PPE at no cost to employees involved in such tasks. Using check valves in plumbing systems similarly prevents harmful backflow, which parallels the need for protective barriers in cleaning.
Here’s what you must prioritize:
- Chemical-resistant gloves and aprons: Shield your skin from corrosive cleaners and biohazards.
- Eye protection: Use sealed goggles or face shields to block splashes and aerosolized droplets.
- Closed-toe, non-slip footwear: Prevent slips and protect feet from spills or waste contact.
Always select PPE based on the cleaning task’s hazard level. Make certain of proper fit and follow maintenance or disposal protocols.
Choosing the Right Commercial Cleaners for Toilet Rims

When it comes to cleaning those pesky toilet rims, choose a cleaner that suits the type of buildup you’re dealing with. Are you facing mineral scale, organic matter, or stubborn stains? Identifying that will help you pick the right product.
Using a concentrated janitorial cleaner specifically designed for industrial and commercial use can enhance cleaning effectiveness on tough stains. Also, think about how you want to apply the cleaner.
Do you prefer a pointed-nozzle liquid that can reach those tight spots, or would you rather use a thick gel that clings for a longer time? Both options have their benefits, and matching the product’s chemistry and delivery method to your specific cleaning challenge will lead to better and safer results.
Additionally, wearing gloves and using proper safety and hygiene practices during cleaning helps protect against bacterial contamination and chemical exposure.
Effective Cleaner Ingredients
When selecting a commercial cleaner for toilet rims, you’ll want to focus on the active ingredients that target common issues like rust, limescale, and mineral deposits. Effective formulas often combine acids, surfactants, and mineral agents to maximize cleaning power.
- Acid-Based Ingredients: Hydrochloric acid (20-23%) efficiently dissolves rust and limescale. Citric acid (20%) offers a plant-based alternative for mineral deposits.
- Surfactants: Components like linear alkylbenzene sulphonate (3.5%) enhance soil removal beneath rims. Additionally, some formulations incorporate probiotic blends to provide active cleaning benefits and maintain long-term hygiene active cleaning.
- Mineral and Effervescent Agents: Sodium carbonate (8%) and sodium percarbonate (3%) support stain removal and cleaning action, often in tablet form.
Application Techniques
Although selecting the right commercial cleaner is crucial, applying it effectively under the toilet rim guarantees maximum cleaning performance. Use angled nozzles or gel formulations for targeted, lasting contact. Gel/gelatinous formulations are especially effective because they cling to surfaces longer, improving stain removal.
Apply cleaner at multiple points slowly to avoid splashing. Following the manufacturer’s instructions ensures optimal contact time and effectiveness. Follow label dwell times, combining routine short soaks with periodic deep treatments. Agitate with rim-curved brushes when allowed to dislodge soil before flushing.
Natural Remedies for a Chemical-Free Clean
Cleaning under the toilet rim calls for effective yet gentle solutions that avoid harsh chemicals. You can rely on natural remedies like vinegar and baking soda, which combine to break down mineral deposits and stains efficiently.
Effective and gentle cleaning under the toilet rim can be achieved with natural remedies like vinegar and baking soda.
- Pour 1 cup of white vinegar into the bowl and swish it around with a brush. Then add 1 cup of baking soda for a fizzing reaction that loosens grime. This method is especially effective against hard water mineral deposits that often cause persistent rings. Regular use of these natural ingredients also helps prevent the buildup of scale and bacterial growth.
- For stubborn buildup, place a vinegar-soaked paper towel under the rim overnight to dissolve residues. This prolonged contact time helps to break down organic matter and mineral deposits that contribute to odors and stains.
- Mix baking soda with Borax to form a paste, apply under the rim, and let it sit for 10-15 minutes before scrubbing to target bacteria and stains. Combining these natural cleaners leverages their antibacterial properties for a more thorough and eco-friendly clean.
These methods provide a thorough, chemical-free clean while preserving your toilet’s surface and the environment.
Step-by-Step Guide to Cleaning Under the Toilet Rim
Since effective cleaning under the toilet rim requires thorough preparation and the right tools, you should start by wearing protective gloves and ensuring proper ventilation. Flush the toilet to remove excess water, then remove loose debris with a paper towel or disinfecting wipe.
Apply a thickened, angled-neck toilet cleaner directly under the rim to coat the underside and rim jets. Allow the product to sit as directed. This helps to prevent limescale and grime build-up that can block the jets.
Next, scrub the rim’s underside and jets with an angled brush and a small toothbrush to dislodge biofilm and scale. Regular maintenance like this can help prevent toilet fill valve issues caused by mineral deposits.
Flush to rinse away loosened grime and residue. Finally, use a handheld mirror to inspect the rim jets. If stains or clogs persist, repeat spot treatment and scrubbing until the jets flow evenly and surfaces look clean.
Recommended Dwell Times for Best Results
When you want the cleaner to break down buildup and kill germs effectively, you need to allow the product to remain wet on the toilet rim for the full recommended dwell time. This guarantees active ingredients work properly and soils dissolve completely.
Using natural cleaning agents like vinegar and baking soda can also benefit from proper dwell time to maximize their foaming and cleaning action natural cleaning options. Follow these key dwell time guidelines:
- General cleaning requires 10–15 minutes of wet contact.
- Tough stains need up to 30 minutes to loosen grime fully.
- Disinfectants demand 10 minutes on hard surfaces for pathogen kill. Proper maintenance and regular inspections ensure cleaning tools remain effective and safe for use in damp environments maintenance and inspections.
Always read the manufacturer’s label for exact times and keep the surface wet throughout. If the cleaner dries early, reapply to maintain effectiveness. Skipping or shortening dwell time reduces germ reduction and soil breakdown, making your cleaning less effective.
How to Prevent Buildup and Maintain Cleanliness?
Allowing cleaners to work effectively under the toilet rim is only part of keeping it spotless. You should prevent mineral buildup by installing a water-softening system or using acid-based descalers periodically to dissolve scale.
Black mold can often appear under the rim, especially in more humid locations, so it is important to address both mold and mineral deposits for thorough cleanliness. Regular inspection and maintenance help detect early signs of mineral deposits and biofilm formation.
Weekly rinses with vinegar or diluted toilet descalers interrupt scale before it hardens. Clean or replace rim jets to maintain proper water flow, preventing stagnation and localized deposits.
Minimize organic residue by avoiding cleaners that leave films and using enzymatic products to break down biofilms. Flush after disposing of oily or solid waste and scrub under the rim weekly to remove early organic films.
Maintain toilet tank hygiene to avoid reintroducing contaminants. Finally, make certain flush components work well to promote effective rim jet function, maximizing scour and reducing buildup risks. This helps to prevent the accumulation that can trap buildup and mold.
Tips for Reaching Difficult Areas Under the Rim
Getting into the tight spaces under the toilet rim can be challenging, but using the right tools and techniques makes the task manageable. To effectively reach difficult areas, follow these tips:
- Use angled or curved brushes with tapered heads or flexible silicone mini-brushes to conform to rim contours and access under-lip surfaces. Ergonomic toilet cleaning tools with longer handles reduce bending and improve safety during cleaning.
- Apply gelled or enzymatic cleaners directly beneath the rim through squeeze bottles with angled nozzles. Allow 10–30 minutes dwell time to dissolve buildup.
- Employ wire or pipe cleaners to mechanically dislodge scale inside rim jets. Follow this with high-pressure water flushing or manual syringes to expel loosened debris.
Frequently Asked Questions
Can Cleaning Under the Toilet Rim Help Reduce Bathroom Odors?
Yes, cleaning under the toilet rim markedly reduces bathroom odors. You disrupt biofilm buildup, which traps odor-causing bacteria, by scrubbing with a stiff brush and applying disinfectants like hydrogen peroxide or enzyme cleaners.
Regular cleaning prevents urine crystals and bacteria from accumulating, which reactivate smells when moisture returns. Consistently maintaining this area, along with inspecting seals and improving ventilation, guarantees a fresher bathroom environment and effectively controls persistent odors.
How Often Should I Clean Under the Toilet Rim for Best Hygiene?
You should clean under the toilet rim at least once a week to keep germs at bay like a pro.
If you live in a busy household or have sensitive occupants, bump that up to 2–3 times weekly.
Use a dedicated angled brush and a good disinfectant to tackle biofilm and mineral buildup effectively.
Regular cleaning prevents odors, stains, and microbial reservoirs, ensuring your bathroom stays fresh and hygienic every day.
Are There Any Health Risks From Neglecting Toilet Rim Cleaning?
Yes, neglecting toilet rim cleaning poses health risks. Harmful bacteria like Salmonella and viruses such as norovirus can build up under the rim, protected by biofilms. These microbes can spread via touch or flush aerosols, increasing infection risk. You’re also vulnerable to mold-related respiratory and skin issues.
Regular, thorough cleaning reduces this microbial load, lowering your chances of gastrointestinal infections and other health problems linked to contaminated restroom surfaces.
Can Toilet Rim Cleaners Damage Plumbing or Septic Systems?
Think of harsh toilet rim cleaners as tiny saboteurs inside your plumbing and septic system. They can corrode rubber seals, degrade metal parts, and block rim jets. This reduces flush efficiency.
In septic tanks, these chemicals harm beneficial bacteria essential for waste breakdown. This can risk backups and costly repairs. To protect your plumbing and septic health, avoid bleach-based or continuous-release tablets. Instead, choose gentle, septic-safe cleaners and maintain your toilet regularly.
Is It Safe to Use Bleach Products Under the Toilet Rim?
Yes, you can safely use bleach products under the toilet rim if you follow instructions carefully.
Always apply bleach in a well-ventilated space, avoid mixing it with acidic or ammonia-based cleaners, and keep children and pets away during the dwell time.
Use gloves to protect your skin, and rinse thoroughly after the recommended contact time.
Avoid frequent use to prevent damage to plumbing components and environmental harm.
Enjoy a Fresher Bathroom with Proper Toilet Rim Care
Now that you know the best way to clean under the toilet rim, why settle for anything less than a truly fresh bathroom? With the right tools, cleaners, and techniques, you can easily tackle buildup and keep your toilet hygienic.
Remember to follow recommended dwell times and reach those tricky spots for a thorough clean. Consistent maintenance not only prevents grime but also makes certain your bathroom stays inviting and sanitary every day.

