Last Updated on May 16, 2023
Float valves are devices that control liquid flow or gas flow by opening, closing, or partially blocking passageways; after all, they work off buoyancy. They are used in various applications, including water tanks, toilets, and irrigation systems.
Typically these valves are mounted above the water line but can you install a float valve underwater? While most float valves are installed above the water line, installing a float valve underwater is possible.
If you’re going to install a float valve underwater, make sure you get one made for submersible use. Keep reading to discover how to install and maintain a float valve underwater.
How Can You Install a Float Valve Underwater?

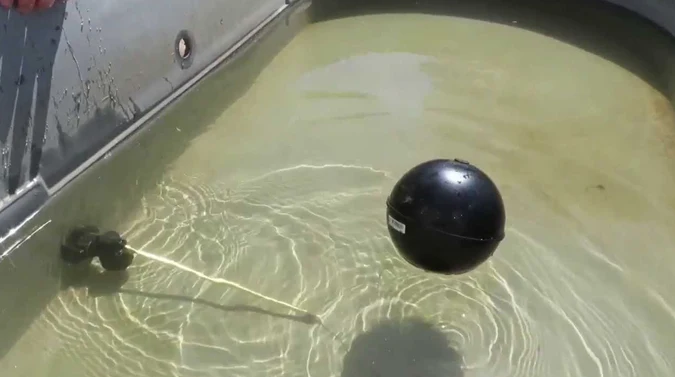
Float valves are usually installed above water, but you can install them underwater too. This can be useful in applications where the water level needs to be constantly monitored, such as in an aquarium or fishpond.
The following steps outline how to install a float valve underwater:
Step 01. Determine the Valve Location
The first step when installing an underwater float-operated valve is to determine the location of the valve. The valve must be installed at a point where the water level is higher than the point where the discharge pipe enters the water.
This will ensure that the water can flow freely into the discharge pipe and that the floats can operate correctly. The ideal location for the valve is near the edge of the pool, where it can be easily reached by divers or other pool users.
Once the valve location has been determined, the next step is to mark the spot on the pool deck or wall. This will ensure that the hole for the valve is drilled in the correct spot.
Step 02. Create a Hole in the Marked Position
After marking the location, the next step is to drill a hole through the deck or wall. The hole size will depend on the valve size, but it should be large enough to allow water to flow freely. This step is essential to ensure that the float valve functions correctly.
There are several ways to create this hole, but the most common method is to use a drill to create a pilot hole in the center of the mark. Enlarge the hole to the correct size using a spade bit or significant drill bit. If done correctly, this will ensure that the float valve is installed correctly and can function properly.
Step 03. Insert the Water Inlet Pipe
The water inlet pressure pipe is one of an underwater float valve’s most important installation considerations. The pipe must be installed so that the water level is below the bottom of the tank but not so low that it constantly triggers the valve.
Also, the pipe should be directed away from any obstacles that could interfere with the float’s movement. Depending on the depth of the installation, the water inlet pipe should reach the top of the pool. The water inlet pipe can be made of PVC or metal, and it is essential to ensure that it is adequately sealed to prevent leaks.
Step 04. Attach the Underwater Float Valve
Two methods can be used to do this. The first method is to use coupling. This fitting has two screws that can be tightened to hold the pipe. The second method is to use a threaded adapter. This is a fitting that has threads on the inside and outside.
To attach the valve to the pipe using a coupling, align the holes in the coupling with the holes in the valve. Then, insert screws into the holes and tighten them until they are snug.
The threaded adapter must be screwed onto the threads on the valve for the valve to be attached to the pipe. Then, screw the pipe into the threads on the adapter.
These are the basic steps for installing an underwater float valve. But, there are a few additional considerations that should be made. The float must be adjusted to trigger the valve at the desired water level. Also, the installation of the discharge pipe must be leak-proof.
How Does an Underwater Tank Float Valve Work?

A water float valve is a device that regulates the flow of water in a tank. The valve is typically controlled by a float, which is attached to the valve stem.
As the float rises and falls with the water level in the tank, it opens and closes the valve to maintain a constant water level. While they vary in size and design, all float valves share the same basic principle of operation.
The floating valve is connected to a rod or arm that extends into the tank. A weighted object, such as ballast, is connected to the other end of the rod or arm. The ballast helps to keep the floating valve in place so that it can properly regulate the flow of liquid into and out of the tank.
When the liquid level in the tank decreases, the ballast becomes lighter, allowing the floating valve to rise. This, in turn, opens up the valve and allows more water to flow into the tank.
Similarly, when the water level in the tank increases, the ballast becomes heavier and pulls the floating valve down. This shuts the water flow into the tank and prevents it from overflowing.
Why Install a Float Valve Underwater?

Many homes have a sump pump installed in the basement to help remove accumulated water. The sump pump is usually connected to a float switch, which turns the pump on and off as needed. The basement can quickly flood if the power goes out or the pump fails.
To help prevent this, some homeowners install a float valve underwater. A float valve is similar to a toilet fill valve, which uses a float ball to open and close a valve in response to changes in water level.
When the water level rises, the float ball rises and eventually activates the valve, allowing water to flow into a discharge pipe. There are a few reasons you might need or want to install a float valve underwater:
- One common reason is when your tank’s water level fluctuates often. If the water level in your tank changes frequently, an above-ground float valve might not be able to keep up. In this case, an underwater float valve can help regulate your tank’s water level.
- Another reason for installing a float mechanism underwater is if your discharge pipe is located below the waterline in your tank. This can happen if the discharge pipe is connected to a drain lower than your tank’s waterline. Float valves can be installed underwater to prevent water from clogging your discharge pipe.
- Also, a float valve can help to prevent evaporation by keeping the water level constant. This is especially helpful in hot, dry climates. Plus, an underwater float valve can be less likely to become clogged with debris.
- An underwater float valve can help to reduce noise by keeping the water level constant. When the water level in a tank fluctuates, it can cause the pump to make noises as it turns on and off. Also, an underwater float valve can provide extra protection against flooding.
Where Should Underwater Float Valves be Installed?

You need to pick the right place for your float valve when installing it. Underwater float valves need to be mounted correctly to work properly. The most common mistake is installing the valve too close to the inlet or outlet, which can result in turbulence and reduced flow rates.
A proper height is also essential for the installation of the valve. If it is installed too high, there will not be enough water pressure to close the valve properly. The valve may not open fully if installed too low, leading to sediment buildup and clogging.
The ideal location for an underwater float valve is in a comprehensive, straight section of pipe where there is minimal turbulence. The float valve should be installed near the bottom of the tank, where it can easily detect changes in water level.
Depending on the specific design of the float valve, it may also need to be installed higher up in the tank to prevent water from siphoning. Make sure you read the instructions on the float valve to make sure it’s installed right.
How Much Pressure Can a Float Valve Hold?
Float valves are essential in water tanks because they help regulate water flow, ensuring that the user always has a steady water supply. Without a float valve, the shower would either not have enough water pressure or would waste water by constantly running. But how much pressure can it handle?
The amount of pressure a float valve can hold depends on the model and design of the valve. But, most float valves are designed to withstand various pressures, from 29.0 to 145.0 psi. And some commercial-grade float valves can even go up to 200.0 psi.
How Do I Know If My Underwater Float Valve is Working Properly?
The average home or business uses an underwater float check valve to help control the water in their swimming pool, spa, or hot tub. While these valves are designed to be durable and long-lasting, they can occasionally become damaged or stopped up, which can cause problems with the overall operation of the pool.
Most people think a float valve is fully operational as long as the handle moves up and down smoothly. But, it is essential to check the underwater float valve periodically to ensure it works correctly.
The best way to do this is to place a bucket under the float valve and open the handle. If water flows freely into the bucket, the float valve works correctly. But, if water does not flow or flows slowly, the valve may have a problem.
Also, it is vital to check for leaks around the base of the valve. If any leaks are found, they should be repaired promptly to prevent further damage. By periodically checking the underwater float valve, you can ensure that it will continue to work correctly for longer.


