
To shim your toilet, first turn off the water and flush to drain it. Gently rock the toilet to find instability and use a level to spot uneven areas.
Loosen closet bolts slightly, then insert firm plastic or rubber shims under the base’s low spots until stable. Trim excess shim material flush to the base, retighten bolts evenly without overtightening, and finish with a silicone caulk bead for moisture protection.
Keep going for detailed steps and pro tips on secure toilet shimming.
Key Takeaways
- Turn off water supply, flush toilet, and remove bolt caps to expose closet bolts before starting the shimming process.
- Identify wobble spots using a level and gently rock the toilet to find uneven gaps between the base and floor.
- Insert plastic or rubber shims incrementally under low points without lifting the toilet excessively for stable, even support.
- Loosen closet bolts evenly with an adjustable wrench during shimming to avoid stressing or shifting the wax ring.
- Trim excess shim material flush with the base, then tighten bolts gradually and apply a silicone caulk bead around the base.
Why Toilet Shimming Prevents Toilet Rocking?

When you shim a toilet, you stabilize it by filling gaps caused by uneven floors or unlevel flanges, which directly prevents rocking.
This reduces stress on the porcelain bowl, minimizing the risk of cracks and damage over time.
By eliminating movement, shimming also prevents closet bolts from loosening, which can lead to leaks or instability.
Before final tightening, make certain the toilet sits firmly because overtightening on an unstable base can cause cracks.
Shims act as precise, non-compressible supports that level the toilet without compromising the wax seal.
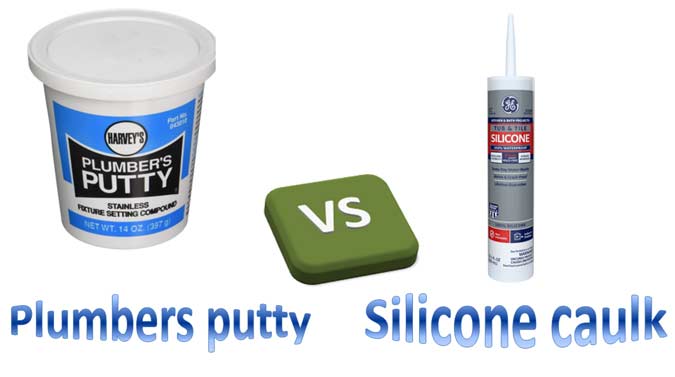
After shimming, a silicone caulk bead often seals the base to enhance moisture resistance and improve finish.
Proper shimming is an essential fine adjustment step following checks for loose bolts and floor irregularities to ensure long-lasting stability.
Regular maintenance and inspections help ensure a leak-free toilet, preventing costly repairs and water waste.
Tools and Materials for Toilet Shimming
Gather the right tools and materials before you begin shimming your toilet to guarantee a smooth and effective process. You’ll need durable items that provide stability without compressing over time.
Ensure a smooth toilet shimming process by using durable, stable materials that won’t compress over time.
Start with plastic or rubber shims, which offer a firm, long-lasting fit. Use a level to pinpoint uneven areas accurately. An adjustable wrench is essential for snugging closet bolts once the toilet is stabilized.
Key tools and materials include:
- Plastic or rubber shims for precise support
- A level to identify low points under the toilet
- An adjustable wrench to tighten bolts evenly
Having these tools ready guarantees you can correctly position shims, achieve a level toilet base, and secure bolts without risking damage or instability. Choosing the right gasket is also crucial as it helps prevent leaks and ensures a secure fit during installation.
How to Prepare Your Toilet for Shimming?
Before shimming your toilet, turn off the water supply at the shutoff valve located behind the unit to prevent any leaks or spills.
Next, flush the toilet to drain as much water as possible from the tank and bowl. This reduces weight and moisture during the process.
Remove the decorative bolt caps to expose the closet bolts securing the toilet base.
Carefully rock the toilet side to side and front to back to identify any instability.
Use a level across the toilet base or seat to pinpoint where it tilts or sits unevenly.
These steps prepare the fixture for accurate shim placement without disturbing the wax ring seal or causing damage.
Proper preparation guarantees effective stabilization and simplifies the shimming process.
Before starting, it’s also important to turn off the water supply to ensure safety and prevent leaks during any adjustments.
Finding the Right Spot to Shim Your Toilet
After you’ve identified the instability and confirmed which side of the toilet sits low using a level, focus on locating the exact gap where the bowl lifts off the floor. This gap is where your shims will provide support.
Carefully rock the toilet to pinpoint the precise spot causing the wobble. Usually, it’s near the base edges or behind the closet bolts. Avoid guessing; accurate placement guarantees stability without lifting the bowl excessively.
Gently rock the toilet to find the exact wobble spot, usually near base edges or closet bolts.
Key points to find the right shim spot:
- Identify the side with the largest gap between the bowl base and floor.
- Check near corners and bolt locations where pressure concentrates.
- Confirm the spot by gently pressing and observing bowl movement.
Once located, you’re ready to insert shims to level and stabilize the toilet effectively. Make sure to follow proper installation steps and apply even pressure when securing the toilet to prevent leaks and damage.
Loosening Closet Bolts Without Damaging Wax
To shim your toilet effectively, you’ll want to loosen the closet bolts just the right amount. The goal here is to allow for a little movement without compromising that all-important wax seal. Grab an adjustable wrench and gently back off the nuts. Just be careful—avoid any sudden or excessive force, as that could damage the wax ring.
Keeping the integrity of the wax seal is crucial. It ensures a proper fit and helps prevent leaks while you make those adjustments. So, take your time and be gentle! For best results, also inspect the condition of the closet bolts to avoid wobbling or instability after shimming.
Proper Bolt Loosening Technique
Loosen the closet bolts just enough to allow slight movement of the toilet bowl without breaking the wax seal underneath. This careful approach prevents wax damage and maintains the toilet’s water-tight connection while giving you room to insert shims.
Follow these key steps for proper bolt loosening:
Use an adjustable wrench: Turn each bolt counterclockwise slowly and evenly to avoid sudden shifts.
Loosen incrementally: Back off the bolts just enough so the bowl can rock gently without detaching from the flange.
Check bowl movement: After loosening, gently rock the toilet side to side and front to back to confirm the seal remains intact.
This method makes certain you keep the wax ring functional while preparing the toilet for stable shimming. Always ensure you have the proper tools and materials ready before beginning any repair work.
Protecting Wax Seal
Maintaining the integrity of the wax seal requires careful handling when loosening closet bolts.
Start by slightly loosening the bolts just enough to allow slight bowl movement without breaking the seal.
Use an adjustable wrench and turn bolts incrementally, alternating sides evenly to avoid stressing or shifting the wax ring.
Avoid fully removing bolts unless you plan to replace the wax ring.
If bolts resist, apply penetrating oil and wait to ease loosening without excessive force.
Keep the toilet bowl stable during this step to prevent seal damage.
Remember, excessive rocking or prying risks breaking the wax seal, leading to leaks and odors.
Using the correct tools, such as an adjustable wrench, helps prevent damage during this process.
Step-by-Step Guide to Sliding and Adjusting Shims
Start by gently sliding the shims under the low side of the toilet bowl.
Make sure you don’t force them in too quickly. Gradually push them in until the bowl stabilizes without lifting it excessively, which could break the wax seal.
Check the toilet’s level frequently as you adjust.
Focus on these key steps:
Insert shims at the identified low points, usually near the back or sides.
Slide shims incrementally to prevent over-lifting or uneven pressure.
Confirm stability by gently rocking the toilet and using a level.
Once the toilet feels firm and level, stop sliding the shims.
Avoid forcing or stacking shims excessively, as this risks damaging the bowl or seal.
Proper adjustment makes for a stable toilet ready for bolt tightening.
If you encounter persistent instability, it may be due to worn or damaged components affecting the toilet’s seating.
Trimming and Finishing Toilet Shims Cleanly
Trimming excess toilet shims guarantees a clean, professional finish and prevents interference with the toilet’s base or floor.
Use a sharp utility knife or heavy-duty scissors to carefully cut off any protruding shim material flush with the base.
Trim protruding shims carefully with a sharp knife or scissors for a seamless, flush finish.
Avoid forcing the blade under the toilet, which may damage flooring or the wax seal.
Trim in small increments to maintain the precise support level you established.
After trimming, check the toilet’s stability again to confirm no movement resulted from cutting.
Clean any debris or dust from the area to make certain a smooth surface for caulking.
Finally, wipe the base and floor dry, preparing for a neat silicone bead if you plan to seal the toilet’s perimeter.
This clean finish improves aesthetics and moisture resistance.
In areas with specific building regulations, it is important to ensure your installation complies with local codes to avoid future issues.
Tightening Closet Bolts After Shimming
Once the shims are trimmed flush with the toilet base and you’ve confirmed the bowl sits firmly without rocking, it’s time to tighten the closet bolts.
Use an adjustable wrench to snug the bolts gradually, alternating sides to distribute pressure evenly and prevent cracking the porcelain.
Avoid overtightening; the goal is firm stability, not stress on the toilet base.
Follow these key steps:
Tighten bolts incrementally, switching sides with each turn.
Stop when the toilet no longer shifts but don’t force bolts beyond snug.
Recheck for any movement after tightening to guarantee stability.
This method secures the bowl without compromising the wax ring seal or the porcelain integrity, maintaining a stable, long-lasting installation.
Adding a sound-deadening pad under the toilet can further reduce vibrations and noise for a quieter bathroom experience.
Applying Silicone Caulk for a Moisture-Proof Seal
Once your toilet is stable and those bolts are nice and snug, it’s time to apply some silicone caulk around the base. This will help create a moisture-proof seal. Just remember to keep a steady hand while you’re applying it, so you get even coverage all the way around.
If you notice any excess caulk, don’t worry—just grab a damp rag or paper towel and wipe it away right away. It’s easier to clean up while it’s still fresh!
And finally, be sure to let the caulk cure fully according to the manufacturer’s instructions. This step is really important to ensure you have a reliable seal before you start using the toilet.
Caulk Application Tips
You should always apply silicone caulk carefully around the toilet base to create a moisture-proof seal that prevents water damage and mold growth.
Start by guaranteeing the toilet is stable and the surface clean and dry.
Cut the caulk tube nozzle at a 45-degree angle for precise control.
Apply a continuous, even bead of caulk along the base, avoiding gaps or breaks.
Smooth the bead with a caulk tool or a wet finger to guarantee adhesion and a neat finish.
Remember to leave a small gap at the back if local codes or installation guidelines require it for ventilation.
Key tips:
Use 100% silicone caulk for flexibility and waterproofing.
Apply steady pressure to maintain bead consistency.
Clean excess caulk immediately with a damp cloth to avoid residue buildup.
Curing and Cleanup
Allow the silicone caulk to cure fully before using the toilet to guarantee a durable, moisture-proof seal. This curing process usually takes 24 hours but varies by product. During this time, avoid disturbing the seal to prevent gaps or leaks.
After applying caulk, clean excess immediately with a damp rag for neatness and better adhesion.
| Step | Details |
|---|---|
| Apply | Use a steady bead around base |
| Smooth | Tool or finger for even finish |
| Clean | Wipe excess before curing |
| Cure time | Typically 24 hours |
| Final check | Inspect seal for continuity |
Proper curing and cleanup ensure a long-lasting, moisture-resistant finish that protects your floor and toilet base.
Common Toilet Shimming Mistakes and How to Avoid Them
Although shimming a toilet may seem straightforward, several common mistakes can undermine the stability and longevity of the installation. You need to avoid these pitfalls to assure a secure fit and prevent damage.
Forcing shims in too aggressively can lift the toilet excessively, compromising the wax ring seal and causing leaks.
Over-tightening closet bolts risks cracking the porcelain. Tighten evenly and stop once the toilet is stable.
Using improper materials like wood or cardboard instead of plastic or rubber shims allows compression and wobbling to return.
Always use a level to confirm stability before final tightening. If rocking persists, inspect the flange, floor, or wax ring rather than relying on more shim layers.
This approach guarantees a durable, stable toilet installation.
Frequently Asked Questions
How Often Should Toilet Shims Be Inspected or Replaced?
You should inspect toilet shims annually or whenever you notice rocking or instability.
Replace shims if they’ve compressed, cracked, or shifted, as worn shims can cause leaks or damage.
Also, check after any toilet maintenance involving removal or adjustment.
Regular inspections help maintain stability and protect the wax ring seal.
Don’t wait for obvious movement; proactive checks prevent costly repairs and ensure your toilet stays securely in place.
Can Toilet Shims Be Reused if the Toilet Is Removed?
You generally shouldn’t reuse toilet shims after removal because about 30% of shims deform slightly under pressure, reducing their effectiveness.
Since shims need to provide firm, non-compressible support, worn or bent ones can cause instability or rocking.
It’s best to replace them with new plastic or rubber shims to guarantee a precise, durable fit.
This helps maintain toilet stability and prevents potential porcelain stress or bolt loosening over time.
Are There Eco-Friendly Options for Toilet Shims?
Yes, you can find eco-friendly toilet shims made from sustainable materials like recycled rubber, bamboo fiber composites, or biodegradable plastics.
These options provide durable, non-compressing support while reducing environmental impact.
When selecting, verify that the material resists moisture and maintains stability over time.
Using eco-friendly shims helps you minimize waste and chemical use without compromising the toilet’s stability or longevity.
What Should I Do if Shimming Doesn’T Stop the Toilet From Rocking?
If shimming doesn’t stop the toilet from rocking, you should inspect the flange and floor for damage or unevenness.
Check if the wax ring is compressed or deteriorated, causing instability.
Tighten the closet bolts carefully, avoiding overtightening.
If the floor is severely uneven, consider repairing or reinforcing it.
In some cases, replacing the wax ring or adjusting the flange height may be necessary to achieve a stable, level toilet.
Can Shimming Affect the Toilet’s Flushing Performance?
Think of shimming as the foundation’s subtle whisper, not a shout. It won’t directly affect your toilet’s flushing performance if done properly.
However, if you force shims too aggressively, you risk breaking the wax seal, causing leaks or poor suction during flushing.
Final Checks After You Shim Your Toilet
Now that you’ve mastered each step, from loosening bolts without damage to sealing with silicone, your toilet will sit rock-solid and leak-free.
But don’t rush; missing even one detail can lead to wobbles or water damage. Double-check your shims, tighten bolts carefully, and finish with caulk.
Ready to enjoy a sturdy, stable toilet? The real test is just ahead. Make sure you’re fully prepared before you flush.