To clean your silicone pipe effectively, start by carefully disassembling all parts, including the glass bowl and metal inserts. Rinse under warm water to flush loose debris, then soak silicone components in 70–91% isopropyl alcohol for up to an hour, agitating with salt for abrasion.
Use freezing and soft scrubbing to remove stubborn resin, especially in tight areas. After thorough rinsing, air dry completely before reassembly to prevent moisture damage. Discover advanced tips to maintain longevity and performance.
Key Takeaways
- Disassemble the pipe fully, removing glass bowls, metal inserts, and O-rings, while wearing gloves and safety goggles.
- Rinse all parts under warm running water to flush out loose debris and residue before soaking.
- Soak silicone parts in 70–91% isopropyl alcohol with coarse salt for 30–60 minutes, then scrub gently with a soft brush.
- For heavy buildup or odors, use an overnight soak in a warm vinegar-water solution with baking soda, followed by thorough rinsing.
- Avoid boiling water, strong solvents, and ultrasonic cleaners to prevent silicone damage; always air dry completely before reassembly.
Disassembling Your Silicone Pipe for Cleaning
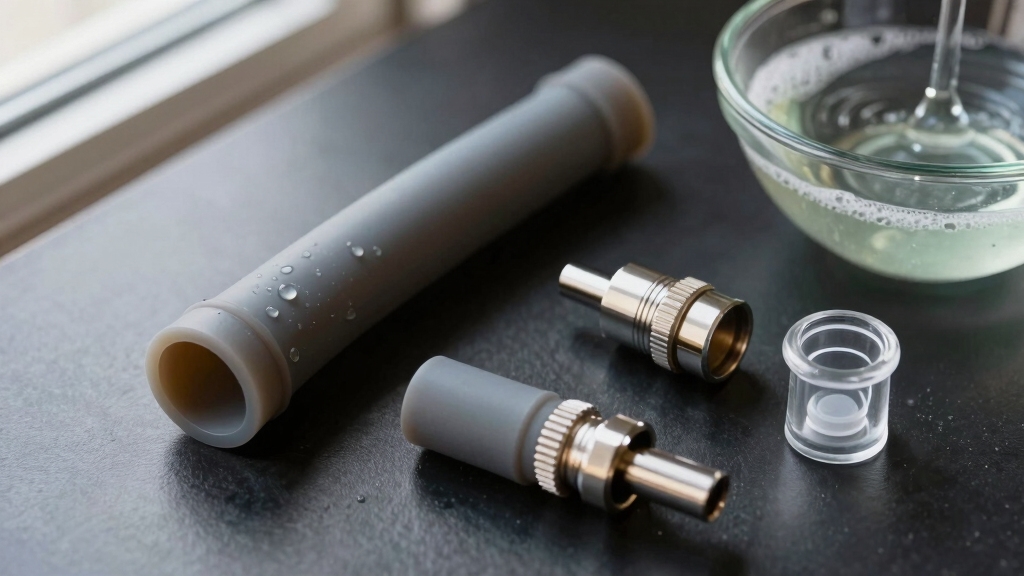
Before you begin cleaning your silicone pipe, carefully identify and list all detachable components, such as the silicone body, glass bowl, metal screen or insert, O-rings, and downstem, based on your model’s design.
Start by identifying all detachable parts like the silicone body, glass bowl, and metal inserts before cleaning.
Consult manufacturer’s instructions to guarantee damage prevention or voiding warranties. Gather tools like soft-bristle brushes, pipe cleaners, and microfiber cloths. Wearing safety goggles and gloves is recommended to protect your hands and eyes during disassembly.
To separate parts, apply gentle twisting and pulling at seams; warm the silicone briefly with warm water if joints resist. Remove glass bowls and metal inserts first to avoid damage. Use tweezers or pipe cleaners for extracting small parts like screens and springs, and inspect O-rings for wear.
Store small components in labeled dishes to avoid misplacement. Rinse parts under warm water before proceeding to help prevent resin buildup. Lay parts out sequentially or photograph them to guarantee accurate reassembly.
Removing Loose Debris Effectively
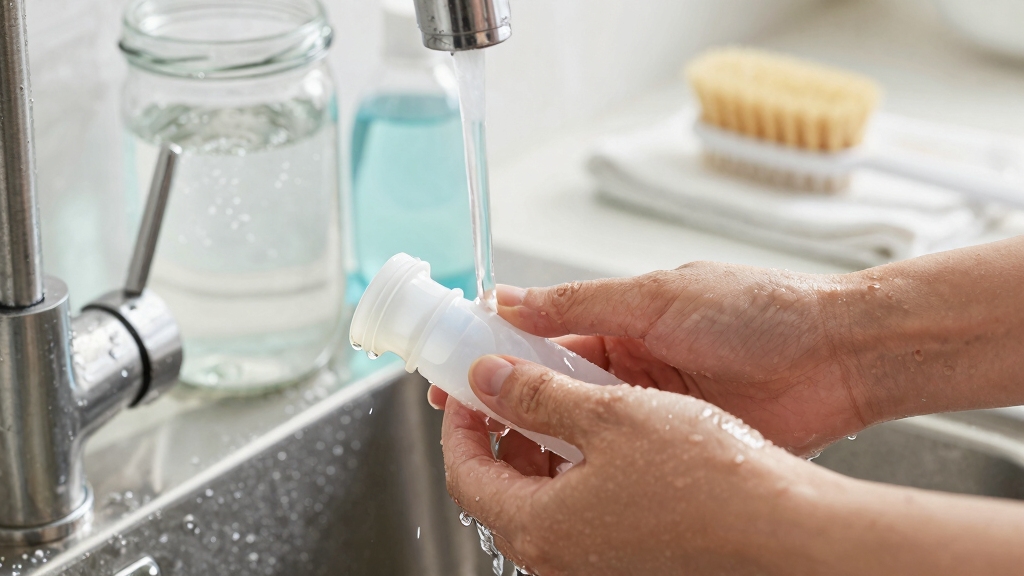
Start by thoroughly rinsing your silicone pipe components under warm running water to flush out loose ash and particulate debris. Using boiling water can help soften and loosen stubborn residues for easier cleaning.
Direct the flow through every opening, the bowl, carb, and mouthpiece, to push out trapped particles. Repeat short flushes of 10–20 seconds until the water runs clear, indicating most debris is removed.
Use a squeeze bottle or turkey baster to force water through narrow passages for enhanced mechanical flushing. Next, gently tap parts on a soft surface to dislodge residual ash without damaging silicone.
Invert and shake components within a covered container to avoid losing small pieces. Employ soft nylon brushes, flexible pipe cleaners, or silicone-safe picks to sweep or tease out remaining particles.
Apply light pressure and rotate tools to lift debris without scratching or gouging the material. Regularly cleaning your silicone pipe like this not only removes debris but also prolongs lifespan by preventing buildup that reduces effectiveness.
Applying the Freezing Technique to Loosen Residue
Once you’ve cleared out all loose debris and dried your silicone pipe thoroughly, you can move on to applying the freezing technique to loosen stubborn residue.
First, place the pipe in an airtight bag to minimize frost buildup. Then position it flat in your freezer at about −18 °C (0 °F). Proper handling is important as chemical leaching can occur if residues are left too long on silicone surfaces.
Freeze for 30–60 minutes for light residue or 4–6 hours for heavier buildup. After freezing, flex and gently squeeze the silicone to fracture brittle resin, listening for cracking sounds. This method works best on very dirty pipes or those not cleaned for a long time.
Tap the pipe softly on a padded surface to dislodge chunks. Then use a soft plastic tool to chip away remaining residue. Avoid metal tools to protect silicone integrity. Finally, rinse immediately with warm water to flush loose particles before thawing causes stickiness. Repeat only when necessary to prevent material stress.
Soaking Silicone Parts in Isopropyl Alcohol
Hey there! So, if you’re looking to clean those disassembled silicone parts, here’s a little tip: start by soaking them in 70-91% isopropyl alcohol. Aim for at least 30 minutes, and don’t forget to give them a little shake now and then. This helps break down any residue more effectively.
Disassembling the pipe first is crucial because it allows you to access all the nooks and crevices for a more thorough clean disassemble for access. Always prioritize safety precautions when handling cleaning agents.
Now, if you’re dealing with some heavier buildup, you might want to extend that soak time to about 1-2 hours, or even overnight if you really need to tackle it. Trust me, it can make a big difference!
Once you’ve soaked them, grab a brush and scrub away any remaining deposits. After that, make sure to rinse everything thoroughly with warm water. Finally, let all the parts air dry completely before you put them back together. Happy cleaning!
Soaking Duration Tips
Although isopropyl alcohol effectively breaks down residue on silicone pipes, you should carefully control soaking duration to prevent material damage. Regular maintenance using mild, non-corrosive agents helps preserve the beneficial bacteria that can be affected by harsh chemicals.
Soaking beyond 60 minutes risks surface tackiness and silicone degradation. Use 70% isopropyl alcohol for better penetration and slower evaporation. Limit soak time to 30-60 minutes for routine cleaning or 1-2 hours for deep cleaning.
Avoid stronger concentrations and repeated long soaks to maintain pipe integrity. For extreme odor situations, an overnight soak in white vinegar + baking soda can be used as an alternative or follow-up treatment.
| Soaking Time | Effect |
|---|---|
| 10-15 min | Safe alternative with hot soapy water |
| 30 min | Minimum for stubborn residue |
| 30-60 min | Max for 70% isopropyl alcohol soak |
| 1-2 hours | Deep cleaning with 70% concentration |
| >60 min | Causes tacky surface, material damage |
Post-Soak Cleaning
Controlling the soaking duration in isopropyl alcohol sets the stage for effective post-soak cleaning of your silicone pipe. After soaking in 70%-91% isopropyl alcohol within a sealed Ziploc bag, you’ll want to agitate gently to dislodge stubborn residue.
Adding coarse salt enhances abrasion without harming silicone integrity. However, it is important to avoid IPA and coarse salt on silicone to prevent damage to the material avoid damage.
Once soaking concludes, focus on targeted scrubbing with a soft-bristled brush or cotton swab for hard-to-reach areas. Then rinse thoroughly with warm water to eliminate all alcohol and salt traces, preventing any silicone drying or damage.
Submerge all parts fully in resealable bag to guarantee complete alcohol coverage. Shake gently for a few minutes with salt for effective residue removal.
Scrub residual buildup with a soft-bristled brush before rinsing under warm running water. Regular maintenance, including lubrication with silicone spray, can help keep the pipe components functioning smoothly and prevent sticking.
Using Soap and Warm Water for Regular Maintenance
Regularly soaking your silicone pipe in mild soapy warm water effectively loosens fresh resin buildup and maintains peak performance. This method also prevents residue build-up, which is crucial for maintaining the pipe’s functionality and hygiene.
Use a few drops of mild dish soap in 50–70 °C (122–158 °F) water, avoiding boiling temperatures to prevent silicone deformation. Submerge the pipe completely, agitating the solution periodically during a 10–30 minute soak, adjusting time based on residue severity.
After soaking, mechanically scrub with a soft-bristled brush or pipe cleaner targeting joints and crevices. Rinse thoroughly under warm running water until no soap film remains, repeating rinses as needed to prevent off-flavors. Squeeze hollow parts gently to flush trapped debris.
Air-dry fully before storage or reuse, ensuring internal passages dry completely to avoid mold. For stubborn buildup, using a gentle acid solution can be effective, similar to how white vinegar dissolves mineral deposits in other cleaning applications.
Preparing a Vinegar-Based Cleaning Solution
To kick things off, mix equal parts of white vinegar and water—a 1:1 ratio works perfectly for general cleaning. If you’ve got some tough residue to tackle, feel free to bump up the vinegar concentration a bit. Just remember, it’s all about finding that balance!
It’s always a good idea to test on a small area first to check the effectiveness of your solution before fully submerging your pipe. Vinegar is effective at killing many household mold spores and preventing regrowth on non-porous surfaces.
Now, when it comes to soaking times, you’ll want to gauge that based on how much buildup you’re dealing with. For lighter grime, 15 minutes might do the trick, but if things are a bit more stubborn, you could go all the way up to 60 minutes.
Just keep an eye on the temperature of your solution; it should be warm but not hot, especially if you’re cleaning silicone parts. Wearing gloves during cleaning helps protect your skin when using acidic solutions like vinegar.
Make sure to prepare enough of the solution to fully submerge whatever you’re cleaning. And don’t forget the rinse! After soaking, it’s essential to rinse everything thoroughly to get rid of any lingering acid residues. Happy cleaning!
Ingredients and Mixture
To prepare an effective vinegar-based cleaning solution for your silicone pipe, you’ll need to combine specific ingredients in precise ratios to maximize cleaning power while preserving material integrity.
Start by mixing equal parts white distilled vinegar (5% acetic acid) and warm water to guarantee safe acidity and peak wetting. Add a few drops of mild dish soap to emulsify oils without excessive foaming. This mixture helps reduce mineral deposits that can harbor bacteria and cause odors.
For enhanced cleaning, incorporate either 1–2 tablespoons baking soda for a fizzing reaction that lifts residue or 1–2 tablespoons coarse salt to provide gentle abrasive action.
Include dish soap to reduce surface tension and improve rinse efficiency. Always add baking soda slowly to avoid vigorous fizzing. Mix vinegar and water before adding soap to prevent premature foaming. Use warm—not boiling—water to protect silicone integrity.
Regular use of this alcohol-free cleaning approach helps preserve the pipe’s material integrity and ensures a healthier smoking environment.
Soaking Time Guidelines
Although vinegar-based solutions are gentler than strong solvents, you’ll need to soak your silicone pipe for at least one hour to effectively loosen mild to moderate residue.
Combine white vinegar, warm water, and a few drops of dish soap to create an effective cleaning solution. Heat accelerates the process, so use warm—not boiling—liquid to reduce soak time without risking silicone damage. Selecting the proper temperature ensures optimal curing and prevents material degradation.
For heavy buildup, extend soaking up to overnight, but avoid prolonged exposure to prevent material degradation. Regular maintenance also helps prevent premature device failure by keeping residue from building up too severely. After soaking, rinse thoroughly and follow with gentle scrubbing if necessary.
Avoid abrupt temperature changes; allow gradual cooling to protect seals and bonded parts. Regular maintenance soaks of 30 minutes suffice for light cleaning, but deeper cleans require longer vinegar soaks for ideal residue dissolution without harsh chemical risks.
Scrubbing Hard-to-Reach Areas Thoroughly
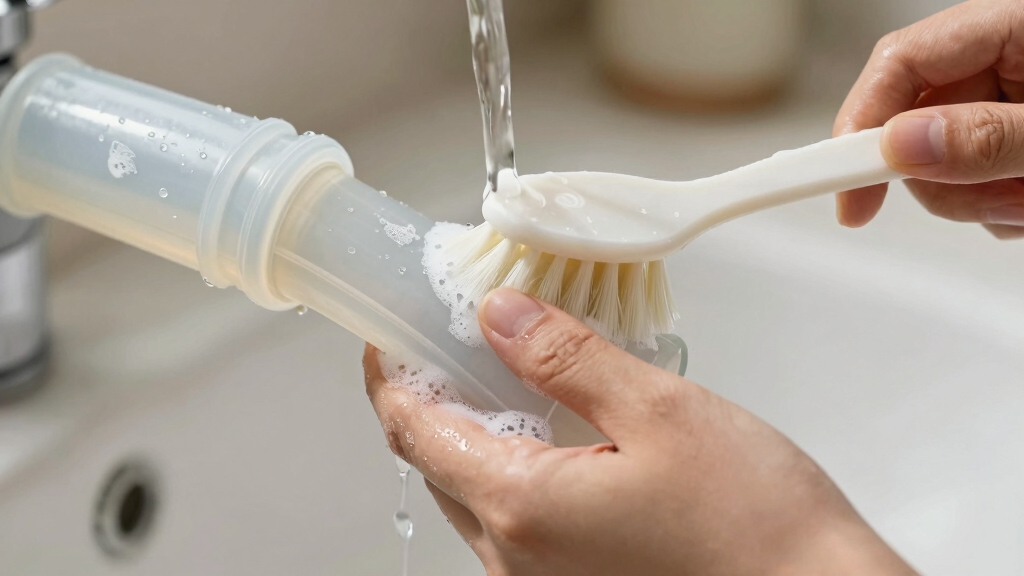
When you tackle scrubbing hard-to-reach areas of a silicone pipe, you’ll need specialized tools like soft-bristle brushes and pipe cleaners designed to navigate narrow crevices without damaging the material.
Start by gently scrubbing with soft-bristle brushes soaked in warm, soapy water to loosen resin without scratching. Use bendable pipe cleaners dipped in rubbing alcohol to reach tight corners and gaps where brushes can’t reach, applying a careful back-and-forth motion.
Regular cleaning is essential as resin, ash, and old bong water create foul taste that masks delicate terpenes. Finally, cotton swabs help push out residue from tiny crevices after soaking and tapping hardened particles.
Soft-bristle brushes glide over surfaces without abrasion. Pipe cleaners bend to access intricate internal pathways. Cotton swabs extract stubborn residue from confined spots. This method guarantees thorough, precise cleaning while preserving the silicone’s integrity.
Rinsing Techniques to Ensure Complete Cleanliness
Before you start rinsing, it’s a good idea to disassemble all the components. This way, you can really expose every surface and passage for a thorough clean. Have you thought about the different rinsing methods? You might want to compare options like a steady tap flow, syringe flushing, or even thermal shock rinses.
Each method has its perks, and the best choice really depends on your pipe’s design. Regular cleaning improves enjoyment of each session and maintains device performance, so it’s worth taking the time to do it right.
Once you’ve finished rinsing, take a moment to inspect each part carefully. It’s crucial to confirm that there’s no residue or debris left behind. After all, ensuring peak cleanliness is the goal! This thorough check helps prevent built-up residue from obstructing airflow and affecting the taste of your herb.
Pre-Rinse Preparation
Start your pre-rinse preparation by thoroughly loosening and removing residue through a series of carefully controlled rinsing steps.
Begin by disassembling your silicone pipe to expose all internal surfaces. Use warm water to rinse each part, dissolving light buildup without risking silicone damage. Disassemble silicone dab rig into bowl, downstem, and removable attachments to ensure thorough cleaning.
Follow with a hot water rinse, not boiling, to soften tougher deposits for easier removal. For stubborn residues, prepare a vinegar soak by mixing equal parts white vinegar and water; soak components for at least 15 minutes to break down resin bonds effectively.
Finally, rinse all parts thoroughly with clean water to remove loosened debris and vinegar traces. Visualize your process as:
- Disassemble and soak parts in warm, soapy water
- Rinse with hot, not boiling, water to soften buildup
- Use vinegar solution soak to break down stubborn residues
Rinsing Methods Comparison
Following the pre-rinse preparation, selecting the appropriate rinsing method markedly impacts the thoroughness of your silicone pipe cleaning.
Start with a warm tap water rinse to remove loose debris, minimizing chemical dilution later. For stubborn residues, brief exposure to hot water can soften buildup but monitor temperature to avoid silicone warping. It is important to rinse tubing thoroughly after chemical use to remove any cleaning-solution residue.
Chemical rinses like isopropyl alcohol or vinegar-water mixtures dissolve organic and mineral deposits effectively but require thorough water rinsing afterward.
Employ rinsing techniques suited to the pipe’s geometry: gentle continuous flow prevents pushing debris deeper; intermittent shaking dislodges stubborn material; backflushing clears trapped residue in bends.
Targeted high-velocity rinses using syringes enhance mechanical removal without damage. Avoid strong solvents and ultrasonic cleaning unless explicitly compatible, ensuring silicone integrity while maximizing cleaning efficacy.
Post-Rinse Inspection
Although rinsing removes most contaminants, you’ll need to conduct a thorough post-rinse inspection to guarantee complete cleanliness of your silicone pipe.
Start by visually checking for cracks, stains, or any deformities. Confirm that no soap suds or residues remain by verifying that the final rinse water runs completely clear and feels free of slipperiness. Because silicone tubing is resistant to UV light and ozone, inspections also help detect environmental degradation that might not be immediately visible.
Use warm water for rinsing, followed by a cold rinse to firm the silicone and remove lingering agents. After air drying, inspect again for hidden residues or odors that could compromise the pipe’s integrity.
Key inspection steps include:
- Confirming zero soap suds and absence of soap scent
- Verifying clear water flow and surface feel during rinses
- Inspecting after drying for moisture, odors, and deterioration
This methodical approach guarantees your silicone pipe is contamination-free and ready for use.
Drying Methods to Prevent Moisture Damage
When drying a silicone pipe, controlling moisture is critical to prevent damage and bacterial growth. Begin by patting the exterior dry with a microfiber cloth.
Then position the pipe upright on an absorbent towel in a room between 68-77°F (20-25°C). Avoid direct sunlight to prevent warping. For faster drying, loosely stuff lint-free towel strips inside, replacing every 30 minutes until dry.
Alternatively, use a food dehydrator set at 95-115°F (35-46°C) for 1-2 hours or a preheated oven at 170-200°F (77-93°C) for 10-15 minutes. Ensure complete cooling on a wire rack to avoid thermal shock.
Employ compressed air for crevices. Finally, store the pipe with silica gel packets in a low-humidity environment to inhibit mold and extend lifespan.
Tips for Reassembling Your Silicone Pipe Safely
After ensuring your silicone pipe is thoroughly dried and free from moisture, focus on reassembling the components with care to maintain functionality and longevity.
First, inspect all fittings for cracks, deformities, and smooth any sharp edges with emery paper. Proper cleaning maintains hygiene and prevents premature wear, which is essential for fluid transfer systems.
Confirm compatibility between the pipe and fittings to avoid leaks or stress. Next, avoid stretching the pipe during installation by selecting the correct length and gently inserting fittings without excessive force.
Finally, prevent twists by laying the pipe straight and aligning it properly to maintain flow efficiency. Insert the pipe fully against the fitting shoulder, then finger-tighten the nut before applying a slight additional turn.
Choose clamps with smooth edges and apply even pressure, avoiding overtightening. Mark nut positions to ensure accurate reassembly and system depressurization before adjustments.
Frequently Asked Questions
Can I Use Bleach to Clean My Silicone Pipe Safely?
You shouldn’t use bleach to clean your silicone pipe regularly. Bleach can degrade silicone by causing surface embrittlement and discoloration, especially with repeated or prolonged exposure.
If you must use it, dilute it heavily, limit contact time, rinse thoroughly with plenty of water, and make certain complete drying to avoid residue and fumes. Instead, opt for milder methods like hot water with soap or isopropyl alcohol with salt to preserve your pipe’s integrity.
How Often Should I Deep Clean My Silicone Pipe?
You should schedule a significant, scrupulous deep cleaning every two to three days if you’re a heavy user, while weekly washings work wonderfully for daily dabblers.
Regular rinsing reduces resin residues and restores robust respiration. Remember, routine removal of residues prevents persistent, problematic buildup, preserving pipe performance and purity.
Prioritize periodic purification with gentle soap and filtered water, ensuring silicone’s strength stays strong and flavor stays fresh for flawless functionality.
Is It Safe to Put My Silicone Pipe in the Dishwasher?
Yes, you can safely put your food-grade silicone pipe in the dishwasher if it’s BPA-free and certified.
Place it on the upper rack to avoid excessive heat, and choose a gentle cycle under 140°F to prevent warping.
Disassemble the pipe and secure small parts in the silverware compartment to guarantee thorough cleaning.
After washing, dry all components completely to avoid mildew buildup and maintain the pipe’s durability and flavor integrity.
Can Silicone Pipes Retain Odors After Cleaning?
Imagine you soak your silicone pipe in alcohol but skip thorough rinsing.
Yes, silicone pipes can retain odors after cleaning because their tiny air pockets trap volatile compounds from residues.
Even after freezing or soaking, stubborn resins embed odors deep within the porous material.
To effectively eliminate smells, you need extended soaking, proper rinsing, and complete drying.
Neglecting any step risks persistent odors lingering in the pipe’s crevices and bends.
What Should I Do if My Silicone Pipe Develops Mold?
If your silicone pipe develops mold, immediately disassemble it to expose all surfaces. Rinse with hot water to remove debris, then apply isopropyl alcohol or diluted bleach carefully, allowing proper contact time to kill spores.
Use a soft brush to scrub gently, avoiding damage. Rinse thoroughly with hot water afterward, then dry completely with a lint-free towel and air-dry in a ventilated area to prevent recurrence.
Last Step to Long-Lasting, Flavor-Pure Sessions
Cleaning your silicone pipe is like tuning a delicate instrument. Each step sharpens its performance. By methodically disassembling, freezing, soaking, and scrubbing, you remove stubborn residues that dull its function.
Rinse and dry thoroughly to prevent moisture’s silent sabotage. When you reassemble with care, you restore not just a pipe but a finely crafted tool. It is ready to deliver pure, untainted enjoyment every time you use it.
Precision in cleaning guarantees longevity and peak performance.

