Last Updated on November 26, 2025
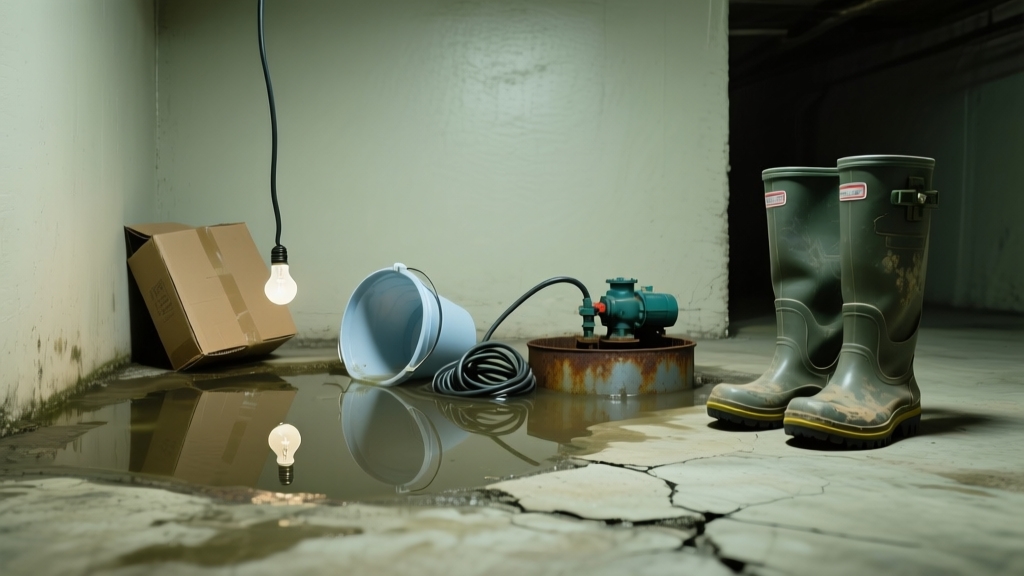
If your sump pump fails, start by cutting power and inspecting the pit for debris, float switch movement, and clogs. Check the circuit breaker and test the electrical outlet or backup battery.
Clear any blockages around the float and discharge lines to restore function. If the pump’s old or damaged, consider replacement to avoid floods. You can also use temporary pumps or sandbags to protect your basement.
Learn practical steps to troubleshoot, maintain, and decide on repairs or upgrades.
Key Takeaways
- Immediately unplug the pump and inspect the sump pit for debris, blockages, or float switch obstructions causing failure.
- Test the float switch manually to check if the pump activates and ensure power is supplied to the outlet.
- Clear clogs from discharge lines and clean the pump’s impeller and inlet screen if water flow is blocked.
- Use a portable utility pump or backup battery pump to remove water and prevent flooding temporarily.
- If the pump is old or damaged, consider replacing it promptly and schedule regular maintenance to avoid future failures.
Common Causes of Sump Pump Failure
When your sump pump fails, it’s often due to common issues that can be identified and addressed.
Power outages cause about 40% of failures, especially during storms when heavy rain and electricity loss coincide. Check for tripped breakers or unplugged cords. Backup power sources like batteries or generators can keep the pump operational during these outages.
Ensuring a stable power source is critical for preventing pump failure caused by electrical issues. Nearly 40% of sump pump failures happen during storms due to power outages and electrical issues.
Clogged discharge lines, caused by debris, ice, or animals, block water flow and can overheat the pump. Inspect and clear these lines regularly, and consider installing guards.
Float or switch malfunctions occur when debris or wear prevents activation, leading to continuous running or no operation. Hollow floats filling with water is another issue. Improper installation, incorrect pipe positioning or pump sizing, also causes failure.
Ultimately, lack of maintenance leads to debris buildup and worn components, raising failure risk. Regular professional inspections help maintain reliable performance.
How to Safely Assess a Failed Sump Pump?
Before you begin evaluating a failed sump pump, make certain all safety precautions are in place to prevent electrical hazards and physical injuries. Unplug all electrical devices in the area or shut off the main power if outlets are inaccessible.
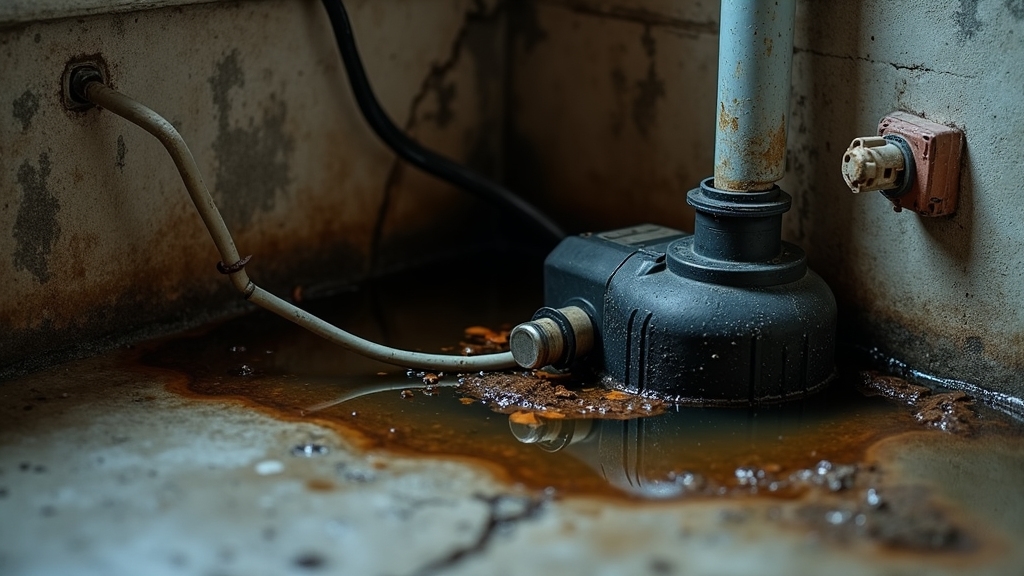
Confirm the pump is connected to a GFCI outlet to reduce shock risk. Conduct a thorough visual inspection of the sump pit, pump housing, seals, and discharge line for cracks, rust, blockages, or debris.
Perform a water test by filling the sump pit to typical activation levels and observe for leaks during pump operation to check the seal integrity water test. Check the float switch for obstructions or damage that could hinder activation.
Remove sludge and dirt from the pit to ensure no physical barriers affect operation. Observe for unusual noises or irregular cycling that indicate mechanical issues.
Avoid probing electrical components unless you’re qualified; prioritize safety first. Also, consider the pump type and power requirements when planning a replacement or repair to ensure compatibility and efficiency.
Troubleshooting Electrical Issues
First things first, let’s make sure your sump pump is plugged into a live outlet. Seriously, double-check that! Also, take a quick look at the circuit breaker to see if it’s tripped.
Now, here’s a handy tip: try manually lifting the float switch. If the pump kicks on, that’s a good sign! Additionally, it’s crucial to disconnect power supply before inspecting to avoid electrical hazards.
But while you’re at it, give the pump a quick inspection for any debris or damage. These little steps can really help pinpoint those pesky electrical issues that might be keeping your pump from working. Additionally, check that the circuit breaker is properly reset and the fuse is not blown to ensure power supply to the pump.
Power Source Verification
Although sump pumps are essential for preventing water damage, electrical issues often cause their failure. The first step is to verify the power source to ensure the pump receives electricity properly. Here’s how to proceed:
- Circuit Breaker and Fuse Check: Confirm the breaker controlling the pump’s circuit isn’t tripped; reset if needed. Inspect fuses for damage and ensure the circuit isn’t overloaded or shared with high-power devices. It’s important to understand that some devices, like hot water recirculating pumps, may increase electrical load on shared circuits.
- Power Outlet and Plug Inspection: Make sure the pump is firmly plugged into a functional GFCI outlet. Test the outlet with another device or voltage tester, and inspect the plug and cord for wear or damage.
- Battery Backup Power Verification: If your system has a backup, check that batteries are charged and connections are intact to guarantee operation during power outages. Additionally, confirm that power is actually reaching the pump motor itself to rule out internal electrical faults or wiring problems within the pump power supply check.
Float Switch Inspection
When your sump pump fails to activate despite having power, the float switch often holds the key to diagnosis.
Start by checking for debris or obstructions in the sump pit that can restrict float movement. Remove the pump, unplug it, and clear any blockages. Blockage or debris can cause the float switch to stick, leading to pump failure. Proper float switch positioning is critical to ensure the float can move freely without obstruction.
Inspect the float arm to ensure it moves freely and isn’t sticking to pit walls or corroded. Manually lift the float; if the pump doesn’t start, the switch or float may be faulty.
Examine wiring and terminals for looseness or corrosion, repairing as needed. Confirm the float switch rating matches your pump model to avoid sensitivity issues. If problems persist, replace the float switch using manufacturer-approved parts, following safety protocols to maintain system integrity.
Inspecting and Clearing Float Switch Problems
Alright, let’s dive into checking that float switch! First things first, make sure it can move freely without anything getting in the way. Sometimes, debris, wires, or tubing can sneak in and block its path, which is no good because it can prevent the pump from kicking in when it needs to.
A stuck float switch may require cleaning or replacement if it doesn’t move freely. So, go ahead and clear away any obstacles you spot, as proper maintenance helps avoid sump pump failures.
Once you’ve done that, take a moment to manually lift the float. This is a great way to see if the pump responds. If it does, then you can feel confident that the switch is functioning properly!
Float Switch Movement
Since the float switch relies on unobstructed vertical movement to detect water levels accurately, you need to regularly inspect and clear any issues that hinder its motion.
Start by verifying the float moves freely without sticking or snagging on pipes and cables. Check for twists or tension in tether cables and ensure the float isn’t contacting sump pit walls.
Different types of floats, such as tethered floats or those attached to arms, may require specific attention based on their pump design. A malfunctioning float switch can lead to excessive tank pressure if the pump fails to activate properly.
Manually lift and lower the float to confirm the switch activates the pump properly. Follow these steps to maintain float switch movement:
- Reroute or secure tether cables for smooth, unrestricted float travel.
- Adjust float height or reposition it to prevent premature or failed activation.
- Replace worn or damaged components to restore proper function.
Testing after maintenance ensures reliable pump operation and prevents failure.
Removing Obstructions
Trash, grease, sludge, and sediment frequently accumulate, causing the float to stick in one position and disrupting pump operation. Check for floating debris or objects wedged against the float, and remove any you find.
Also, ensure cables aren’t tangled or caught on the pump or pit walls; tangled cables restrict float movement and may cause malfunction. Use float spacers or trees to keep cables organized and secure.
Verify the float switch height to avoid delayed activation or excessive cycling. Regularly clean the sump pit and consider installing a sealed lid to reduce debris entry.
Additionally, regular inspection and cleaning remove obstructions and ensure the float moves freely. Routine inspection and removal of obstructions keep the float switch functional and prevent sump pump failure.
Because sediment presence can lead to clogging within the pump, maintaining a clean sump pit is essential.
Removing Debris and Clogs From the System
Before you can effectively remove debris and clear clogs from your sump pump system, you need to safely power down the unit and carefully access its components.
Start by switching off the breaker and unplugging the pump. Remove the sump cover cautiously, then lift the pump out without damaging the float switch or wiring.
Use a wet/dry vacuum to clear standing water and loose debris from the pit. It is important to prepare all tools before starting the cleaning process to ensure efficiency. Additionally, inspecting the discharge hose for any kinks or damage is crucial to maintain proper drainage.
Begin with turning off power, unplugging the pump, removing the cover, and vacuuming out water and debris safely. Follow these steps to clean and maintain the system:
- Scrub the impeller, inlet screen, and pump body with a soft brush and recommended cleaner to remove hair, silt, and grease.
- Inspect and clear debris from the sump pit and discharge pipe, ensuring the weep hole and check valves function properly.
- Check the float switch for free movement and remove any buildup to prevent jamming, as a flexible discharge hose helps reduce stress on the system components.
Temporary Solutions to Prevent Basement Flooding
When your primary sump pump fails, implementing temporary solutions can help prevent basement flooding and minimize water damage.
You can use a portable utility pump to quickly remove standing water. These submersible pumps work without a sump pit and some models pump water down to 1/8 inch of the floor. Submersible pumps are generally more energy efficient as they consume less power when surrounded by water.
Installing a battery backup sump pump ensures operation during power outages and mechanical failures. Some models even alert you when activated. Adding a battery backup pump provides continuous operation during power failures, offering extra protection against flooding.
If electricity isn’t reliable, a water-driven backup pump uses household water pressure to continuously remove water without batteries. Additionally, deploying a portable generator can power your sump pump during outages.
To manage water flow, employ temporary diversion methods like sandbags, trenches, or gravity-fed channels to redirect water away from your basement entry points.
Essential Preventive Maintenance Tips
Although sump pumps are designed for durability, regular preventive maintenance is essential to guarantee they function reliably when needed. You should focus on these key areas:
- Inspection and Cleaning: Examine the pump and pit monthly for damage, debris, and proper float movement. Clean the pit and pump at least annually to remove sludge, iron ochre, and blockages that impair flow. It is also important to conduct visual inspection for external wear, damage, and corrosion to catch potential issues early.
- Functional Testing: Test the pump monthly by filling the basin and listening for unusual noises. Confirm it discharges water fully and the float moves freely without sticking.
- Electrical Checks: Inspect connections quarterly for corrosion or wear. Verify voltage with a multimeter and ensure GFCI outlets function properly. Replace worn parts annually and schedule a professional inspection yearly.
Following these steps ensures your sump pump operates effectively and prevents failures during critical times.
Backup Systems to Ensure Continuous Operation
Since sump pump failure can lead to significant water damage, installing a reliable backup system is essential to maintain continuous operation during power outages or primary pump malfunctions.
You can choose from battery backup pumps, water-powered pumps, or combination units. Battery backups run on deep-cycle or AGM batteries and activate automatically when the main pump fails, offering several hours to days of operation.
Many advanced models also include monitoring systems with visual and audio alarms to alert homeowners of issues such as low battery, corrosion, or pump failure. Water-powered backups use municipal water pressure to pump water without electricity but require adequate water pressure.
Combination systems integrate a primary electric pump and battery backup in one unit, simplifying installation with shared discharge lines and automatic switching. Regularly test your backup system, monitor battery health, and consider alarms for alerts to ensure your sump pump remains operational during emergencies.
Deciding Between Repair and Replacement
Deciding whether to repair or replace your sump pump depends largely on factors like cost, age, and the severity of the problem. To make an informed choice, consider these key points:
- Cost Efficiency: If repair costs exceed 50% of replacement expenses, typically $309 to $1,346 plus installation, replacement is more economical. Minor fixes under $150 favor repair. Keep in mind that replacement costs can range significantly based on pump type and labor rates.
- Pump Age and Condition: Pumps over 7–10 years with frequent failures usually warrant replacement due to limited lifespan and part availability.
- Severity of Issue: Simple repairs like float switch adjustments are manageable. However, major failures, such as motor burnout or electrical faults, often justify replacement for reliability and improved efficiency.
Evaluate these factors carefully, consult a professional for diagnosis, and weigh long-term performance and energy savings when deciding between repair and replacement.
Frequently Asked Questions
How Often Should I Test My Sump Pump Under Normal Conditions?
You should test your sump pump at least once a year under normal conditions to guarantee it’s working properly. Many experts recommend testing before heavy rain seasons or if you plan to sell your home.
For better reliability, consider quarterly tests, especially if your sump pump handles typical groundwater. Regular testing helps you catch issues early, keeping the system ready to prevent basement flooding and foundation damage.
Can a Sump Pump Failure Affect My Home Insurance Coverage?
Yes, sump pump failure can affect your home insurance coverage. About 80% of standard homeowners policies exclude water damage from sump pump failures unless you add a specific “water backup and sump pump overflow” endorsement.
Without this, claims for water damage caused by a failed pump typically get denied. To protect yourself, review your policy, consider adding this endorsement, and maintain your pump regularly.
This can help avoid denied claims due to neglect or gradual damage.
What Are the Signs of a Failing Backup Battery System?
You’ll notice a constant red or amber battery indicator light, reduced runtime during outages, and longer recharge times. The battery might swell, corrode, or leak, and terminals could show rust or damage.
If your backup system fails to activate during power loss or the pump cycles irregularly, your battery is likely failing. Frequent alarms or a battery older than five years also signal it’s time for replacement or maintenance.
Are There Specific Sump Pump Brands Known for Reliability?
Yes, you’ll find Zoeller and Wayne Water Systems stand out for reliability. Zoeller’s pumps often last 20+ years with minimal maintenance, making them a solid choice.
Wayne offers quiet, dependable operation, ideal for homes. Liberty Pumps deliver smart features and strong performance, while Superior Pump balances affordability and reliability.
Basement Watchdog excels in backup systems. Choosing one depends on your needs, but these brands consistently earn top user and expert ratings.
How Loud Is a Typical Sump Pump During Operation?
A typical electric sump pump runs around 80-85 decibels, similar to a noisy office or vacuum cleaner. Submersible models are quieter, often producing 20-40 dB, like gentle water flow.
Pedestal pumps are louder due to exposed motors. Gas-powered pumps can exceed 100 dB, which is very loud. You can reduce noise by placing the pump inside the pit, using vibration mounts, and ensuring proper installation to minimize mechanical vibrations.
Simple Fixes That Bring Your Sump Pump Back to Life
When your sump pump fails, it’s like a lighthouse going dark in a storm. Your basement’s safety depends on it. By quickly diagnosing electrical or float switch issues, clearing debris, and considering backup systems, you restore that guiding light.
Regular maintenance is your anchor against future failures. Whether you repair or replace, acting promptly guarantees your home stays dry and secure. This turns potential disaster into manageable control.

