Last Updated on February 21, 2025
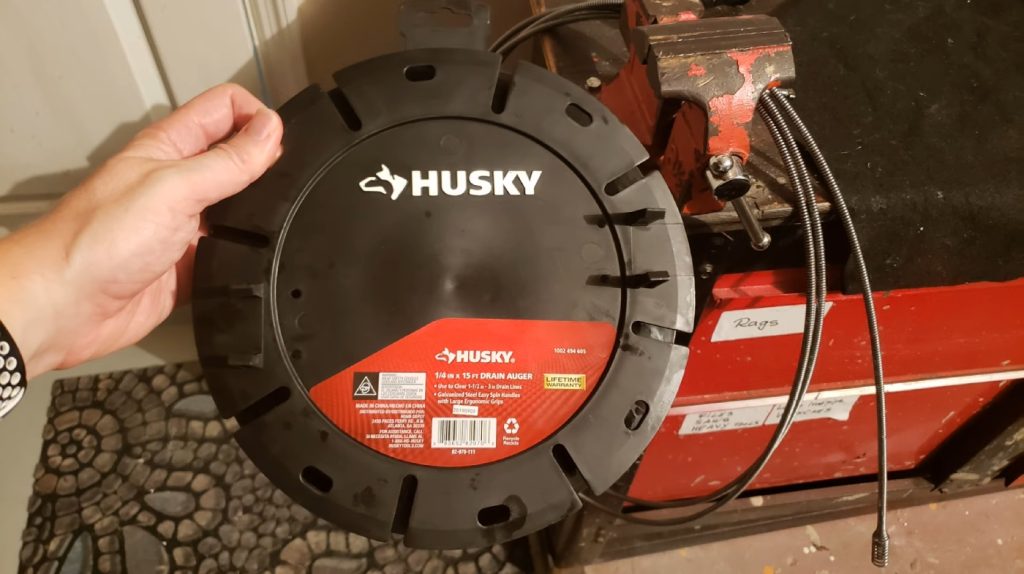
To use a Husky drain auger, first inspect the tool for damage and wear protective gear. Access the drain by unscrewing a cleanout plug or removing a trap.
Insert the auger cable slowly while rotating it to reach the blockage. Maintain proper rotation and apply moderate pressure to clear stubborn clogs.
After clearing, flush the drain with hot water and retract the auger fully. For extensive maintenance tips and storage best practices, keep exploring this guide.
Key Takeaways
- Inspect the auger for damage and wear, and ensure you have protective gear, like safety glasses and gloves, before use.
- Access the drain by unscrewing the cleanout plug or removing a trap using an adjustable wrench.
- Insert the auger cable slowly into the drain, rotating the handle clockwise to navigate through clogs.
- Apply moderate pressure and gently push and rotate the cable to clear stubborn blockages without forcing it.
- After use, retract the auger, flush the drain with hot water, and clean and maintain the auger for longevity.
Preparation for Use
Before using your Husky drain auger, it’s crucial to prepare adequately to guarantee safety and effectiveness. Start by inspecting the auger for any damage; you want it in good condition.
Wear protective gear, including safety glasses and leather gloves, to shield yourself from potential hazards. Check the drain for chemicals or other risks, ensuring your safety while working.
Confirm that the auger suits the job, particularly noting the Husky 25ft Power Drum Auger’s compatibility with lines up to 2 inches in diameter, but avoid using it for toilets.
Additionally, be aware that an old drain line clogs approximately every six months, so regular maintenance is essential.
Clear the workspace of obstacles, and use a bucket to catch water and debris. Following these steps helps you work efficiently and mitigate risks during the process.
Accessing the Drain
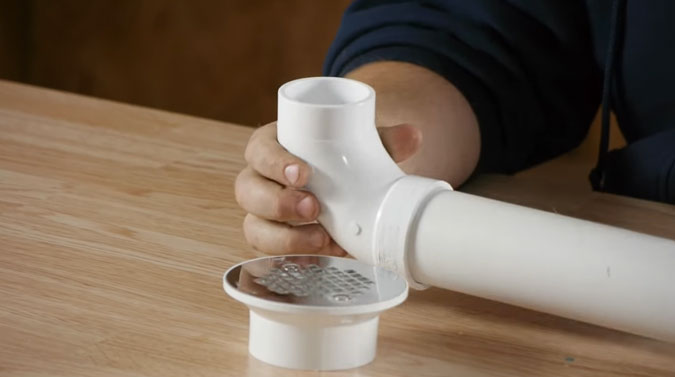
To access the drain effectively, you’ll need to choose the right method, whether it’s unscrewing a cleanout plug or removing a trap.
Before proceeding, guarantee you have the necessary tools on hand, like an adjustable wrench and safety equipment. Clearing any obstructions will also streamline your work and prevent complications during the augering process.
Additionally, it’s important to consider drain clearing services if you encounter persistent clogs that you cannot resolve on your own.
Types of Drain Access
Accessing your drain effectively relies on understanding various types of drain access points available in sewer systems. Familiarizing yourself with these access points helps guarantee proper maintenance and quick resolution of issues.
Here are four common types to evaluate:
- One-way cleanouts: These allow access in a single direction, ideal for maintenance at the end of sewer lines.
- Two-way cleanouts: Found at property lines, they offer access from two directions for thorough system checks.
- Indoor cleanouts: Located near the main sewer line entry, these facilitate easy access within your home.
- Outdoor cleanouts: Positioned outside near pipe exits, these help prevent damage and support efficient drainage.
Removing Obstructions Effectively
When you encounter a clog, efficiently removing obstructions from your drain requires a systematic approach. Start by removing any grills or covers to access the drain.
Ascertain your auger cable isn’t tangled and select the appropriate size for your pipe’s diameter. Equip yourself with gloves and protective eyewear for safety.
It’s important to note that common drain blockages can include foreign objects like hair, which may require additional attention during the cleaning process.
Insert the auger slowly into the drain while rotating the handle, pushing it until you reach the obstruction. If you encounter resistance, gently pull back on the cable to retrieve the blockage.
For stubborn clogs, repeat this process. After removal, run hot water through the drain to clear any residual debris and inspect for remaining obstructions to ascertain a thorough clean.
Tools for Removal
Properly accessing the drain is essential for effective removal of clogs, and several tools can assist in this process. Here’s what you’ll need:
- P-Trap Wrench: Use this to remove the P-trap for easier access to sink drains.
- Adjustable Wrench: Essential for removing fittings and trap arms to insert the auger deeper.
- Bucket: Place this under the drain to catch spills when you remove components.
- Safety Gear: Gloves and goggles protect you from sharp edges and potential splashes. Twisting while advancing can also help agitate the clog for more effective removal.
Ensure the work area around the drain is clear, and inspect the drain layout to identify potential issues.
Inserting the Auger
Before inserting the auger, make sure you’ve taken the necessary safety precautions to protect yourself from potential hazards in the drain.
Wear safety glasses and leather gloves to guard against chemicals and bacteria. Confirm the drain is safe for use with the auger and check for any chemicals, following the manufacturer’s instructions.
Regular maintenance with natural remedies can help prevent clogs and make using the auger less frequent. Inspect the auger for any damage before proceeding.
Access the drain by removing the cleanout plug or drain traps. Place a drop cloth under the drain to catch debris. Loosen the setscrew to extend 6-8 inches of cable from the housing.
Position the auger close to the drain, secure the cable, and rotate the crank handle clockwise to advance the cable with moderate force.
Clearing the Blockage
To effectively clear a blockage with your Husky drain auger, focus on using the proper rotation technique. As you encounter stubborn blockages, maintain a steady push and pull motion to break up debris.
Additionally, ensure you are prepared to inspect the drain for any visible obstructions before using the auger. Adjust your approach based on the resistance felt, ensuring you’re maneuvering bends and tight spots with care.
Proper Rotation Technique
Mastering the rotation technique is essential for effectively clearing a blockage with your Husky drain auger. Follow these steps to guarantee peak performance:
- Rotate Clockwise: Always rotate the auger cable clockwise to push it deeper into the drain.
- Feed Cable Gradually: As you meet resistance, slowly feed an additional 6 to 12 inches of cable to navigate bends effectively.
- Apply Moderate Pressure: Combine steady rotation with moderate forward pressure to overcome blockages without forcing the cable. Using a self-feeding auger can enhance this process by allowing controlled cable feeding.
- Maintain Control: If using a power drill, keep the speed low (500 RPM or less) to guarantee smooth operation and prevent damage.
Handling Stubborn Blockages
When dealing with stubborn blockages, you may need to employ more than just basic techniques to clear the drain effectively.
Start by inserting the auger into the drain and rotating it until you reach the blockage. If you encounter resistance, gently push while rotating the cable to navigate tight spots, like sanitary tees or p-traps.
To ensure optimal results, remove the trap before snaking to allow easier access to the blockage. For deep blockages, consider using longer cables, such as 25-foot or 50-foot options.
If the clog persists, try pulling back the cable slowly or using chemical cleaners to soften the material. Regular maintenance and periodic inspections will help prevent future clogs.
After clearing, run cold water through the drain to guarantee all debris is removed and test the drain for proper flow.
Post-Operation Procedures
After you’ve successfully cleared the blockage with your Husky drain auger, follow proper post-operation procedures to maintain the tool and guarantee peak performance.
Here’s what you should do:
- Clean and Flush: Retract the auger fully, flush the drain with hot water, and dry the cable to prevent rust. Regularly using the auger for clearing drain lines can help prevent future build-up.
- Dispose of Blockages: Identify the type of debris removed, store it in a sealed bag, and document it for future reference.
- Cable Care: Oil the cable if recommended, inspect for wear, and avoid bending during retraction.
- Safety Precautions: Wear protective gloves, keep the workspace clear, and make sure children and pets are away.
Maintenance and Storage
Proper maintenance and storage of your Husky drain auger are essential for ensuring its longevity and peak performance.
Regularly inspect the auger for any damage or wear, and clean it after each use to prevent rust and debris buildup. Lubricate moving parts periodically to reduce friction and maintain efficiency.
Store the auger in a dry location, keeping the cable covered and the handle protected from damage. Wind the cable properly onto the drum when not in use.
Monitor the condition of the spring wire and handle, checking for loose fasteners that may need tightening. Always retain the product manual for reference, ensuring you follow the manufacturer’s instructions for ideal usage and care.
Frequently Asked Questions
What Types of Drains Can the Husky Drain Auger Be Used On?
You might think a Husky drain auger only tackles the simplest clogs, but it’s actually versatile. You can use it on kitchen sink drains, where grease and food particles often cause blockages.
It’s equally effective for bathroom sinks and shower drains, handling pesky hair build-up. While it’s not ideal for toilet drains due to potential porcelain damage, it excels in general drain lines, accommodating various pipe sizes up to 2 inches in diameter.
How Do I Know if My Blockage Is Too Severe for the Auger?
To determine if your blockage is too severe for the auger, assess the clog’s composition and size. If it consists of grease or hard objects, your auger might struggle.
Additionally, if you’ve tried multiple attempts without progress, the blockage could be more significant than the auger’s capabilities. Consider the pipe’s diameter; larger clogs in narrower pipes often require professional intervention.
Can I Use the Auger on a Clogged Toilet?
Yes, you can use an auger on a clogged toilet, but it’s important to use a toilet-specific auger. Regular drain augers mightn’t have the protective design needed for porcelain surfaces.
A toilet auger is engineered to navigate the toilet’s drain effectively, helping to remove clogs without pushing debris deeper. Always wear gloves for protection and check your tool for any damage before use to guarantee safe and efficient operation.
What Should I Do if the Cable Gets Stuck in the Drain?
If the cable gets stuck in the drain, start by pulling it back slowly to prevent further entanglement. Use a combination of gentle pressure and rotation to help release it.
If that doesn’t work, check the thumbscrew to verify it’s tight. Consider adding lubrication to reduce friction. If necessary, disassemble the drum to remove any tangles.
Is It Safe to Use Chemicals After Using the Auger?
Chemicals can cause considerable complications after using an auger. It’s essential to clear your drain of any harsh substances before you proceed. Using chemicals post-auger might damage pipes, especially if clogs persist.
Chemicals don’t fix underlying issues like breaks or sagging. If you need to use them, make certain your drain is free from debris first. For ongoing problems, consider calling a professional plumber instead of relying on harsh chemicals.
Maintenance Matters: Keep Your Auger in Top Shape
Using a Husky drain auger effectively can save you significant time and money on plumbing services. Did you know that nearly 80% of home plumbing issues stem from clogged drains?
With proper technique and maintenance, you can tackle these problems yourself and keep your plumbing system running smoothly.
Always remember to follow safety precautions and perform regular upkeep on your auger to guarantee its longevity and efficiency. You’ll be well-equipped to handle future clogs with confidence.


