Last Updated on May 10, 2023
The float valve is an integral part of your swamp cooler repair, and if it’s not working properly, your cooler might not be able to function correctly. You can use swamp coolers to cool down your home during the summer, but if the float valve is broken, it can be hard to keep your cooler running.
We will walk you through the steps of how to replace a float valve in a swamp cooler. This is a simple process that only takes a few minutes and doesn’t require any special tools or knowledge. This is a repair that most people can do on their own without having to call a professional by following these simple instructions.
How to Replace a Float Valve in a Swamp Cooler: Installation Process

A float valve replacement is an essential component of swamp cooler maintenance, and installing one is relatively simple. When you turn on the power to the cooler, water will flow into the tank and stop automatically when it reaches the fill line.
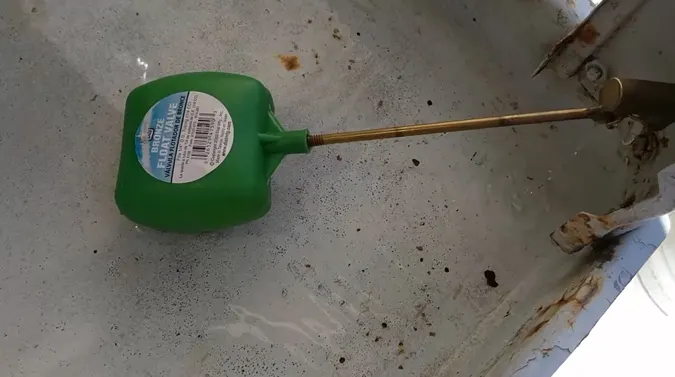
You must get a float valve kit with a few tools and supplies to install a water float in a swamp cooler. The kit will contain everything you need to install the valve. The installation of a float valve is a pretty simple process.
With your new float valve installed, your swamp cooler will maintain a consistent water supply, ensuring that it can operate all summer effectively long.
- The first step is to shut off the power to the cooler and remove the cover.
- Locate the water supply fill line on the side of the cooler and mark it with a pencil.
- Disconnect the water line from the unit.
- Once the water line is disconnected, you can then install the float valve in its place. Make sure that the arrow on the float points in the direction of the water flow.
- Cut a hole in the side of the cooler just above the fill line using a utility knife.
- Insert the float valve into the hole and secure it with screws or adhesive tape.
- Attach a length of tubing to the valve and run it to a water source.
- Reconnect the water supply line and turn the power to the cooler. With the float valve in place, your swamp cooler will be able to regulate the water level automatically, ensuring that your unit always has enough water to operate efficiently.
Why Do You Need to Replace a Float Valve on a Swamp Cooler?

It can be a lifesaver having a swamp cooler during hot weather. A room can be cooled by several degrees by circulating cooled water through a pad that evaporatively cools the water. A swamp cooler will perform better if ice is added to it. Many people are unaware of this fact. Below are a few of the benefits:
One meaningful way to care for your swamp cooler is to install a float valve. Here are ten reasons to install a float valve on your swamp cooler:
- A float valve helps to regulate the amount of water in the swamp cooler, preventing the unit from becoming overfilled.
- A float valve can help to prevent overflow in the event of a power outage or other malfunction.
- A float valve helps prolong the life of your swamp cooler by preventing scale build-up and corrosion.
- A float valve can also help improve the efficiency of your swamp cooler by maintaining optimal water levels.
- Installing a float valve is a relatively simple and inexpensive task that can be easily accomplished by most do it yourself.
- By installing a float valve, you can ensure your swamp cooler will always have enough water, even if you forget to fill it yourself.
- Float valves are essential to any emergency preparedness plan for your home cooling needs.
- A well-maintained swamp cooler with a float valve will provide years of trouble-free service.
- Installing a float valve is one of the best ways to protect your investment in a swamp cooler.
- Float valves provide peace of mind, knowing that your swamp cooler is operating safely and efficiently.
How To Find the Right Swamp Cooler Float Valve?
Need a floating valve for your swamp cooler? Our latest blog reviews the best swamp cooler float valve with detailed explanations of features and functionality.
These valves are made of durable materials that can withstand extreme temperatures, ensuring optimal performance for an extended period. They are compatible with various cooler models and feature an easy-to-use design for effortless installation and maintenance.
With these swamp cooler valves, you can keep your water levels perfect every time. Completely efficient and simple to control, these powerful components easily handle heavy pressures so that no precious liquid goes wasted.
How Does the Swamp Cooler Float Valve Work?

It’s essential to have a float valve in the swamp cooler, as it helps to regulate the level of water in the unit. The float valve is typically located near the bottom of the cooler and consists of a float and a valve.
The float valve rises and falls with the water level in the cooler, and the valve opens and closes to allow water to enter or leave the unit. When the water level in the swamp cooler gets too low, the float drops, and the valve opens, allowing water to flow into the unit.
This replenishes the water so that the unit can continue to operate. Conversely, when the water level gets too high, the float rises, and the valve closes, preventing more water from entering the unit.
The float valve is an essential part of regulating the level of water in a swamp cooler, and it helps to ensure that the unit operates efficiently.
At What Humidity Level Do Swamp Coolers Stop Working?
If the humidity level is too high, swamp coolers will add heat to the air instead of removing it. Swamp coolers are less effective in humid climates and can even make the room feel hotter.
The specific humidity level at which a swamp cooler stops working depends on the unit type and manufacturer, but generally, most units will stop being effective when the humidity level reaches 60-70%.
Why at High Humidity Level Swamp Coolers Stop Working?
When the humidity level is high, swamp coolers stop working because the air is already saturated with water. The evaporative process that cools the air relies on evaporation to work, and when the air is already full of water vapor, there is nothing left to evaporate.
The air does not get any cooler, and the swamp cooler stops working. High humidity levels can also cause the pads in the cooler to become soaked, which reduces their effectiveness.
High humidity can lead to mold and mildew growth inside the swamp cooler, reducing its efficiency even further. It is essential to keep an eye on the forecast and be prepared to switch to an air conditioner or other cooling system if the humidity level rises too high.
Does a Swamp Cooler Need Constant Water?

For the swamp cooler to work effectively, it must have a constant water supply. If the water level drops too low, the unit will be less effective at cooling the air. The evaporative pads will become dry and cracked, damaging the unit and reducing its lifespan.
For these reasons, it is essential to check the water level in your swamp cooler regularly and add more water as needed.
A swamp cooler is an air conditioner that uses evaporation to cool the air. The cooling begins when water is pumped into the unit and absorbed by the evaporative pads. As the water evaporates, it draws heat from the air, lowering the temperature.
How to Make a Swamp Cooler Less Humid?
Swamp coolers work by adding moisture to the air, so it stands to reason that the best way to make them less humid is to remove some of that moisture. The most common way to do this is by opening a window or door while the swamp cooler is running.
This will help to circulate the air and prevent the room from becoming too humid.
As the air passes through the cooler, it is cooled and humidified. One way to make your swamp cooler less humid is to use a drier wick.
A drier wick will absorb less water, resulting in less humid air circulated through the cooler. Raising the swamp cooler off the ground. Raising will allow hot, dry air to circulate under the cooler, helping to evaporate water collected on the wick making it less humid.
Keep the cooler clean. Dirt can prevent proper airflow, making it harder for the cooler to remove moisture from the air.
Does Filling a Swamp Cooler with Ice Help?
Benefits
It can be life-saving to have a swamp cooler in hot weather. The cooled water is circulated through an evaporative pad in this device, which lowers the room’s temperature by several degrees. The performance of a swamp cooler will be enhanced if it is filled with ice. Many people don’t realize that. The following are some of the benefits:
- The ice will help to cool the water, making it more effective at lowering the temperature in the room.
- The ice will help increase the humidity in the air, making the room feel more relaxed and comfortable.
- The ice will help to filter the air, removing dust and other airborne particles.
- The ice will help to reduce static electricity, making it less likely for shocks.
- The ice will help to keep the evaporative pads from drying out and prolong their life.
- You can reduce the heat with ice condensation on windows and floors.
- The ice will help to absorb odors, leaving the room smelling fresher.
- It will be easier to reduce the temperature with ice noise levels coming from the cooler.
- The ice will help to minimize energy consumption by reducing the workload of the cooling system.
- The added weight of the ice will help to stabilize the cooler and prevent it from tipping over.
Drawbacks
Cooling will be provided by the ice as it evaporates. Adding ice to a swamp cooler can harm its performance. The ice will cause the evaporative pads to work overtime, reducing efficiency and increasing wear and tear.
The ice may cause the water level in the unit to drop too low, causing it to overheat and shut down prematurely, so if you are looking for ways to improve the performance of your swamp cooler, skip the ice and stick to regular maintenance.
Swamp coolers are a great way to stay cool during the hot summer. They can also be a source of frustration if they start to leak. You can do a few simple things to stop your swamp cooler from leaking.
- Check the fill line: Most swamp coolers have a fill line that indicates how much water the unit should hold. If your cooler is leaking, it may be because it is overfilled. Simply empty some of the water until it reaches the fill line.
- Check for cracks: Cracks in the cooler’s body or reservoir can also cause leaks. Inspect the unit carefully and look for any cracks or holes. If you find any, seal them with epoxy or silicone caulk.
- Replace the pads: The pads inside the swamp cooler absorb water and help to evaporate it into the air. Over time, these pads can become warped or worn out, which can cause leaks.
Replacing the pads is an easy job that you can do yourself. Simply remove the old pads and insert new ones in their place.
- Tighten the lid: A loose lid can also be responsible for leaks. Make sure that the lid is securely fastened to the unit’s body. If necessary, use a wrench to tighten the screws or bolts that hold the lid.
- Check the float valve: The float valve is responsible for regulating the water level inside the swamp cooler’s reservoir. If this valve becomes stuck in the open position, it can allow too much water inside, resulting in a leak. Cleaning or replacing the float valve should fix this problem.
- Empty and clean the reservoir: Over time, sediment and other debris can build up in the swamp cooler’s reservoir, causing it to leak. To fix this problem, simply empty all of the water and then clean the reservoir with a hose or a scrub brush. If necessary, descale the reservoir with vinegar to remove any mineral deposits.
- Check for leaks in iced-up lines: In freezing weather, ice can form inside the lines that connect the swamp cooler to the water supply. This ice can block water from flowing into the unit, causing it to leak.
To prevent this from happening, disconnect the lines and allow any ice inside them to melt. Once melted, reconnect the lines and ensure they are tightly secured so they will not fall apart again.
- Use Teflon tape on threaded connections: Threaded connections are another common source of leaks on swamp coolers. To prevent leaks, wrap Teflon tape around any threaded connections before screwing them together.
- Replace O-rings as needed: The O-rings are located where the various parts of the swamp cooler attach. These O-rings can become hardened or cracked, allowing water to pass through and causing leaks. Inspect all of the O-rings on your unit and replace any that show signs of wear or damage.
Restore Functionality of Your Swamp Cooler
Upon exploring the situation from multiple perspectives on how to replace a float valve in a swamp cooler. It is logical and practical to use Teflon tape when making threaded connections. Remove any mineral deposits from the reservoir by cleaning or descaling it with vinegar as needed.
If the swamp cooler is unplugged and allowed to melt out, ice will not form inside the lines connecting it to the water supply in freezing weather. It should be possible for you to get your swamp cooler up and running again with a little effort. We appreciate and thank you for taking the time to read this article.

