Last Updated on May 18, 2023
When the thermostatic mixing valve in your home doesn’t work properly, this can result in considerable destruction of your property in the long run and may even put the safety of your family at risk. It is important that the thermostatic mixing valve be removed as soon as possible.
It is imperative that you take action now and remove the valve. We have created an easy to follow guide that will walk you through the process of how to remove thermostatic mixing valve in simple few steps. Our guide is simple to follow and only takes a few minutes to complete.
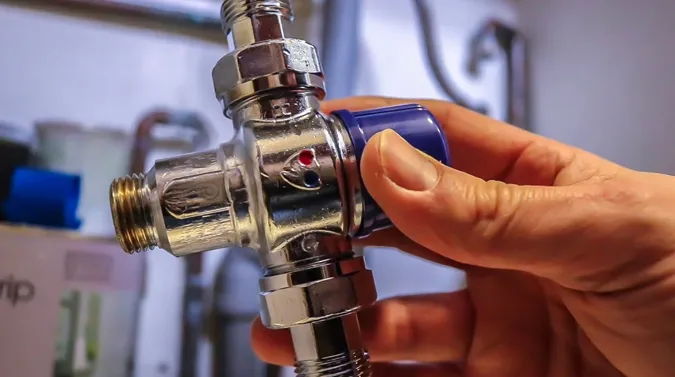
How to Remove Thermostatic Mixing Valve: 9 Easy Steps

If your water temperature does not appear to be properly regulated as it is supposed to be, chances are you may end up having to replace it. This is why we have created a guide with detailed information about how to remove the thermostatic mixing valve here, as well as providing a comprehensive guide below.
- Shut off the water supply to the shower by turning off the valve located behind the shower head.
- Remove the shower hose or, if it is a fixed shower head, from the wall by unscrewing the nut located at the end of the shower hose or shower head by unscrewing it counterclockwise.
- Loosen the screw at the top of the surface of the shower valve and remove the flat metal plate cover from around the shower valve by unscrewing it counterclockwise.
- Remove the screws that hold the thermostatic mixing valve to the shower wall and remove the valve from the shower.
- Disconnect the TMV from the shower pipe by unscrewing it counterclockwise.
- Remove the TMV from the shower and reconnect the shower valve to the shower pipe by screwing it clockwise.
- Replace the cover on top of the shower valve and tighten the screw.
- Screw the flat metal plate back onto the shower valve. Reconnect the shower hose to the shower arm by screwing it clockwise.
- Replace the shower head by screwing it clockwise.
Reverse these steps to install a new thermostatic mixing valve. Be sure to turn on the water supply before screwing the new valve into place. Turn on the mixing valve located behind the shower. Test the shower to make sure everything is working properly.
What are the Drawbacks of Not Removing the TMV?

There are a number of possible negative aspects that might be encountered by not removing the thermostatic mixing valve will be discussed in the following paragraphs.
Can Lead To Scalding Water
Unless the thermostatic mixing valve is not removed, hot water could potentially flow out of the faucet too quickly and cause scalding. This can be dangerous for people, especially children, who may not be able to quickly remove themselves from the hot water.
Decrease Water Pressure
Not removing your thermostatic mixing valve from the kitchen sink or from the shower in the bathroom has the possible potential to cause a decrease in water pressure. This is because the valve is designed to mix hot and cold water simultaneously, which can reduce the overall water pressure flowing through the pipes.
Cause Corrosion in the Pipes
When not removing a thermostatic mixing valve, the constantly fluctuating temperature in the pipes can cause corrosion over time, leading to leaks and potential damage to the plumbing system. It’s important to have this valve inspected and replaced if necessary in order to prevent problems in the long run.
Cause Mineral Buildup in the Pipes
Without proper removal and cleaning, mineral deposits can build up in the valve over time. These deposits can then enter your water pipes, causing blockages and reducing water flow. These mineral buildups can also lead to corrosion in your pipes. Eventually, causing them to accumulate and clog the pipes.
Possibly resulting in leaks or bursts. Regularly removing and cleaning the thermostatic mixing valve may not seem like a huge task, but it can help save you from a costly damage in the long run. Next time you are performing plumbing maintenance, do not forget to remove and clean that thermostatic mixing valve.
Can be Difficult to Clean
As a homeowner, it’s important to regularly clean your water pipes in order to maintain efficient water flow and prevent any potential damage. Failing to remove the TMV before cleaning can greatly complicate this process.
Not removing the valve can decrease the pressure of the water being used for cleaning, making your thermostatic mixing valve less effective. To properly clean your pipes and keep them functioning efficiently, be sure to remove the TMV before beginning any maintenance.
May Not Function Properly
The thermostatic mixing valve might not work properly if it is not removed in order to remove the mineral buildup that can occur over time as a result of the thermostatic mixing valve not being removed.
This can make it difficult for the valve to mix the hot and cold water together, which can eventually lead to problems with the water temperature.
Could Lead To Water Damage
Failing to regularly remove and maintain your thermostatic mixing valve during routine maintenance can have serious consequences for your home’s plumbing system, such as preventing water damage in your home. This can cause water to leak out of the pipes and into the surrounding area, which can damage property and lead to costly repairs.
Lead to a Loss of Heat or Hot Water
When you do not remove the thermostatic mixing valve from the sink in your kitchen or from the shower in your bathroom, it could possibly bring about heat dissipation from the hot water. The reason for this can be attributed to the fact that the valve is primarily intended to combine cold water and hot water.
This process can reduce the overall temperature of the water flowing through the pipes. If the water becomes too cold, it can cause the pipes to freeze and burst, which can be detrimental to the pipes, resulting in a decrease in heat or hot water.
What are the Benefits of Removing the Thermostatic Mixing Valve?

Some benefits of removing your thermostatic mixing valve include the following:
Improved Energy Efficiency
Removing the thermostatic mixing valve is able to improve energy efficiency by preventing the water heater from overheating. The thermostatic mixing valve can also prevent hot water and cold water from being properly mixed together, which can waste energy.
Aside from that, if your thermostatic mixing valve is malfunctioning or not performing as it should, there is a possibility that it will force the water heater to work harder and use more energy.
Improved Water Temperature Accuracy
Removal of the thermostatic mixing valve can improve water temperature accuracy by preventing hot and cold water from being mixed together. If the thermostatic mixing valve is malfunctioning, it can cause the water heater to overheat or underheat the water. This can lead to inconsistency in the water temperature, which can be frustrating for users.
Potential Cost Savings
Some potential cost savings resulting from after removing the thermostatic mixing valve are as follows:
Reduced Electricity Bills and Energy Costs
The thermostatic mixing valve in a water system can become stuck or worn out over time, leading to excessively hot or cold water. Not only can this make for uncomfortable showers, but it can also result in higher energy costs as the hot water heater constantly compensates for inaccurate mixing.
Removing the thermostatic mixing valve may solve this issue and save on energy expenses. This not only improves comfort but also helps to conserve energy and lower bills.
Extended Water Heater Lifespan
Removing the thermostatic mixing valve from your water heater can help to extend the lifespan of the water heater. This is because the valve can cause corrosion and scale buildup within your water heater, which can also lead to higher a shorter lifespan for your water heater.
Removing Your Thermostatic Mixing Valve: Pre Consideration

There are a few things you should consider before removing and replacing your thermostatic mixing valve. Before going for a direct yes or no in answer to this question, you should first consider these few facts. Replacement is not always necessary. Here are a few factors to keep in mind:
Determine the cause of failure
Before rushing to remove and replace your thermostatic mixing valve, take some time to determine what caused it to fail in the first place. Many times, it’s something simple and easy to fix, like a dirty cartridge or corroded valve.
Has it been damaged in any way?
If you have found that the valve has been damaged in any way, it is likely that removal and replacement are necessary. This could be due to a physical impact, chemical corrosion, or excessive wear and tear. If the valve has been damaged, it is important to remove and replace it as soon as possible to avoid any further damage and potential safety hazards.
Is there a problem with water pressure or flow
You’re not getting the water pressure you need to take a shower, do the dishes, or water your garden. Low water pressure can be caused by many things, from a clogged pipe to a faulty valve. A professional plumber can help diagnose the problem quickly and easily. Don’t wait until the low water pressure becomes a major inconvenience.
The last time it was serviced; or removed and replaced
If it has been a while since your thermostatic mixing valve was last serviced, removed, and replaced, it may be time to consider doing so.
The condition of the valve
If the valve is old and corroded, it may be time to remove and then replace it.
Consider the cost
Replacing a new thermostatic mixing valve after you remove the current thermostatic mixing valve can be expensive, so it’s important to weigh the costs and benefits of removal for replacement against other possible solutions. If you are on a tight budget, you may want to consider repairing the valve instead of removing and then replacing it.
Evaluate your needs before you remove
You should analyze and consider your needs before removing them. Not all valves are created equal. Make sure you get a valve that meets your specific needs and requirements.
Review the installation

If you have removed the TMV in your showers or sinks and successfully replaced the existing thermostatic mixing valve, review the installation instructions and how you have installed it very carefully to ensure that the operation has been accomplished properly.
Check for leaks
Always check for leaks after installing a new valve, no matter what type it is.
- Ensure that there is no water supply to the fixture or appliance.
- Identify the source of the leak.
- Repair the leak.
- Turn on the water supply and check for leaks again.
Test the valve
- Once everything is installed, take some time to test the valve to ensure proper operation.
If, after taking all of these factors into consideration, your answer is yes to any of these or all of these questions, and you still feel that replacement is the best option, then it may be time to replace your thermostatic mixing valve.
Where Can You Get a Thermostatic Mixing Valve to Replace Your Old One?
The best place to get a thermostatic mixing valve to replace your old one is from a plumbing supply store or online. Many companies make and sell these valves, so you should be able to find one that fits the exact specifications of your current system. The benefit of buying Thermostatic Mixing Valve online is that you can compare prices and find the best deals.
You need to be sure you pick one that will play nicely with your existing plumbing. And, of course, it has to meet all the necessary safety and performance standards.
Luckily, we’ve undertaken the necessary research for you and checked out the best models on the market. So please peek at our review for guidance on snagging a top-rated thermostatic mixing valve that’ll stand the test of time.
As a Final Observation
Now that you know how to remove thermostatic mixing valve, as well as the benefits and drawbacks of removing one, you can make an informed decision about what is best for your home.
Removing a thermostatic mixing valve is not as complicated as it might seem at first. By following the 9 easy steps outlined in this article, you will be able to remove your thermostatic mixing valve with ease.
So, if you are considering removing your thermostatic mixing valve, or if you have any other questions or would like to learn more about thermostatic mixing valves, be sure to read our other articles for more tips and information.

