Last Updated on May 16, 2023
A leaky water valve is a real hassle, but you can fix it quickly with the right know-how. Several methods are at your disposal to control that pesky drip.
To fix your leaky water valve, you can try tightening the washer nut below the valve handle with a wrench. If this doesn’t work, the next step is to replace the gaskets and washers by unscrewing the valve handle and packing the nut.
The last resort is to unscrew the valve from the pipe and install a new one if neither of these methods works.
We will go through each method in more detail so that you can fix your leaky water valve and avoid further problems.
How To Fix Leaky Water Valve: DIY Methods

Don’t let an inconvenient leaky water valve put a damper on your day. Just follow these easy methods and have it running smoothly again in no time.
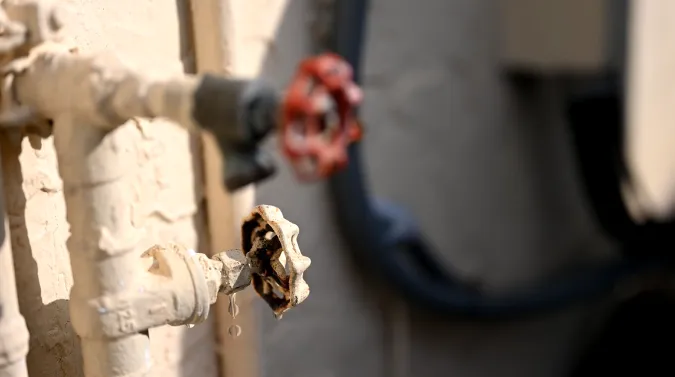
Method 1: Tightening the Washer Nut
Step 1: When faced with a leaky water valve, the first step is to locate the water shut-off valve. This valve is typically found near the water meter or where the main water supply enters your home.
Once you have located the valve, you need to turn off the water supply by turning the valve clockwise until it stops. This will ensure that water flow to the problematic valve is wholly halted, allowing you to safely and effectively fix the issue.
Step 2: After turning off the water supply, the next step is to tighten the washer nut. This can be accomplished by using a wrench to turn the nut clockwise. It is imperative to use the correct size wrench for the nut to avoid damaging it.
As you tighten the nut, be mindful not to over-tighten it, as this could cause harm to the valve. A general rule of thumb is to tighten the nut until you feel some resistance, but not to the point where you struggle.
Step 3: Once you have tightened the washer nut, turn the water supply back on by turning the shut-off valve counterclockwise.
This will allow water to flow to the valve you were fixing. Next, turn on the valve, and look for any signs of leaks. You’re done if there’s no leak.
Method 2: Replacing Gaskets and Washers
Step 1: If tightening does not solve your problem, consider replacing any gaskets or washers inside the valve body. Start by turning off the water supply to the valve.
Following that, use a wrench to remove the nut that holds the valve handle in place. Once the nut is removed, carefully remove the handle and set it aside.
Step 2: Afterward, remove the packing nut located beneath the handle. This nut is typically hexagonal and can be removed with a wrench. Be sure to hold the valve body in place with a second wrench to avoid damaging the pipe.
Step 3: Once the packing nut is removed, you can access the valve stem. Inspect the stem and washer for any signs of wear or damage.
If either is damaged, it will need to be replaced. Use a pair of pliers to remove the washer from the stem carefully. If the washer is difficult to remove, a washer puller tool may be necessary.
Step 4: Install the new washer onto the stem, ensuring it fits snugly. After that, reinstall the packing nut, ensuring it is tightened securely with a wrench. Then, replace the valve handle and nut, and tighten them with a wrench.
Step 5: Turn on the water supply again, and check the valve for leaks. If there are no leaks, you have successfully replaced the gasket or washer in the valve.
Method 03: Replacing the Valve
Step 1: In some cases, the only solution to a leaky water valve is to replace it entirely. To begin this process, turn off the water supply leading to the valve and locate the valve body. This can usually be found where the water enters the appliance, fixture, or pipe.
Step 2: After that, a wrench should be used to loosen and remove the nuts and bolts holding the valve in place. It’s important to exercise caution during this step to prevent damaging any surrounding pipes and fittings.
Step 3: Once the nuts and bolts have been removed, the old valve can be carefully taken off from the pipes. This may require some twisting and turning to remove it from the fittings fully.
Step 4: Before installing the new valve, cleaning the pipes and fittings entirely is important to remove any debris or residue. Furthermore, ensure that the new valve is compatible with the pipes and fittings being worked on.
Step 5: When installing the new valve, it should be slid onto the pipes and put into place. It’s important to ensure that the valve is properly aligned and that the threads are correctly placed.
Step 6: Reattaching the nuts and bolts is the next step, tightening them securely with a wrench. It’s important to avoid over-tightening to avoid damaging the valve or fittings.
Step 7: Turning the water supply back on is the next step, followed by a check for leaks. Congratulations, you have successfully replaced the valve if there are no leaks.
Step 8: When it’s done, the valve should be turned on, and the proper function should be evaluated. The repair is concluded if the valve operates accordingly and there are no leaks.
The Causes of a Leaky Water Valve

Loose packing nuts on the water shut-off valve are known to cause the leaking and in certain circumstances, the washers might malfunction due to an accumulation of mineral deposits on them. The shutoff valves located under the sink or behind the toilets are rarely turned on or off over the years.
Corrosion In the Valve
Corrosion is a common cause of a leaky water valve. This happens when the valve body is exposed to oxygen and moisture, allowing oxidation to occur. The corroded areas become weak spots that can eventually crack or break, causing a leak.
Corrosion can be accelerated by various environmental factors such as high humidity, saltwater exposure, acidic water, or other contaminants in the water supply. In addition, improper maintenance and lack of regular cleaning can also lead to corrosion over time.
To avoid corrosion-related leaks from developing, it is recommended to properly maintain a valve using lubrication and routinely inspect for signs of corrosion. It is also essential to use materials that are resistant to corrosion when building or replacing valves.
Worn Out Parts
Over time, different internal components of a valve can wear out due to regular use or lack of maintenance which may lead to a leaky water valve.
Common components that suffer from wear and tear include gaskets, O-rings, seats and stem seals which might all need replacement if they become worn out enough resulting in leakage during operation.
Regular inspection of these parts should be done in order to detect any potential problems before they cause serious damage or leaking issues with the valve itself.
Loose Fittings
A leaky water valve is often caused by loose fittings. This could be the result of improper installation or incorrect tightening of the valves’ connections.
When a fitting is too loose, it can cause water to seep through and escape from the valve, leading to a potentially hazardous situation for those in the area.
To prevent this from happening, it’s important to make sure that all joints are thoroughly tightened using a wrench or other appropriate tool for the job, when installing new valves or repairing existing ones.
It’s also important to regularly check for any loose fittings, as these can loosen over time due to vibration from running water or other factors. Should there be any looseness detected, it’s important to tighten them promptly and correctly in order to prevent further damage and leakage.
Clogged Seats or Openings

Clogged seats or openings are often responsible for leaks in water valves. Over time, contaminants such as sand and silt can accumulate in seats and openings within valves.
This can cause pressure buildup on one side of the valve while the other has no pressure at all, causing a leaky situation where water escapes out through those now-open spaces.
To avoid this issue, regular maintenance should be performed on valve systems which includes flushing out any accumulated sediment and replacing any worn components if necessary.
If a clog is detected, it’s also important not to attempt cleaning it manually since this could lead to further damage or injury if done improperly.
Improperly Installed Valves
One of the most common reasons for a leaky water valve is an improper installation. This can occur when the valve is not properly secured to the pipe, or when the sealant used to connect the threads has degraded over time.
An improperly installed valve can also be caused by incorrect torqueing of the nuts and bolts during assembly. If a valve is over-tightened, it can break or become warped, resulting in a faulty seal that allows water to escape.
Additionally, if the wrong parts are used during installation, such as screws and washers that are not corrosion-resistant, they may corrode and fail prematurely. It is important to ensure that all components are correctly selected for each valve type and application.
Excessive Pressure Changes or Fluctuations
Changes in pressure can also cause leaks in valves. If there is a sudden increase in pressure within the system, this can stretch and distort the valve body and create gaps between components that allow water to pass through.
Similarly, pressure drops can damage seals and gaskets, compromising their integrity and leading to water leakage. To avoid these issues, it is important to install adequate controls on the system’s pumps that maintain constant pressure throughout its operation.
Pressure relief valves should also be installed to protect against spikes in pressure or vacuum conditions that could damage equipment or shut down operations completely.
High-Temperature Conditions

High temperatures can also cause problems with valves; as temperatures increase, so does the expansion rate of different components inside the valve body. This includes internal seals which expand more than their enclosing surfaces resulting in gaps and eventual failure of these seals allowing water leakage from around them.
To prevent this issue it is important to select materials for both valves and piping which have a low coefficient of thermal expansion so they do not expand excessively at higher temperatures causing leakages at valves due to expanding parts within them.
Additionally maintaining proper lubrication levels on moving parts will ensure smooth functioning under extreme temperature conditions as well as achieving better sealing performance from internal sealing components due to reduced wear on them from friction between moving parts.
Faulty Manufacturing Processes
A leaky water valve can be caused by faulty manufacturing processes. The most common causes of this include inadequate raw materials, poor quality control, lack of proper assembly techniques and tooling, and the use of low-quality components and parts.
When these issues are not addressed during the manufacturing process, any resulting product can be prone to leaks. Inadequate raw materials may lead to lower tolerance levels for components, making them more susceptible to failure due to deterioration.
Poor quality control measures, such as insufficient testing and inspection before assembly, may result in parts with structural defects that can cause leaks when exposed to pressurized water or steam.
Improper assembly techniques or the use of substandard tools during the production phase can also lead to weak connections between components that are prone to leakage.
Finally, using low-quality components or parts is one of the primary reasons why a manufactured item such as a water valve could become defective over time; these parts may not meet industry standards or have structural defects that make them less reliable than expected.
Poor Maintenance Procedures
Leaky valves can also be caused by poor maintenance procedures. It is important for owners or operators of a system where these valves are used to follow recommended maintenance plans so that any underlying issues with the valve can be identified promptly.
Such maintenance activities may include regular inspections for signs of rust build-up on valve parts or other visual indicators that suggest a need for repairs; replacement of worn out parts should also be done when necessary.
If a system is constantly exposed to high pressure or temperature variations, preventive maintenance practices such as flushing out accumulated sediment from within the valve body must be performed periodically.
This will avoid any potential risks associated with leaking valves due to excess stress on their components. Without proper maintenance and upkeep, even high-quality valves could end up becoming defective over time due to gradual degradation caused by normal usage.
Therefore it is critical for responsible personnel overseeing the upkeep of such systems to exercise caution when managing these assets in order to prevent costly problems down the road.
How Often Should I Check My Water Valve For Leaks?

Checking your water valve for leaks should be done regularly as part of your regular maintenance routine. This means it should be checked at least once a year, and more often if you have an older valve.
Look out for signs such as stagnant water near the valve, discoloration in walls or flooring near the valve, and increased water bills. If you notice any of these signs, it is important to check the valve right away and look for leaking areas.
In addition to yearly checks, also pay attention to seasonal changes in temperature and humidity levels as this can cause expansion and contraction of the valves which may lead to leaks over time.
What Are The Signs Of A Leaky Water Valve?
The most common symptoms and indications of a leaky water valve are pooling or damp spots near the area where the valve is installed, discoloration on walls or floors nearby due to moisture accumulation, and an increase in your monthly water bill.
Additionally, you may hear a hissing noise coming from around the area of the valve which indicates that there is a leak present.
Other signs can include mold growth, water staining on walls or floors that are not connected with plumbing fixtures, rust appearing on pipes near the area of the leaky valve, and an unusually wet patch in your yard where there should not be one.
If any of these signs appear it is important to contact a plumber right away in order to have the situation addressed before further damage can occur.
Fix a Leaky Water Valve to Protect Your Home
Fixing a leaking water valve is not an easy task but it’s certainly not impossible. With careful attention to detail and some basic know-how, you can ensure that your plumbing system is up and running properly again in no time.
Whether you choose to replace the valve entirely or simply tighten the stem or swap out gaskets and washers, taking the time to address this issue will help prevent future problems with your home’s plumbing system. Taking these steps today will save you both time and money down the line.

