
To boost your well water pressure, first check that your pump and pressure tank are properly sized and well maintained. Adjust the pressure switch settings to a 20 psi differential with the tank pre-charged slightly below cut-in pressure.
Consider upgrading to a larger tank or adding a booster pump if pressure remains low. Regularly clean fixtures and replace clogged filters to avoid flow restrictions. For steady pressure, installing a constant pressure system helps.
Continuing, you’ll discover detailed steps to optimize your system further.
Key Takeaways
- Upgrade to a larger pressure tank to increase drawdown volume and reduce pump short cycling.
- Install a booster pump or constant pressure system for steady, higher water pressure.
- Adjust the pressure switch settings to maintain a 40-60 psi operating range for optimal flow.
- Regularly clean or replace filters and remove mineral buildup to prevent flow restrictions.
- Have a professional assess well flow, pump condition, and system components for tailored upgrades.
Checking and Maintaining Well Pump and System Components
To maintain your well pump and system components, first test the pump motor’s amp draw with a multimeter to verify it matches manufacturer specs, spotting electrical issues early. Monitor line voltage and grounding for stable power and safety.
Test your pump motor’s amp draw and monitor voltage to catch electrical issues early and ensure system safety.
Pay attention to rapid pump cycling, which indicates motor or control problems. Listen for unusual noises that suggest mechanical wear. Inspect wiring and connections for corrosion or looseness to prevent interruptions.
Clean sediment and mineral buildup from pipes, filters, and pump parts regularly to avoid clogging. Flush pressure tanks and water lines periodically. Check well screens and intake points to sustain water quality and efficiency.
Keeping these components in prime condition helps uphold steady well water pressure. Additionally, if you suspect issues, carefully disassemble the submersible pump to inspect internal components for wear or damage.
Adjusting Pressure Tank Settings and Pressure Switch
To boost your well water pressure, start by setting your pressure tank’s air charge to 2 psi below the pressure switch’s cut-on pressure. Adjust the pressure switch nuts carefully to maintain an ideal range—never below 20 psi cut-on or above 60 psi cut-off—to guarantee system safety and longevity.
Monitoring these settings prevents pump short cycling and keeps your water pressure steady, which helps avoid restricted output in the system. Regular inspection of the pressure switch and air valve is crucial to identify issues early and maintain system reliability pressure switch maintenance.
Pressure Tank PSI Settings
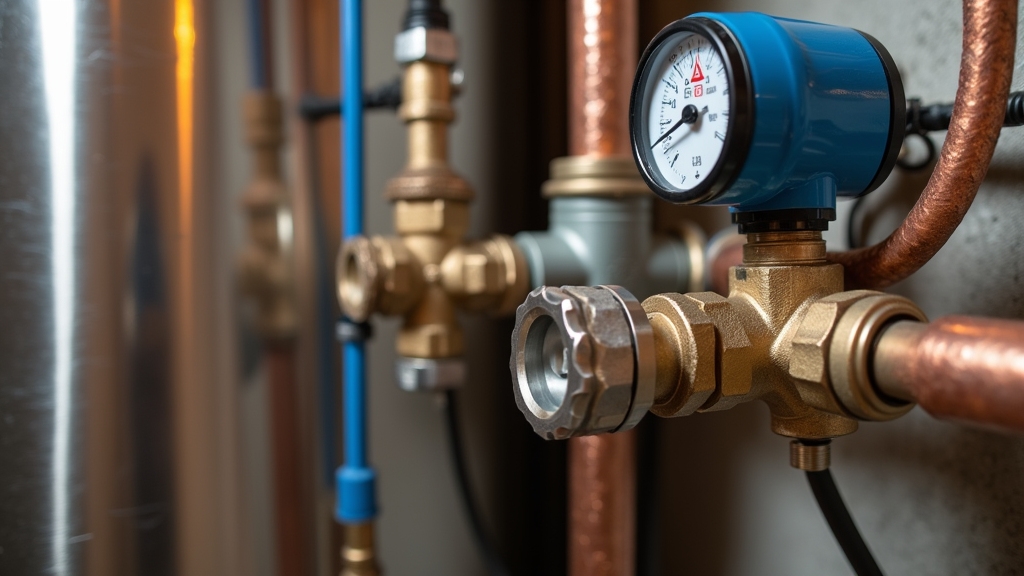
Although pressure tank PSI settings might seem straightforward, properly adjusting both the tank air pre-charge and the pressure switch is essential for maintaining efficient well water pressure and preventing pump wear. Pressure tanks are often paired with pressure-reducing valves or regulators to maintain stable pressure levels in the system.
Set the tank air pressure 2 PSI below the pump’s cut-in pressure—if the pump starts at 30 PSI, charge the tank to 28 PSI. Always measure air pressure with the tank fully drained to avoid skewed readings.
Maintain a 20 PSI differential between cut-on and cut-off pressures (e.g., 30/50 PSI) to balance water availability and reduce pump cycling. Use a pressure tank rated for at least your system’s max pressure, commonly between 100–150 PSI. Choosing a tank with the correct pressure rating ensures system safety and prevents damage.
To adjust, power off the pump, drain the tank, then inflate or deflate the bladder using an air compressor to the correct pressure for ideal performance and longevity.
Pressure Switch Adjustment
Properly setting your pressure tank’s air charge is essential before adjusting the pressure switch, which controls when your pump turns on and off.
Before starting, cut power to the pump and relieve system pressure by opening a faucet. Then, carefully remove the pressure switch cover to access the adjustment nuts. It is important to record the distance from the top of the nut to the stud before making any adjustments to help maintain accurate settings.
Always ensure that the water pressure regulator is functioning correctly to avoid damage during adjustments. Follow these steps to adjust the switch:
- Use a 3/8″ nut driver to turn the range nut; clockwise raises both cut-in and cut-out pressures, counterclockwise lowers them.
- Adjust in small increments—one full turn changes pressure about 2 to 3 PSI.
- Avoid lowering cut-in pressure below 20 PSI or raising cut-out above 60 PSI.
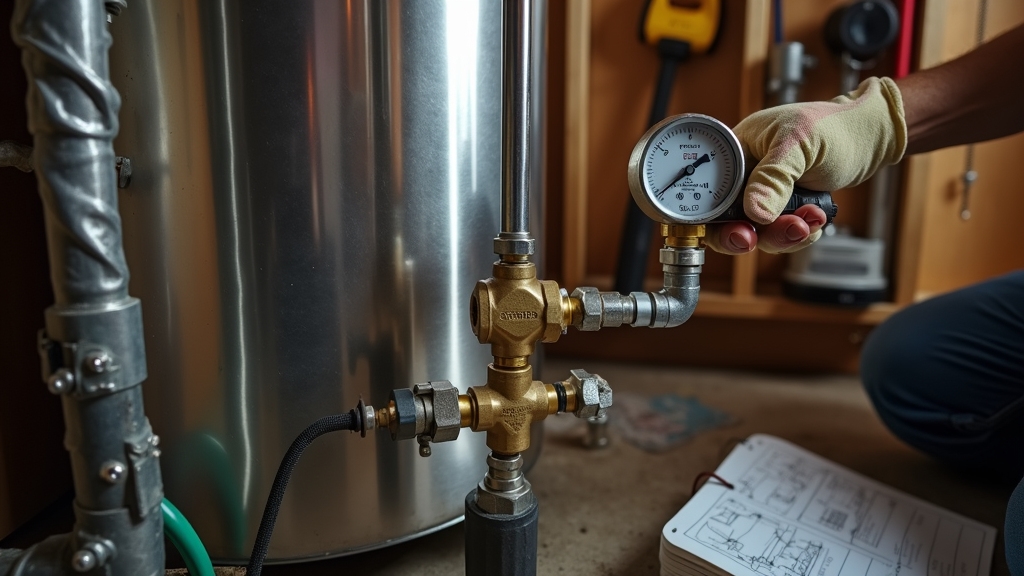
- After adjustments, cycle the pump multiple times and monitor the pressure gauge for accuracy.
Optimal Pressure Range
When you modify your well pressure tank settings and pressure switch, aiming for an ideal pressure range between 40 and 60 psi guarantees balanced water flow and system protection.
Set the pressure switch with a 20 psi differential, such as 40 psi cut-on and 60 psi cut-off, to optimize pump cycling and water delivery. Understanding the maximum water pressure recommended for your system can help avoid damage and inefficiency.
Adjust the tank’s air pre-charge to 2 psi below the cut-on pressure—38 psi for a 40 psi cut-on—to prevent short cycling and ensure proper storage. Avoid pressures below 30 psi, which cause weak flow, and above 80 psi, risking pipe damage.
Matching the tank pre-charge with switch settings stabilizes pressure and prolongs pump life. Regularly verify system settings for efficiency and consult professionals if unsure about adjustments or troubleshooting to maintain optimal operation of your well system components.
Upgrading or Replacing the Well Pump and Adding Booster Pumps
If your well water pressure stays stubbornly low despite basic fixes, upgrading or replacing your well pump and adding booster pumps can provide a targeted solution. Start by evaluating your pump’s condition and size; an aging or undersized pump often limits flow and pressure.
Understand that water pressure is the force of water flow in pipes, which directly affects household water use. Regular maintenance is essential to prevent issues like mineral scale buildup that can reduce the pump’s efficiency.
Consider installing a constant pressure pump system to maintain steady pressure by adjusting pump speed to demand. If the main pump upgrade isn’t enough, add a booster pump to amplify pressure on your water line.
Keep in mind:
- Match pump horsepower and flow rate to your well’s capacity and household needs.
- Use pressure gauges to confirm pressure drops below 40 PSI before adding boosters.
- Ensure compatibility between pumps and system pressure settings.
- Hire a professional for accurate diagnosis and installation to avoid damage.
Increasing Pressure Tank Size and Capacity
Although upgrading your well pump can boost water pressure, increasing the size and capacity of your pressure tank plays a crucial role in maintaining stable pressure and extending pump life.
Proper tank sizing reduces pump short cycling by providing adequate drawdown capacity, which is the usable water volume between cut-in and cut-out pressures. Calculate drawdown by multiplying your pump’s flow rate (GPM) by minimum runtime, usually 1 to 1.5 minutes.
For example, a 10 GPM pump needs at least a 10-gallon drawdown, which means about a 30-gallon tank. Oversized tanks are generally better, smoothing pressure fluctuations and reducing wear.
You can also install multiple tanks in series to meet higher flow demands, which can be especially beneficial when paired with solar-powered well pumps to ensure consistent water pressure.
Accurate sizing ensures efficient operation and prolongs your pump’s lifespan. Remember that pressure switch settings control water pressure, not tank size, so adjustments may be needed to achieve higher pressure.
Cleaning and Maintaining Fixtures and Filters Regularly
You need to remove mineral deposits from fixtures like aerators and showerheads regularly to keep water flowing freely. Clogged filters can also restrict pressure, so inspect and replace them according to manufacturer guidelines.
Regular maintenance is essential, as well as scheduling professional inspections and water testing to ensure overall well system performance and water quality well maintenance. Additionally, installing a decorative cover over visible pipes can improve aesthetics while allowing easy access for maintenance.
Removing Mineral Deposits
Since mineral deposits gradually reduce water flow, regularly cleaning and maintaining your fixtures and filters is essential for preserving well water pressure.
Mineral buildup, mainly calcium carbonate, restricts water pathways, so removing it restores ideal flow. Additionally, iron and other minerals from well water can contribute to clogged pipes and stains, making regular maintenance even more important. Using a wire brush can help physically remove stubborn mineral deposits from affected surfaces.
Use these practical steps:
- Soak faucets, showerheads, and aerators in a 1:1 vinegar-water solution to dissolve limescale.
- Apply a baking soda paste and scrub gently to remove softened deposits without damaging fixtures.
- For stubborn buildup, use diluted commercial limescale removers like CLR, following safety instructions carefully.
- Perform mechanical cleaning with a toothbrush after chemical treatments to clear residual scale.
Replacing Clogged Filters
How often should you replace clogged filters to maintain ideal well water pressure? Typically, sediment, carbon, and iron removal filters need changing every 6 to 12 months, depending on contamination and usage. Whole-home cartridges last 1 to 2 years but may require more frequent replacement in sediment-heavy water.
Under-sink filters usually need replacement every 6 to 12 months as well. Regular maintenance is essential because it helps prevent clogging and buildup that can reduce water flow and pressure. Additionally, choosing the right pump type, such as an inline pump or submersible pump, can influence water pressure and system efficiency.
| Filter Type | Replacement Interval |
|---|---|
| Sediment | 6–12 months |
| Carbon (sulfur) | 6–12 months (lean 6) |
| Iron Removal | 6–12 months |
| Whole-home Cartridge | 1–2 years |
| Under-sink | 6–12 months |
Installing Constant Pressure Systems for Stable Water Flow
When installing constant pressure systems for stable water flow, you’ll integrate components that dynamically adjust pump speed to maintain consistent pressure. These systems replace traditional switches and tanks, using a Variable Frequency Drive (VFD) and pressure sensors to regulate pump operation in real time.
To install:
- Connect the VFD to control pump RPM based on sensor feedback.
- Replace large pressure tanks with compact ones suited for on-demand delivery.
- Ensure all wiring is sealed with waterproof shrink tubes for safety.
- Calibrate sensors carefully to prevent pressure surges or over-pumping.
This setup keeps water pressure steady regardless of demand fluctuations, reduces energy use, and minimizes wear by running the pump at variable speeds instead of cycling on and off. It eliminates frequent cycling, which helps extend the pump’s lifespan by reducing mechanical stress.
Consulting Professionals for Accurate Assessment and Upgrades
Although you may have a general sense of your well system’s performance, consulting professionals guarantees an accurate assessment of water pressure and flow.
Experts perform thorough well flow tests using calibrated pressure gauges, flow meters, and water level probes to measure static and dynamic pressures and gallons per minute (GPM). Measuring the static water level accurately is crucial for understanding the available groundwater and pump drawdown during operation.
They evaluate pump operation, pressure tank functionality, and well conditions over time to identify pressure variability or declining flow. Professionals also interpret system design limitations, including pipe size and pump capacity.
Based on findings, they recommend targeted upgrades such as pump replacement, pressure tank repair, or booster pump installation. Early professional diagnosis prevents costly failures, ensures compliance with local standards, and optimizes your system’s performance and reliability.
Frequently Asked Questions
Can Well Water Pressure Affect Water Quality or Taste?
Yes, well water pressure can affect water quality and taste indirectly. Low pressure may cause water stagnation, encouraging bacterial growth that alters taste. High pressure can worsen pipe corrosion, releasing metals like iron or copper, which cause metallic flavors.
Pressure fluctuations might disturb sediments, temporarily changing taste or clarity. You should maintain proper pressure, inspect your system regularly, and test water quality to guarantee safe, good-tasting water consistently.
How Does Seasonal Temperature Impact Well Water Pressure?
You’d think winter turns your well into a frozen desert, right? Seasonal temperature swings directly affect water pressure by freezing pipes or thickening water, making pumps work overtime and lowering flow.
Cold snaps increase risk of pipe bursts, while warmer seasons cause pressure drops due to higher water demand and evaporation. To maintain steady pressure, insulate pipes, use heat tape, and perform regular maintenance, especially before cold weather hits.
Are There Energy-Saving Tips for Running Well Pumps Efficiently?
You can save energy by choosing a pump sized precisely for your water needs, avoiding oversizing that wastes power. Installing variable frequency drives lets your pump adjust speed to demand, cutting unnecessary energy use.
Keep your system well-maintained with regular inspections and clean pipes to reduce friction. Avoid running pumps at higher pressures than needed, and monitor flow rates closely. These steps will help you run your well pump efficiently and lower electricity costs.
What Are Common Signs of a Failing Pressure Tank?
Imagine your pressure tank as a heartbeat for your water system. If you notice irregular water pressure, frequent pump cycling, or a dull thud when tapping the tank, it’s likely failing.
Other signs include rusty water, air spurts from faucets, visible rust on the tank, leaks, strange noises, and rising energy bills. Catching these symptoms early helps you prevent costly damage and ensures steady water flow.
Can Household Plumbing Materials Influence Water Pressure?
Yes, your household plumbing materials can influence water pressure. For example, PEX fittings reduce internal diameter by up to 35%, causing noticeable pressure drops. Meanwhile, CPVC uses full-flow fittings that preserve pressure better.
Plastic pipes often have smaller fittings that restrict flow, so you might need to oversize pipes or install boosters. Choosing the right materials and fittings is essential to maintain ideal water pressure throughout your system.
Keep Water Flowing: Clean Fixtures and Replace Filters
Boosting your well water pressure isn’t just a one-step fix; it’s a combination of smart maintenance and targeted upgrades. Think of your system like an engine: every part, from the pump to the filters, needs to work in harmony for peak performance.
By regularly checking components, adjusting settings, and considering professional help, you guarantee consistent, strong water flow. Don’t let low pressure drip away your comfort—take control and power up your well system today.

