
Last Updated on May 7, 2023
Growing a garden is a rewarding and fulfilling endeavor, but keeping your plants healthy without enough water is not possible during long power outages. This situation begs the question: can sump pump water be used as an alternative source of irrigation?
With a sump pump, you can easily and efficiently provide your gardens with the necessary moisture without being dependent on natural rainfall or city water sources. Not only does this method reduce costs, but it also has environmental benefits due to reduced water usage.
You can tackle various water management projects to keep your garden happy and hydrated. From creating sloping channels to installing rain barrels or even an ambitious dry well, you can manage the precious water resource.
Let’s explore how you can use the pump most effectively for maximum results.
How Can You Use Sump Pump Water for Garden: 3 Effective Methods
Gardening enthusiasts can turn their lawn into a lush paradise using the power of a sump pump. With it, you can channel rainwater from your basement into your garden and create an idyllic Rain Garden. Here are three creative ways to use this invaluable tool for more beautiful landscaping.
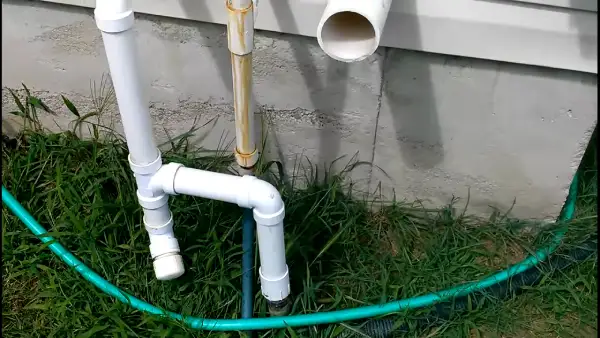
Method 1: Digging a Sloping Channel
Digging a sloping channel is easy to collect rainwater and direct it towards your garden. It provides irrigation for a variety of plant species.
Step 1: Choose the Right Location for Your Sump Pump
Before installing a sump pump, identify a suitable location. Choose an area close to the house’s foundation or yard drains and away from any downward sloping terrain that could lead to runoff into the sump pump.
Step 2: Install the Sump Pump Properly
Place at least 12 feet away from any foundations or other structures. The best spot will be near where the natural slope of your lawn lies.
Step 3: Dig a Sloping Channel
Use a shovel to dig up a gently sloping channel for PVC piping to lead the water away from your home. Then, carve out an inviting bowl-shaped spot in the garden area. Make sure it’s deep enough based on how high you raise its sides.
Step 4: Test Out the Spot
You can test if this spot has optimal conditions by pouring water into it and checking if it has gone within 24 hours. If yes, then you know it’s perfect for what you need. Once everything is set up, turn the power switch on and start collecting the water.
Method 2: Using a Rain Barrel

Rain barrels can make it easy to store and utilize water from your sump pump for your garden. Constructing a rain barrel system efficiently collects, conserves, and reuses waste water.
Step 1: Choose Your Barrels:
To use a rain barrel to collect water from a sump pump for the garden, you’ll need to select barrels that are large enough to accommodate your needs. Look for barrels with wide openings and lids that can be securely closed.
If desired, you can find containers preloaded with holes at their peak or drill them yourself to meet your needs. If you’re using multiple barrels, make sure they all have the same diameter so that pipes from each will work together.
Step 2: Level Ground and Elevate Barrels:
Before setting up your barrels, it’s important to ensure they are level on the ground and elevated at least five inches so that gravity can help move the water. If necessary, dig out some soil or add in extra support, such as cinder blocks or deck blocks underneath the barrels.
Step 3: Drill Hole for Rain Barrel Spout:
Using a hole saw bit, drill a hole near the bottom of each barrel so that you can add a spout attachment where water can flow out once it reaches the maximum line set by your valves. Check each hole before attaching your spouts to ensure an airtight fit.
Step 4: Measure and Cut Pipes:
Once your barrels are securely set up, measure and cut PVC pipes that connect them directly to the sump pump inlet pipe. Ensure your pipes fit together snugly when connecting them with elbows or tee connectors so no leaks occur during heavy rainfall events.
Step 5: Connect Multiple Barrels (Optional):
If you’re using multiple barrels for collection, measure and cut additional pipes to link them together at their drains by using gate valves between them. Allow equal pressure across all containers. This way, if one barrel becomes full of water, it will spill over into a second one instead of overflowing onto the ground.
Step 6: Install Valves:
Install ball valves inside each container at its drain spout line so you can control how much water flows out of each one at any given time. These valves also allow you to track how much rainwater has been collected throughout the season.
Step 7: Install Gutter Filter System:
Now, install a gutter filter system to keep leaves and other debris from clogging up your pipes or entering into any of the tanks within your setup. Once complete, secure lids on each tank and connect hoses or drip lines leading away from tanks towards planters or gardens as desired.
Step 8: Test System:
Test out your new system by running water from your sump pump into the barrels via an attached hose. Check for any leakage issues around tank connections or valve outlets before leaving everything running unattended during rainy weather days.
Method 3: Installing Dry Well

Watering your garden doesn’t have to pinch the pocket or take up valuable time. An easy solution is installing a dry well and connecting it with a sump pump to collect free rainwater for use in your green space.
Step 1. Choose the Location for Dry Well:
Select an area around 12 feet away from your home with a slope leading down toward where your sump pump discharges. Choose this spot carefully to ensure the proper draining of water.
Step 2. Mark the Trench Line:
Create a boundary around your home by using spray paint to draw an impressive trench line from your doorstep to the dry well. To ensure maximum protection, mark out double its width in circumference.
Step 3. Dig the Trench and Well Hole:
Construct a trench around 10 inches deep on an inclined surface, ensuring it’s wide enough for PVC pipe. Excavate another hole large enough to fit your dry well barrel and double the width of the first space you dug.
Step 4. Putting Crushed Stones in The Ground of the Well Hole:
Create a strong foundation for your well by layering the bottom and sides with landscape fabric, then topping off the base with crushed stones. This will give you an attractive yet sturdy place to rest your new water source.
Step 5. Install the Dry Well:
Install the PVC pipe from your sump pump discharge line and place it in a carefully crafted trench. Set the dry well atop fabric-lined walls, lay crushed stones between them for greater stability, then attach both to the designated pipe section. Finish by placing on top one of two covers: the surface drain or that of the well itself.
Step 6. Connect the Discharge Line:
Attach a 90 degree fitting and install the riser within it, connected to the rubber connector via hose clamps. Then, feed through the designated discharge line for maximum security.
Step 7. Backfill and Test:
Finish off the trench and well hole by topping it with topsoil while exposing only a bit of dripping pipe. Rainwater will quickly travel through this system to disperse into an underground well full of stones.
Safety Precautions for Using Sump Pump Water in Your Garden

It is important to take safety precautions when using submersible or pedestal sump pump water in your yard or garden. This standing water can contain contaminants, toxins, and other elements that can be hazardous to both plants and humans if not treated properly.
1. Test the Water:
Testing the water before use is essential to ensure its safe usage in your garden. Testing for contamination and toxicity levels should first ensure no harmful elements are present. You should also test for pH levels, as this determines how well plants absorb nutrients from the soil.
Some common tests you can do include testing for nitrates, ammonia, total dissolved solids (TDS), and other chemicals that can be toxic to plants and animals. If anything out of the ordinary is detected, it’s best to discard the water and find an alternative source instead of risking contamination in your garden.
2. Use a Filter:
Filtering sump pump water helps remove any contaminants or particles, so it’s safe for use on plants or vegetables. Several types of filters are available such as those for sand particles, algae and bacteria, viruses, and heavy metals like lead or mercury.
The filter you choose will depend on the contaminants you need to remove from the water. Ensure all filters are regularly maintained, as they will eventually get clogged up with dirt or debris. It can reduce their effectiveness over time.
3. Use a Safe Container:
Many municipalities require that sump pump water must be stored in a container specifically designed for this purpose before being used in gardens or landscaping projects. These containers come sealed with special valves that prevent leakage or spillage when transporting them from one location to another.
Having a designated storage area is also beneficial since it makes tracking usage easier. It avoids accidental spills into nearby waterways or soil beds that could negatively affect plant growth and human health.
Is sump pump water safe for a garden?

Sump pump water is generally safe for a garden. However, some considerations should be considered before utilizing sump pump water in landscaping. The quality of the water being pumped through a sump pump will depend on where it comes from and what contaminants may be present within that source.
For example, if water is pumped out of a basement or crawlspace, the area may contain dirt, dust, mold spores, and other contaminants. It can affect the safety of the water for use in gardens.
Therefore, testing your sump pump water before using it is essential to ensure no dangerous pollutants are present that could contaminate your plants.
Can you use a submersible pump to water your garden?
You can use a submersible pump to help with irrigation needs in your garden. This type of utility pump works by pushing stored water out of an underground reservoir. Then it delivers the water above-ground through a sprinkler system or directly to individual plants and soil using hoses & nozzles.
Submersible pumps typically range in size and power depending on the amount of water they need to push and how quickly they must move it. When properly sized, they can effectively move large amounts of liquid with very little noise pollution or energy consumption.
What size water pump do you need for your garden?

Selecting the right pump size for your garden depends on several factors, such as the size of your garden, number of plants, soil drainage rate, and amount of sunlight received. It’s recommended that they maintain the capability of cycling at least half of the pond volume each hour for optimal results.
Consider which kind of materials will be used to determine how much pressure is necessary to irrigate your flower beds or lawns properly. It’s important to consider whether you want manual or automatic operation when selecting the right size for your needs.
Water Your Plants Efficiently and Economically with Sump Pump Water Control
Using sump pump water for your garden can be a great way to ensure your plants stay hydrated during dry spells and power outages. It will save you money in the long run and has minimal environmental impact while providing maximum efficiency when watering your plants.
For beautiful and healthy gardens, installing a dry well or constructing a sloping channel offer simple yet efficient solutions. With sump pump water control, you can provide just the right amount of moisture plants need to thrive.

