Last Updated on May 7, 2023
For many homeowners, replacing a shower valve can be a tricky task. Not only do you need to be able to access your copper pipes or water supply lines, but you also may have to remove tiles to reach the spot where the new valve needs to go.
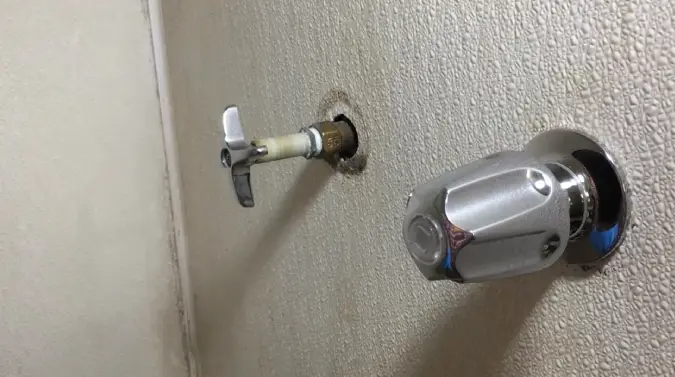
But what if the wall behind is easily accessible? Can you still change the shower valve without removing the tiles? The answer is yes. All you need is access to either behind the existing valve or within its wall, and with a few steps, soon enough, a new one will have been installed instead.
Join us as we uncover how to change your valve without removing any of those hard-to-replace tiles.
How Can You Change Shower Valve Without Removing Tile?

You are aware that replacing a shower valve without demolishing any tiles can become possible when access is available behind the wall. Here’s what you need to do if you’ve got access:
Materials and Tools Needed:
Materials
- Shut off valve
- Copper pipe and fittings
- Teflon tape
- Plumber’s putty
Tools
- Channel locks or adjustable wrench
- Pipe cutter or hacksaw
- Soldering tools (torch, flux, solder)
Step 1: Preparing For the Change
Before beginning the job of replacing the shower valve without removing the tile, it is essential to turn off the water supply to the area. Doing so will help prevent any accidents from occurring while changing out the valves.
Next, one should familiarize themselves with the current valve functioning and layout to know what type of replacement parts are needed when shopping around for materials. Depending on where you are purchasing your parts, buying a universal fit kit may be necessary if you cannot find exactly what you need for your specific set-up.
Lastly, before beginning work, it is essential to check that all pieces are present in the trim kit to complete the installation correctly.
Step 2: Removing the Old Valve
The next step is usually removing any decorative covers around the old valve/shower head connections by unscrewing them as needed and then set aside for later reinstallation. This allows easy access to unthreading the shower handle, revealing the bonnet nut below.
Once this is done, simply pull up the shower valve cartridge from its housing to completely remove it from where it was initially installed. Also, make sure you clean out any debris from around this new opening so that when installing your new valve, there won’t be anything blocking its seating or preventing proper installation of said component.
Step 3: Connecting The Water Supply Lines & valve

Now that you have removed your old valve, it is time to connect your new water supply lines. Measure and cut the copper pipe for length before attaching pre-soldered fittings onto them using wrenches or pliers as necessary.
Upon connecting, securely wrap all joints in teflon tape before connecting new pipe fittings onto valves with an adjustable wrench or another appropriate tool if needed. Ensure not to overtighten these fittings, as this can cause unnecessary strain or damage to the seals.
Then apply a portion of the plumber’s putty around the base of the new shower arm before setting it into place and tightening it with an adjustable wrench. Turn on the water supply afterward to test installation, ensuring no leaks occur.
Step 4: Finishing Touches
After connecting all of your plumbing components, don’t forget the finishing touches. Reattach decorative cover plates around the shower handle and body fittings (if applicable). Also, use a waterproof sealant like silicone caulk around the edges where the tile meets the shower wall or tub surround.
Avoid overfilling so there won’t be too much caulk oozing when finished. To finish, clean any excess materials away with a damp cloth once dry enough.
Tips For Replacing Shower Valves Without Removing Tiles
Replacing shower valves can be tricky and dangerous if done incorrectly. Even if you don’t need to remove any tiles, there are still a few key safety tips to keep in mind while completing this project.
Gather All Necessary Tools
Before starting any project, it’s essential to make sure you have all of the necessary tools. This includes wrenches, screwdrivers, drills, and anything else that could be needed for the job. Ensure each tool is in good condition and replace any worn-out or broken items before beginning work.
Turn Off Electricity and Water

Before beginning work on any plumbing project, turning off the electricity and water supply leading into the shower faucet area is essential. Failure to do so could result in serious injury or even death from electrical shock or flooding in your home.
Wear Protective Gear
When handling any type of plumbing project, it’s important to wear protective gear such as goggles and gloves. This will help protect you from potential injuries like cuts or other hazards posed by working with sharp objects.
Take Precautions Against Contamination
It is possible that when replacing a shower valve, old water or contaminants may seep out into your home. To prevent contamination, you should place buckets underneath where you’re working to catch any leaks that might occur.
Clean Up Thoroughly Afterwards
Once you have replaced the shower valve, clean up around the area where you worked. This includes putting away all the tools you used and wiping down surfaces near where you worked with disinfectant wipes. In moist environments like showers, this will prevent mold from growing around pipes or valves.
What Causes Shower Valves to Fail?
A shower valve serves a vital role in your bathroom. It controls the water temperature and ultimately affects your experience. Unfortunately, shower valves can fail over time due to various causes.
Here are the Five most common reasons:
1. Incorrect installation

Incorrectly installing a shower valve can lead to various potential problems that weaken its performance and shorten its lifespan. Your shower faucet could scald or freeze if the cold and hot water lines aren’t connected right. The valve may also leak water if it is not properly secured to the wall.
2. Hard Water Buildup
Hard water contains minerals such as calcium and magnesium that build up in pipes and fixtures. As minerals build up inside your pipes and fixtures, they can reduce their flow rate and clog up your shower valve. Hard water buildup reduces efficiency and makes turning water on and off harder.
3. Wear & Tear
Normal everyday use puts stress on any fixture or appliance, including your shower valve. As a result of frequent use or pressure caused by high-volume usage, like multiple showers running at once in a household, parts like seals can wear down. This wear & tear will eventually lead to leaks around the edges of your valve if left unchecked for too long.
4. Debris Accumulation
Objects such as hairpins, soap scum residue, dirt particles etc., all contribute to clogs within valves that impede their operation over time. Which can lead to leaks or reduced performance if buildup gets too severe within those valves internal workings.
5. Poor Maintenance
Not maintaining your shower valve regularly by replacing old washers, for example, leads to further damage later on. This is because there is a build-up of wear and tear over time. It can significantly reduce its lifespan compared to fixtures whose parts must be replaced before they deteriorate due to wear and tear or age.
Do You Need a Plumber to Replace a Shower Valve Without Removing Tiles?

Without removing tiles, replacing a shower valve requires some level of expertise as well as specialized tools. Despite the possibility of installing the valve yourself, hiring a certified plumber is recommended to ensure its safe and accurate installation.
Depending on the age and condition of your shower valves, they might need to be replaced or just adjusted for better performance. The plumber will inspect your system and advise on how best to proceed with valve replacement without damaging tiles or surrounding surfaces.
They’ll also follow the manufacturer’s instructions for installing new valves correctly and securely, which will help minimize water leakage in the future. Professional installation of your new shower valve will ensure its durability and longevity while keeping your bathroom safe from potential damage.
When Is It Time To Replace a Shower Valve?
Shower valves should generally be replaced four to five years after it has been installed. This timeline can vary depending on the quality of the valve, how often the shower faucet is used, and how well it has been maintained.
For example, if it’s used frequently and not regularly cleaned or serviced, then it may need to be replaced sooner than four or five years.
Also, if a high-quality valve has been installed that requires minimal maintenance, then it can last longer than five years before needing to be replaced. Ultimately, periodically inspecting your shower valves for wear and tear will help you determine when to change them before damage occurs.
After Replacing the Valve, Why Does the Shower Still Leak?

It is possible that the shower valve is not operating correctly after replacement due to worn inner seals, corrosion of parts, or clogging from hard water deposits. The most common cause is worn or corroded internal seals, which are responsible for keeping leaking showers.
These seals can become brittle over time due to hard water deposits, age, and temperature changes. Aside from that, rubber O-rings and gaskets that form a seal between moving parts may need to be replaced as they can wear out over time from usage.
If your shower is still leaking after replacing the valve, it is best to call a plumber who has experience with this type of repair. Or if you could figure out the problem, you could fix it.
Unlock the Path to Successful Valve Removal Without Removing Tile
With the right steps, it’s possible to quickly and safely replace your shower valve without needing to remove tiles. Just make sure you have access behind the wall, and then with a few careful actions and some handy tools, you can save time, money, and hassle.
Do not try to do this project without first researching and reading about all of the necessary information mentioned above. If you don’t feel comfortable doing it alone, that is okay. You can always contact a professional plumber for help.
With careful consideration, knowledge, and preparation, replacing your own shower valve without taking out any tiles can be achieved.

