
Last Updated on January 18, 2024
You and your sump pump have weathered many storms together, but your faithful pump becomes vulnerable when the power goes out. But fear not, you can easily add an alternative battery backup sump pump kit to your existing sump pump.
Adding a battery backup to your existing sump pump can be a cost-effective solution to ensure continuous protection during power outages. The components of a battery backup sump pump kit include a battery charger, an alarm system, a check valve, and smart charging.
In this step-by-step DIY guide, we’ll walk you through the process based on a resourceful approach taken by professionals. Follow these five steps to safeguard your basement from water damage, even when the electricity goes out.
How to Add Battery Backup to an Existing Sump Pump: Five Steps to Follow
To add a battery backup to the existing sump pump, start by assessing the type and condition of your current sump pump and then follow these steps:
- Assess your existing sump pump
- Gather the necessary tools and materials
- Install the battery backup system
- Mount the battery and control unit
- Make electrical connections
- Test your installation
- Plumbing and connection with sump pump
- Remove the old sump pump
- Install check valve and connect pumps
- Connect discharge pipes
- Connect the battery
- Test and regular maintenance
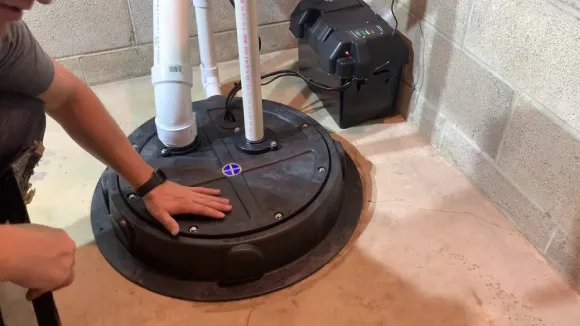
Step 1: Assess Your Existing Sump Pump

Assess your existing sump pump by checking its specifications, power source, and overall condition to ensure it’s in good working order before you install the battery backup.
Start by examining the pump’s capacity, head pressure, and discharge rate. Verify that the power source meets the requirements for the primary pump and the potential battery backup kit system.
Also, inspect the pump for any wear, corrosion, or damage. Test the pump to ensure it functions properly and efficiently when the power goes out. If there are concerns about the pump’s condition, consider consulting a professional or replacing the unit before adding the battery backup.
Step 2: Gather the Necessary Tools and Materials
Gather the necessary tools and materials after assessing the existing sump pump and ensuring it meets the requirements. You’ll need:
- A deep cycle marine battery (12V, lead-acid, 24-40 amp-hours)
- A cutoff switch
- A float charger
- A modified sine wave inverter (or preferably a true sine wave inverter, 2000W)
Additionally, make sure to have:
- A screwdriver
- A handsaw
- A utility knife
- Teflon tape
- A protective box for the battery
These tools and materials are essential for setting up a reliable battery backup kit for your existing sump pump.
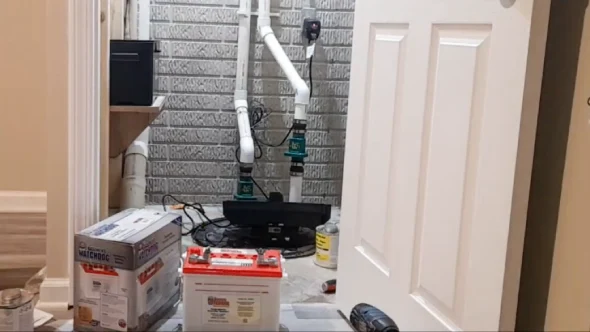
Step 3: Install the Battery Backup System
Now, it’s time to install the battery backup kit for your existing sump pump.
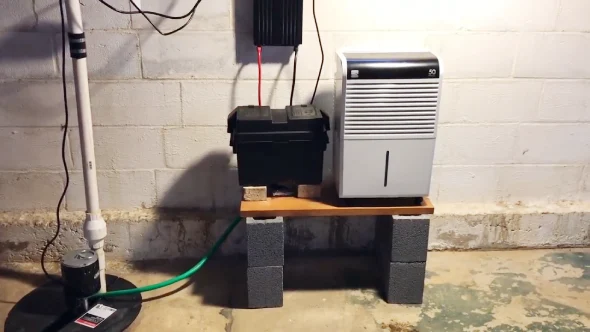
3.1 Mount the Battery and Control Unit
Choose a strategic location on the wall to mount the deep cycle marine battery and its control unit securely on the wall, ensuring accessibility for future maintenance and monitoring. Use appropriate fixtures to secure the battery in place.
Ensure that the control unit is easily accessible for monitoring and maintenance. Mounting the battery and control unit in a well-thought-out location ensures efficient functionality and easy maintenance.
3.2 Make Electrical Connections
To ensure efficient functionality and easy maintenance of your battery backup system, ensure the electrical connections are done right. Start by turning off the cutoff switch.
Connect the red battery cable to the positive battery terminal and the black cable to the negative terminal. Then, plug the sump pump into the modified sine wave inverter’s AC outlet and plug the inverter into a 120-volt AC outlet.
3.3 Test Your Installation
After completing the electrical connections, test the installation of the battery backup kit system for your existing sump pump. Allow the sump pump to cycle under normal conditions.
Simulate a power failure by unplugging the modified sine wave inverter’s power cord. Confirm the power output in ‘battery backup’ mode. Reconnect the modified sine wave inverter to AC power and observe the charging LED.
Step 4: Plumbing and Connection with Sump Pump
Remove the old sump pump to begin the plumbing and connection process with your existing sump pump.
4.1 Remove Old Sump Pump
Carefully unplug, disconnect, and remove the old sump pump from the sump pit, ensuring all connections and plumbing are properly disengaged.
Start by unplugging the pump from the power source and disconnecting any attached piping. Next, remove the pump from the sump pit without damaging any surrounding components.
Once removed, inspect the pit for any debris or sediment that may have accumulated during the pump’s operation.
4.2 Install Check Valve and Connect Pumps
As you add a battery backup kit to your existing sump pump, ensure the 110-volt pump is securely fitted with a check valve using Teflon tape to prevent leaks and maintain proper functionality.
Wrap Teflon tape around the threads of the battery-powered pump and connect it to the check valve. Place both pumps into the sump pit to ensure proper installation and functionality.
4.3 Connect Discharge Pipes
When connecting the discharge pipes for the battery backup sump pump, follow these steps:
- Cut a 1½-inch-diameter PVC pipe to the required length.
- Securely attach the PVC pipe to the existing discharge pipe.
- Use stainless steel hose clamps and a rubber connector to create a watertight seal.
- Ensure that the connection is snug and leak-free.
Properly securing the discharge pipes is crucial to prevent water leakage or inefficiency in the sump pump system.
4.4 Connect the Battery
To add the battery backup kit to your existing sump pump, securely place the deep-cycle 12-volt marine battery in a protective plastic box on a nearby shelf.
Make low-voltage cable connections between the battery and the backup pump. Ensure that the connections are solid and insulated to keep anything electric safe.
Follow the manufacturer’s instructions for the specific battery backup system you’re installing to ensure proper and safe connections.
Step 5: Test and Regular Maintenance
Conduct regular maintenance on the primary and backup sump pumps for efficient operation and long-term reliability. After installing the battery backup, test the operation of both pumps by manually lifting the flow valve in the sump pit.
Regular maintenance includes checking for rust, lubricating per manufacturer’s specifications, and inspecting the discharge pipe for blockages.
Additionally, understand how to reset the backup battery and ensure that the battery charger and the power cord for the 110-volt primary sump pump are plugged in.
What kind of marine battery is good for sump pump backup?
Consider selecting a deep-cycle marine battery for your existing sump pump backup system, as it’s designed to deliver a consistent and prolonged power supply. Also, this matches the 12-volt DC requirements of most sump pumps.
Deep cycle batteries are specifically engineered to provide a steady and prolonged power output, making them well-suited for backup applications.
Note that sump pump systems typically operate on a 12-volt DC power supply. Therefore, when choosing a marine battery for your backup system, ensure that it’s a 12-volt battery to align with the requirements of your sump pump.
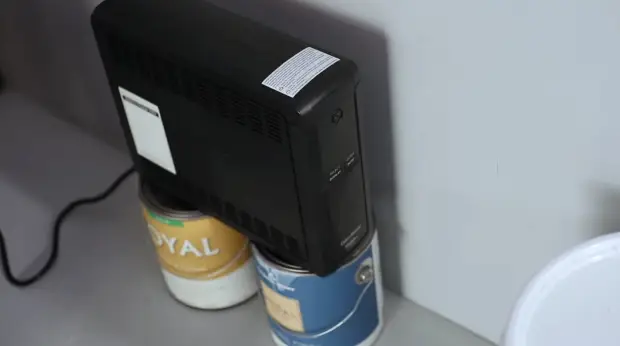
Can I add a UPS to the sump pump as a backup battery?
Adding a UPS to your sump pump as a backup battery may not be a practical solution due to the capacity and power output needed to start a sump pump. While UPS systems work similarly and perform comparable functions, their batteries are generally not large enough to run a sump pump for an extended period.
Additionally, most UPS systems aren’t designed to provide sufficient power to start a sump pump. Sump pumps typically require significant power to start because they often have to overcome initial resistance, especially if they’ve been inactive for a while.
It’s advisable to explore dedicated sump pump battery backup systems specifically designed for this purpose.
How long can a battery backup for a sump pump last?
Proper battery backup for your sump pump can typically last approximately 5-7 hours of continuous pumping during a power outage. This estimate is based on a fully charged battery and assumes that the pump runs continuously.
In practical terms, the actual duration of the battery backup will depend on factors such as:
- The size and capacity of the battery,
- The pumping capacity of the sump pump, and
- The amount of water that needs to be pumped.
Generally, most new fully-charged batteries will last roughly 5-7 hours of continuous pumping and roughly 1-3 days of non-continuous pumping, depending on the frequency. Note that the longer the pump runs, the less power it has, so the battery backup duration will diminish as the pump operates continuously.
Add a Battery Backup to Your Sump Pump to Keep Your Basement Dry
As you now know, a sump pump is not always enough to keep your basement dry, especially during power outages. Therefore, adding a battery backup system to your existing sump pump can ensure functionality and prevent basement flooding during the power outage.
With the steps mentioned in this article, adding a battery backup may seem complicated initially, but you only need a few hours to complete it. Remember to choose the best deep cycle battery for your sump pump backup, and consider using a UPS for added protection.
Follow the instructions carefully and keep your sump pump in the best possible condition. Stay prepared and stay safe.

