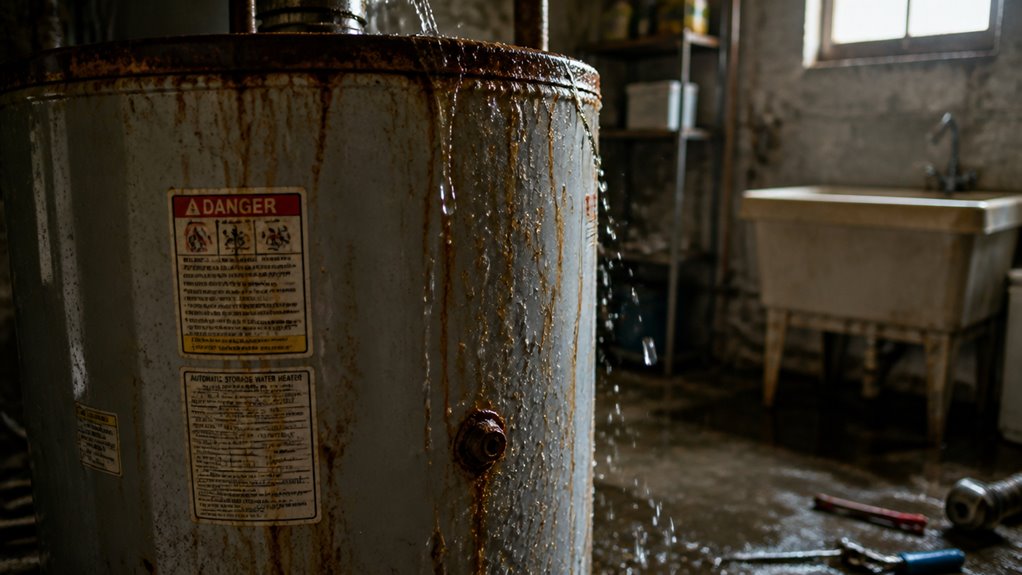
If your hot water heater is leaking from the top, check for loose or corroded fittings at the cold-water inlet, hot-water outlet, or T&P relief valve.
Tighten connections gently, but replace any corroded or damaged parts. High water pressure or thermal expansion may stress these areas, causing drips or moisture.
Addressing these issues promptly can prevent bigger problems. Keep going to find out how to properly repair and maintain your system for lasting performance.
Key Takeaways
- Leaks from the top often stem from loose cold-water inlet or hot-water outlet fittings causing drips.
- Moisture or corrosion around the temperature-and-pressure (T&P) relief valve indicates valve issues or excess pressure.
- Corroded dielectric nipples, unions, or fittings show rust or seepage, signaling the need for repair or replacement.
- High water pressure and thermal expansion can stress connections, leading to intermittent leaks after heating cycles.
- Tighten fittings gently, replace worn washers or connectors, and seek professional help if leaks persist or corrosion is severe.
Identifying Leaks at the Top of Your Hot Water Heater

When you notice water pooling around the top of your hot water heater, it’s important to pinpoint the exact source quickly.
Water at the top often travels downward, making it tricky to identify whether it’s from the tank body or connections.
Check the cold-water inlet and hot-water outlet fittings closely. Drips here usually indicate loose or damaged connections rather than a tank rupture.
Inspect the temperature-and-pressure (T&P) relief valve for moisture or corrosion, which suggests valve issues or excess pressure.
Look for staining or rust around threaded unions and dielectric nipples, as these are signs of long-term seepage.
Intermittent leaks that occur after heating cycles often point to thermal expansion stresses on fittings.
Accurate identification helps you decide if you can tighten fittings or need professional repair to prevent further damage.
Additionally, corrosion or rust in the drain valve can contribute to leaks at the top, so regular inspection of the corrosion in the drain valve is recommended.
Common Causes of Hot Water Heater Top Leaks
Identifying the exact source of water at the top of your hot water heater sets the stage for understanding common causes of leaks in this area.
Leaks often stem from loose inlet/outlet connections, faulty temperature-and-pressure (T&P) relief valves, or corroded nipples and fittings. High water pressure and thermal expansion also stress these components, triggering leaks.
Regular inspection of the pressure relief valve is crucial to prevent leaks and ensure safe operation.
| Cause | Symptom | Action |
|---|---|---|
| Loose pipe connections | Drips at cold/hot ports | Tighten fittings |
| Faulty T&P valve | Moisture near valve | Replace valve if leaking |
| Corroded nipples/fittings | Rust or seepage | Replace corroded parts |
Knowing these causes helps you pinpoint leaks before serious damage occurs.
DIY Repairs for Top Leaks
Although some top leaks require professional attention, you can handle many minor repairs yourself by following a systematic approach.
Start by shutting off power or gas and closing the cold-water supply. Inspect the cold and hot inlet connections for looseness; gently tighten fittings without overtightening.
Check for worn washers or flex connectors and replace them if needed. Examine the T&P valve for seepage; while valve replacement is a professional task, you can reset it to test function.
Look for corroded dielectric nipples or pipe fittings; minor corrosion can sometimes be cleaned, but severe rust calls for professional replacement.
After repairs, slowly restore water flow and check for leaks during a heating cycle. If the leak persists or the source is unclear, contact a professional to avoid further damage.
Regular inspection of components such as the T&P valve and pipes helps reduce energy loss and prevents costly electric bill increases.
When You Should Replace Valves and Fittings?
Minor repairs like tightening connections or replacing washers can often stop leaks. However, some situations call for full valve or fitting replacement.
You should substitute valves when the temperature and pressure relief (T&P) valve leaks continuously after resetting or testing. Corroded dielectric nipples, fittings, or unions showing rust or pitting also require replacement to prevent ongoing seepage.
If you notice cracks, damaged threads, or persistent drips despite tightening, valves and fittings need swapping out. Avoid overtightening, as it can worsen damage.
Always shut off power or gas and close the cold-water supply before starting. If you’re unsure about the leak source or valve condition, call a professional.
Timely replacement prevents further damage and guarantees safe operation, especially when corrosion or valve malfunction signals wear beyond simple repair. Knowing the water heater’s age can help determine when valves and fittings are more likely to fail and require replacement.
Preventing Top Leaks With Maintenance and Pressure Control
Regular maintenance and pressure management play essential roles in preventing top leaks in your water heater.
You should routinely inspect cold and hot water connections for looseness, corrosion, or moisture. Tighten fittings carefully without overtightening to avoid damaging threads.
Test the temperature-and-pressure (T&P) relief valve during maintenance to confirm it seats properly and doesn’t discharge unnecessarily.
Monitor your household water pressure, as excessive pressure increases stress on fittings and valves, raising leak risks.
If thermal expansion recurs, verify your expansion tank functions correctly to relieve system stress.
Replace any corroded or aging connectors and valves before they fail.
Adjusting the pressure regulator can also help manage pressure fluctuations and reduce leak risks.
Frequently Asked Questions
Can a Top Leak Cause Mold Growth Inside Walls?
Yes, a top leak can cause mold growth inside walls if water seeps into wall cavities.
You should act quickly because moisture trapped behind walls creates an ideal environment for mold spores to thrive.
Ignoring the leak allows water to damage structural materials and insulation, promoting health risks.
You need to identify and fix the leak promptly, dry affected areas thoroughly, and inspect for hidden mold to prevent extensive damage.
How Long Can a Minor Top Leak Go Unrepaired Safely?
You shouldn’t let a minor top leak go unrepaired for more than a few weeks.
Studies show that even small leaks can cause hidden water damage within 48 hours.
While tightening connections or replacing washers might temporarily help, ongoing leaks risk corrosion, mold, and structural damage.
Shut off water and power before attempting fixes, and call a professional if you’re unsure.
Timely repair prevents costly damage and safety hazards.
Are There Specific Water Heater Brands Prone to Top Leaks?
You won’t find specific water heater brands consistently prone to top leaks. Leaks usually result from installation, maintenance, or water quality issues rather than brand defects.
Focus on proper installation, regular inspection, and quality parts regardless of brand. However, cheaper models may use lower-grade fittings, increasing leak risk.
Always choose reputable brands with good warranties. Address leaks promptly to avoid damage and guarantee reliability.
Does Water Heater Warranty Cover Leaks From Top Fittings?
Water heater warranties usually cover leaks from top fittings only if they result from manufacturing defects.
Normal wear, corrosion, or installation issues typically aren’t covered. You’ll want to check your specific warranty terms carefully, as coverage varies by brand and model.
Keep documentation of regular maintenance and repairs handy, since neglect or improper servicing often voids warranty claims related to leaks at the cold-water inlet, hot outlet, or pressure relief valve.
Can Sediment Buildup Contribute to Top Leaks Over Time?
Think of sediment buildup as grit in a machine. It doesn’t directly cause top leaks but can worsen them over time.
Sediment settles at the tank bottom, causing overheating and pressure spikes. These stress the top fittings, valves, and connections, increasing leak risk.
You should flush the tank regularly to minimize sediment accumulation. This helps preserve your heater’s integrity and prevents the indirect effects that can lead to leaks at the top.
Final Thoughts on Fixing a Water Heater Leaking From the Top
If your hot water heater is leaking from the top, don’t let it spiral out of control. By identifying the source quickly and addressing common causes like faulty valves or fittings, you can patch up leaks yourself or know when to call in the pros.
Regular maintenance and pressure checks keep things running smoothly, preventing small drips from turning into a waterfall. Stay proactive and nip problems in the bud to avoid costly replacements down the line.